
Welcome to the Tower Unite Pro MiniGolf Guide! If you want to improve your minigolf game and achieve the lowest scores on every map, look no further. With over 1,000 hours of minigolf experience and world records on most maps, Cody has created consistently reproducible shots to help you master every HIO, map, level, and hole. Before diving in, please read our guide on how to use this valuable resource. You can also check out Cody’s world record videos for inspiration. Simply click on a map to jump to its designated section and start improving your skills. More maps will be added in the future, so stay tuned! Let’s get swinging!
How To Use Guide
If you manage these key factors the physics in this game are actually incredibly consistent.
Please Read:
Play on 60FPS – Multiplayer will automatically cap to 60fps, Single Player will not. Physics are tied to FPS so a different FPS often = a different result.
All my setups are done on 1080p, most shots should still work if not on 1080, but pixel perfect ones will vary.
All shots (with a few exceptions) are done on 90 FOV
Common misconception – ping does not generally effect the outcome of your shot, only the timing.. Host FPS does.
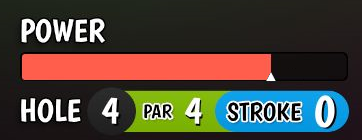
When referring to power, example “Power O” line your power up with the letter like in this example.
In many shots I aim with the cursor position NOT the arrow/power, in most of these cases I will advise not to move the camera and to place your cursor in a specific spot.

Treasure Cove
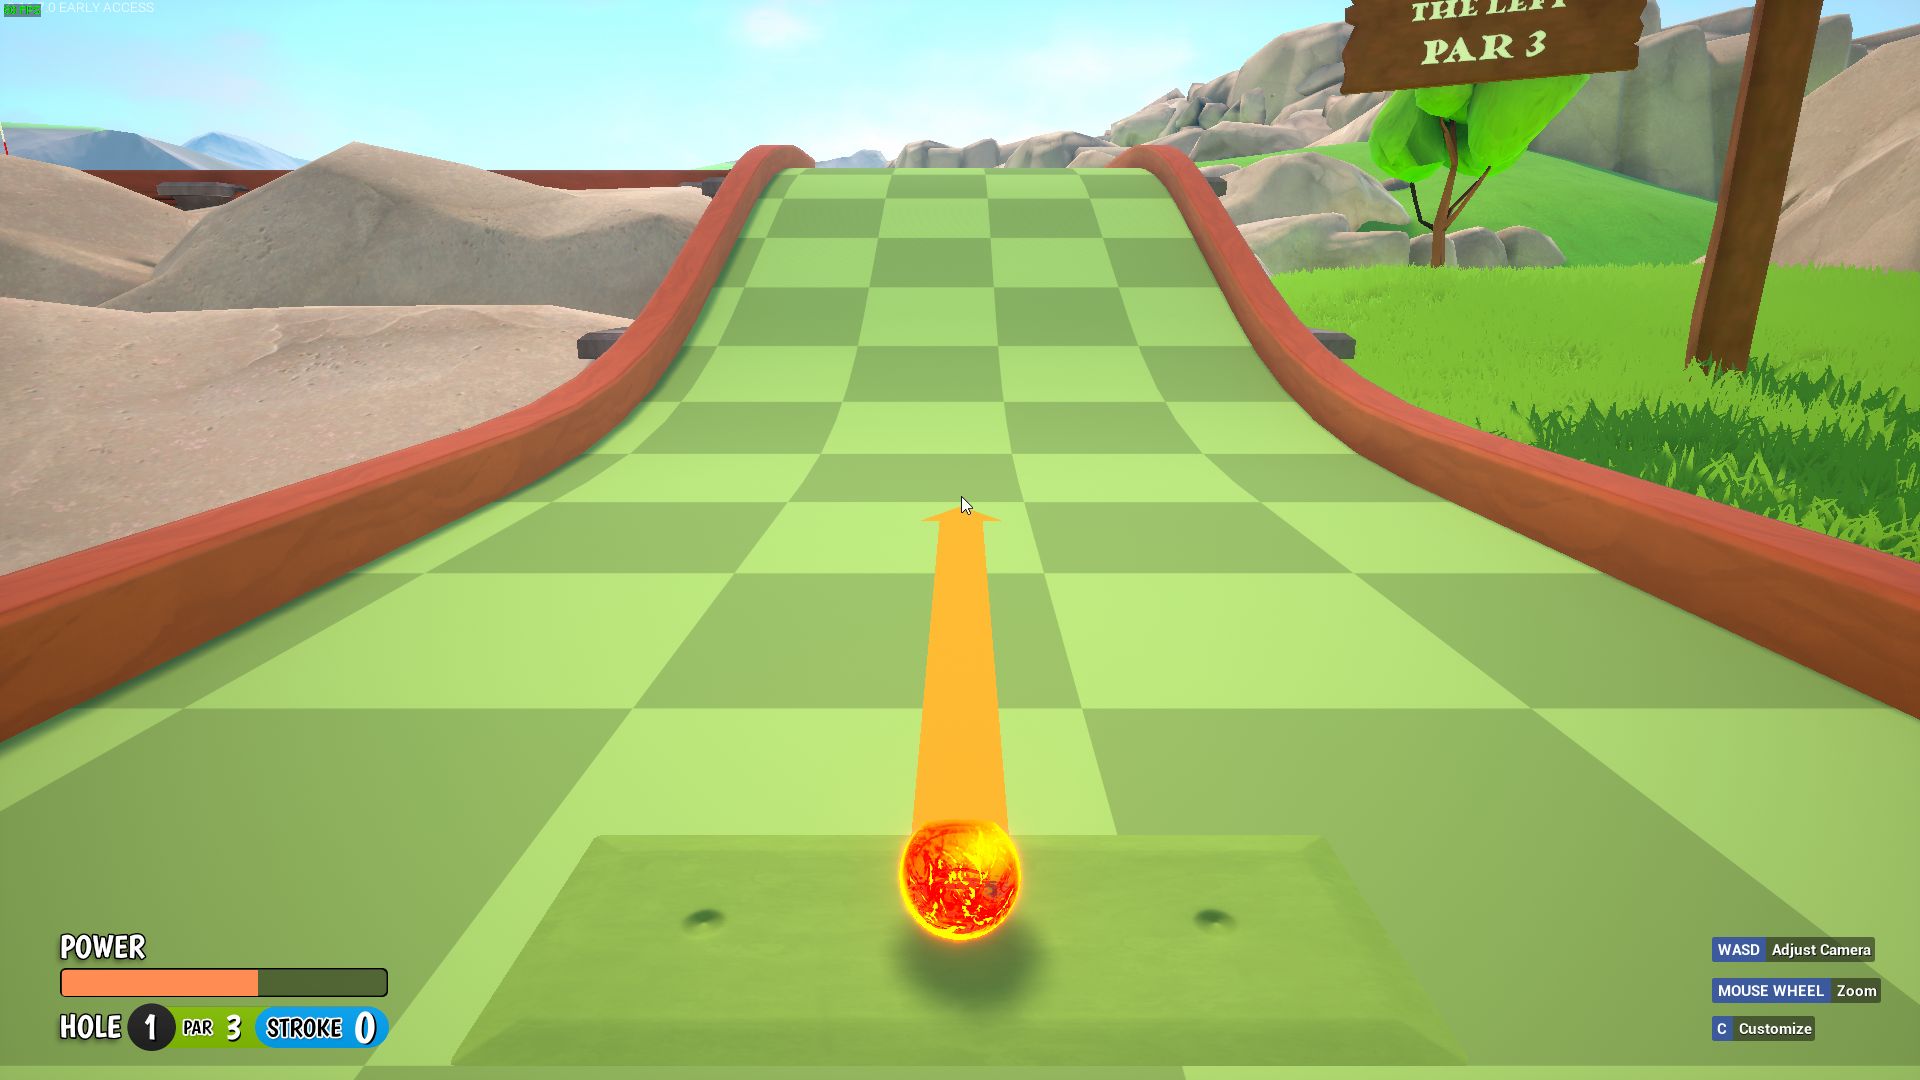
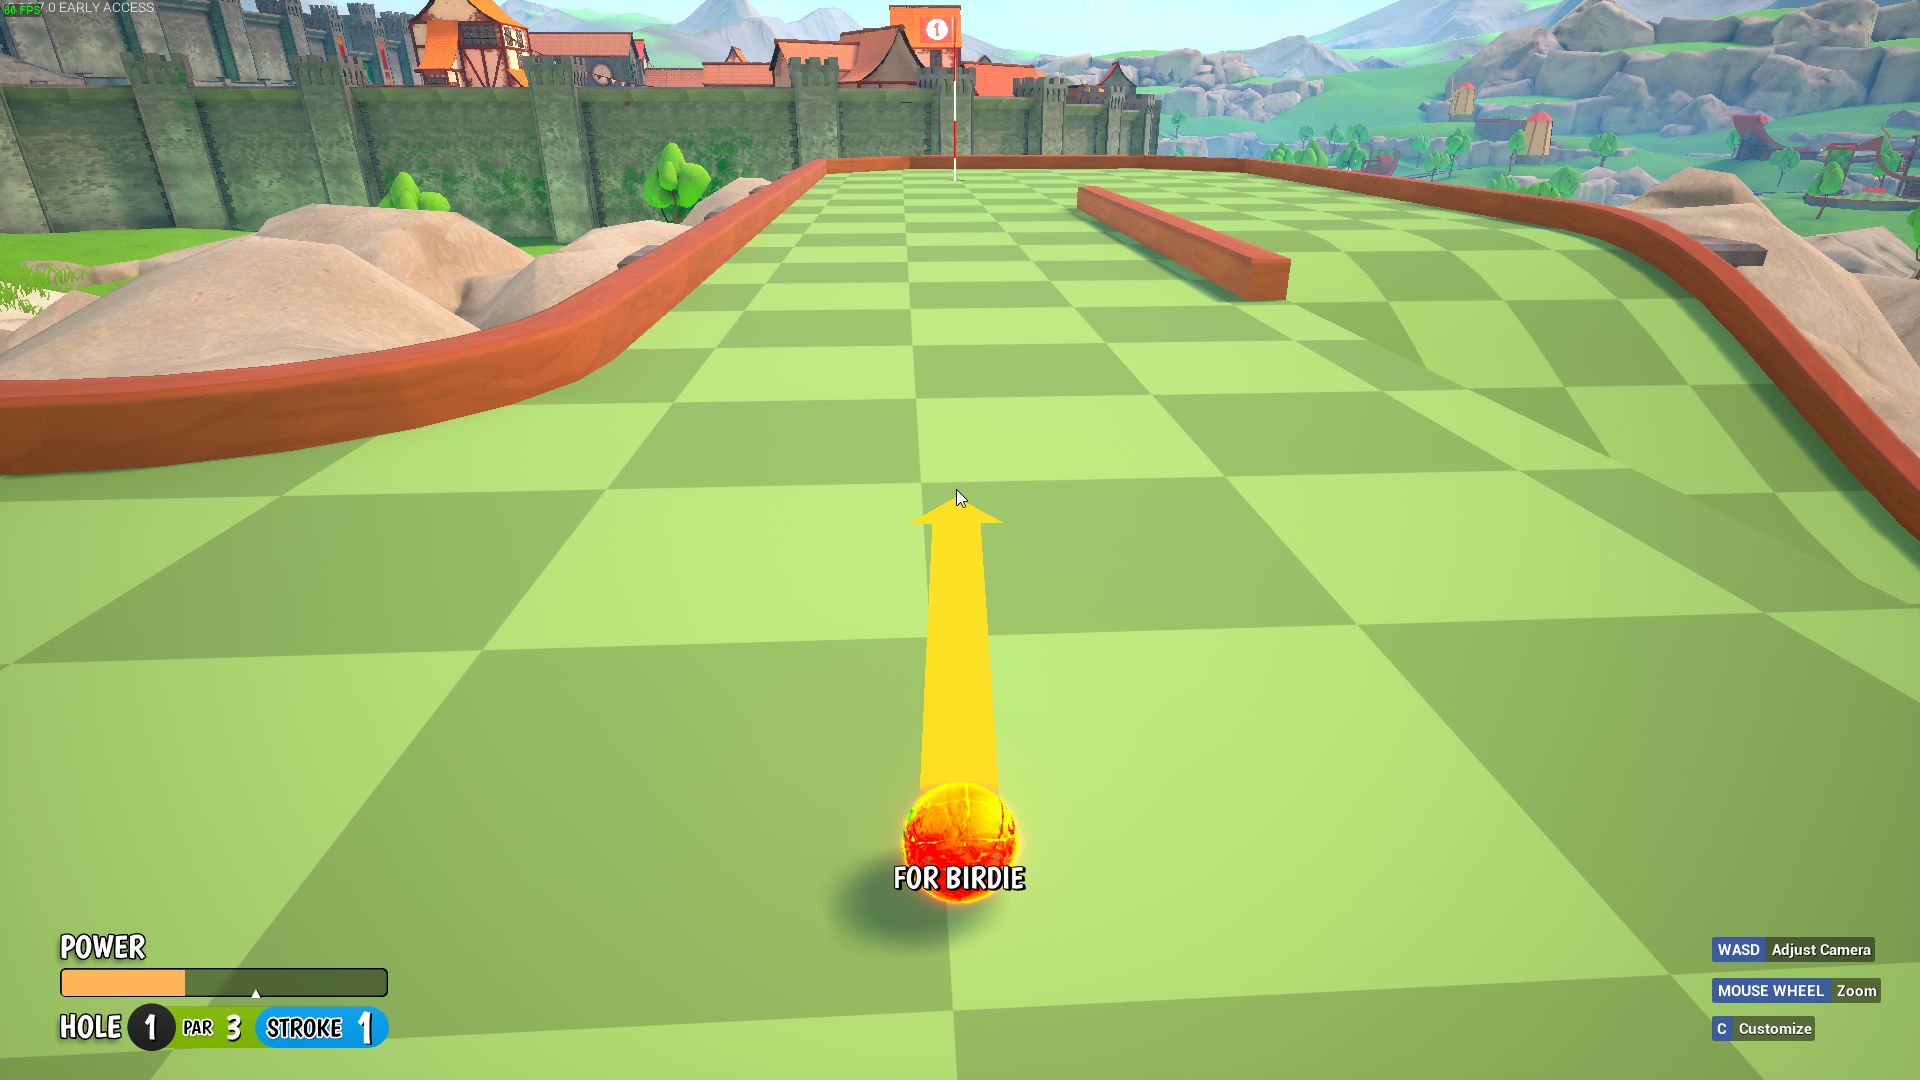
Hole 1
Tap in, Power end of E in “Hole”
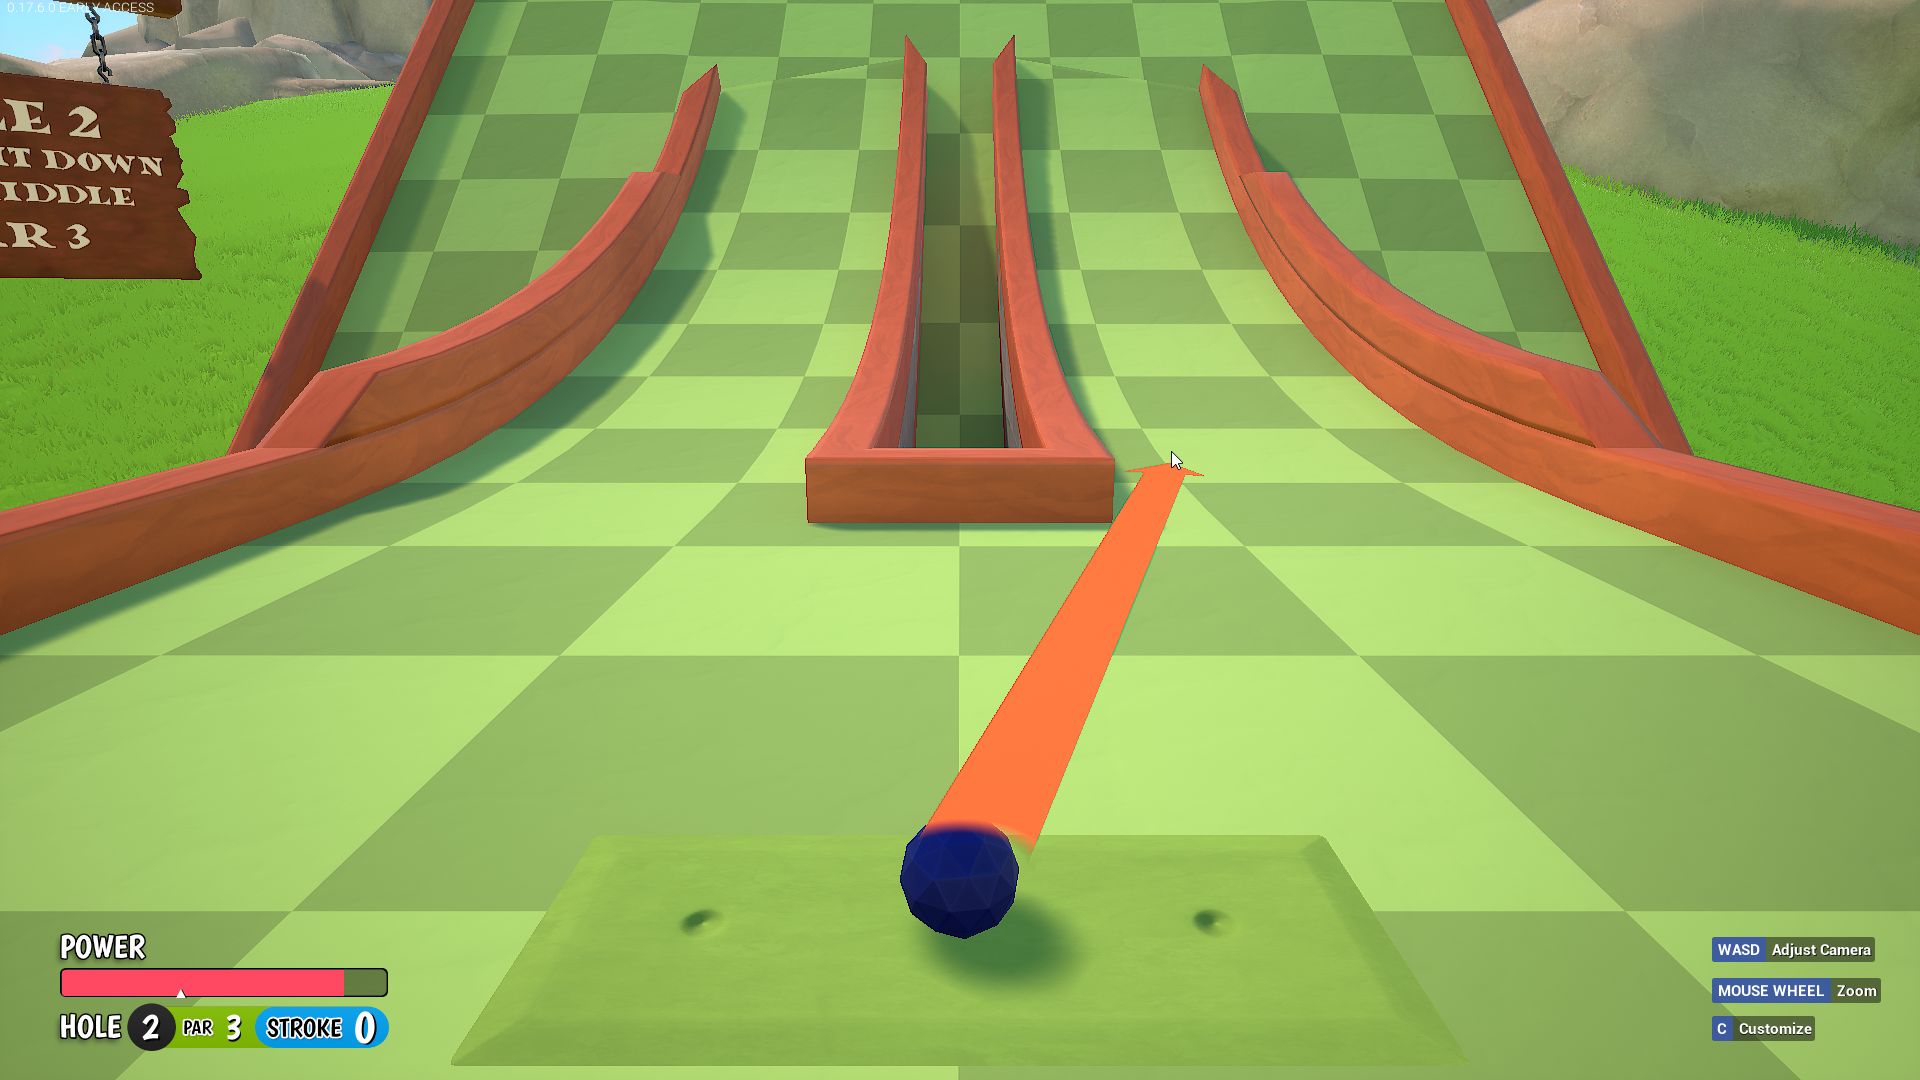
Hole 2
 Timing as the right white block hit’s the top – fairly forgiving.
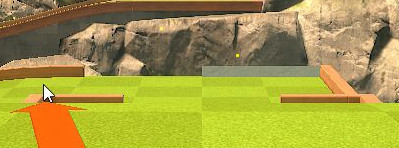
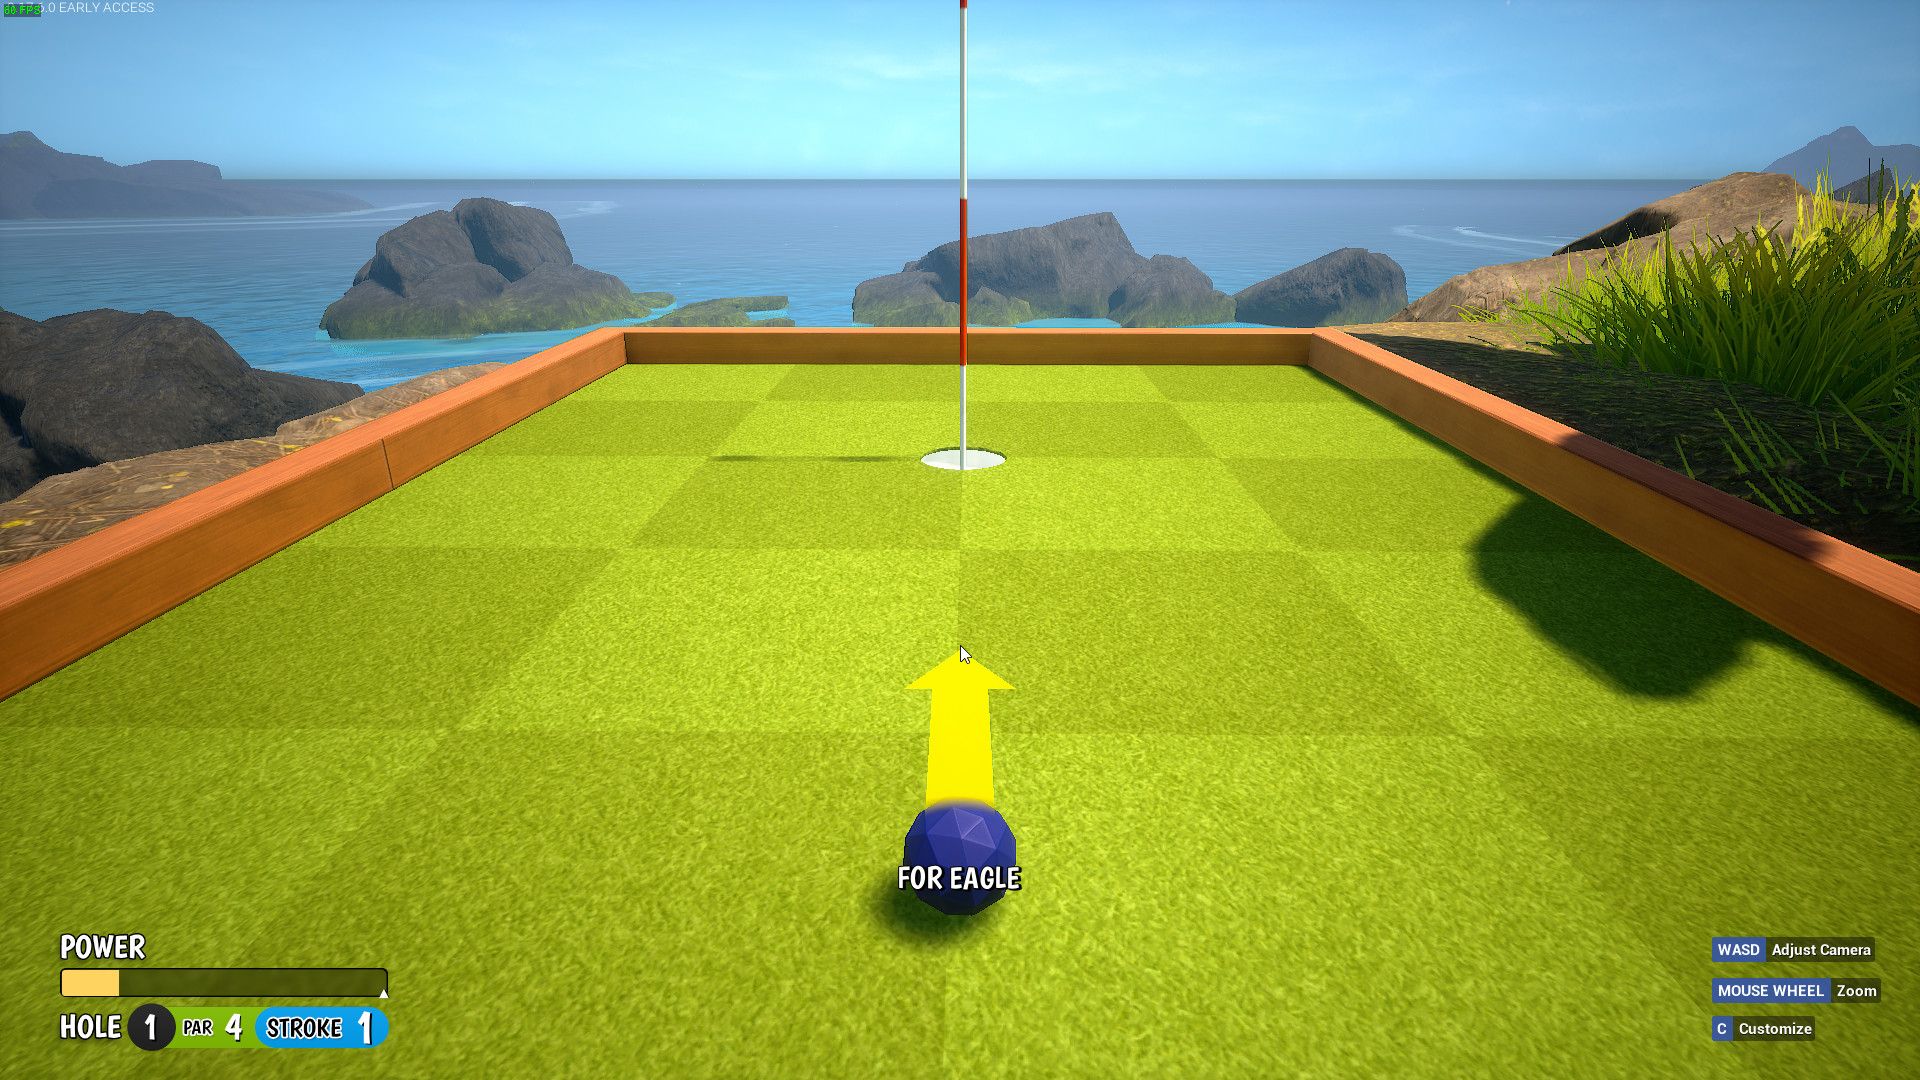
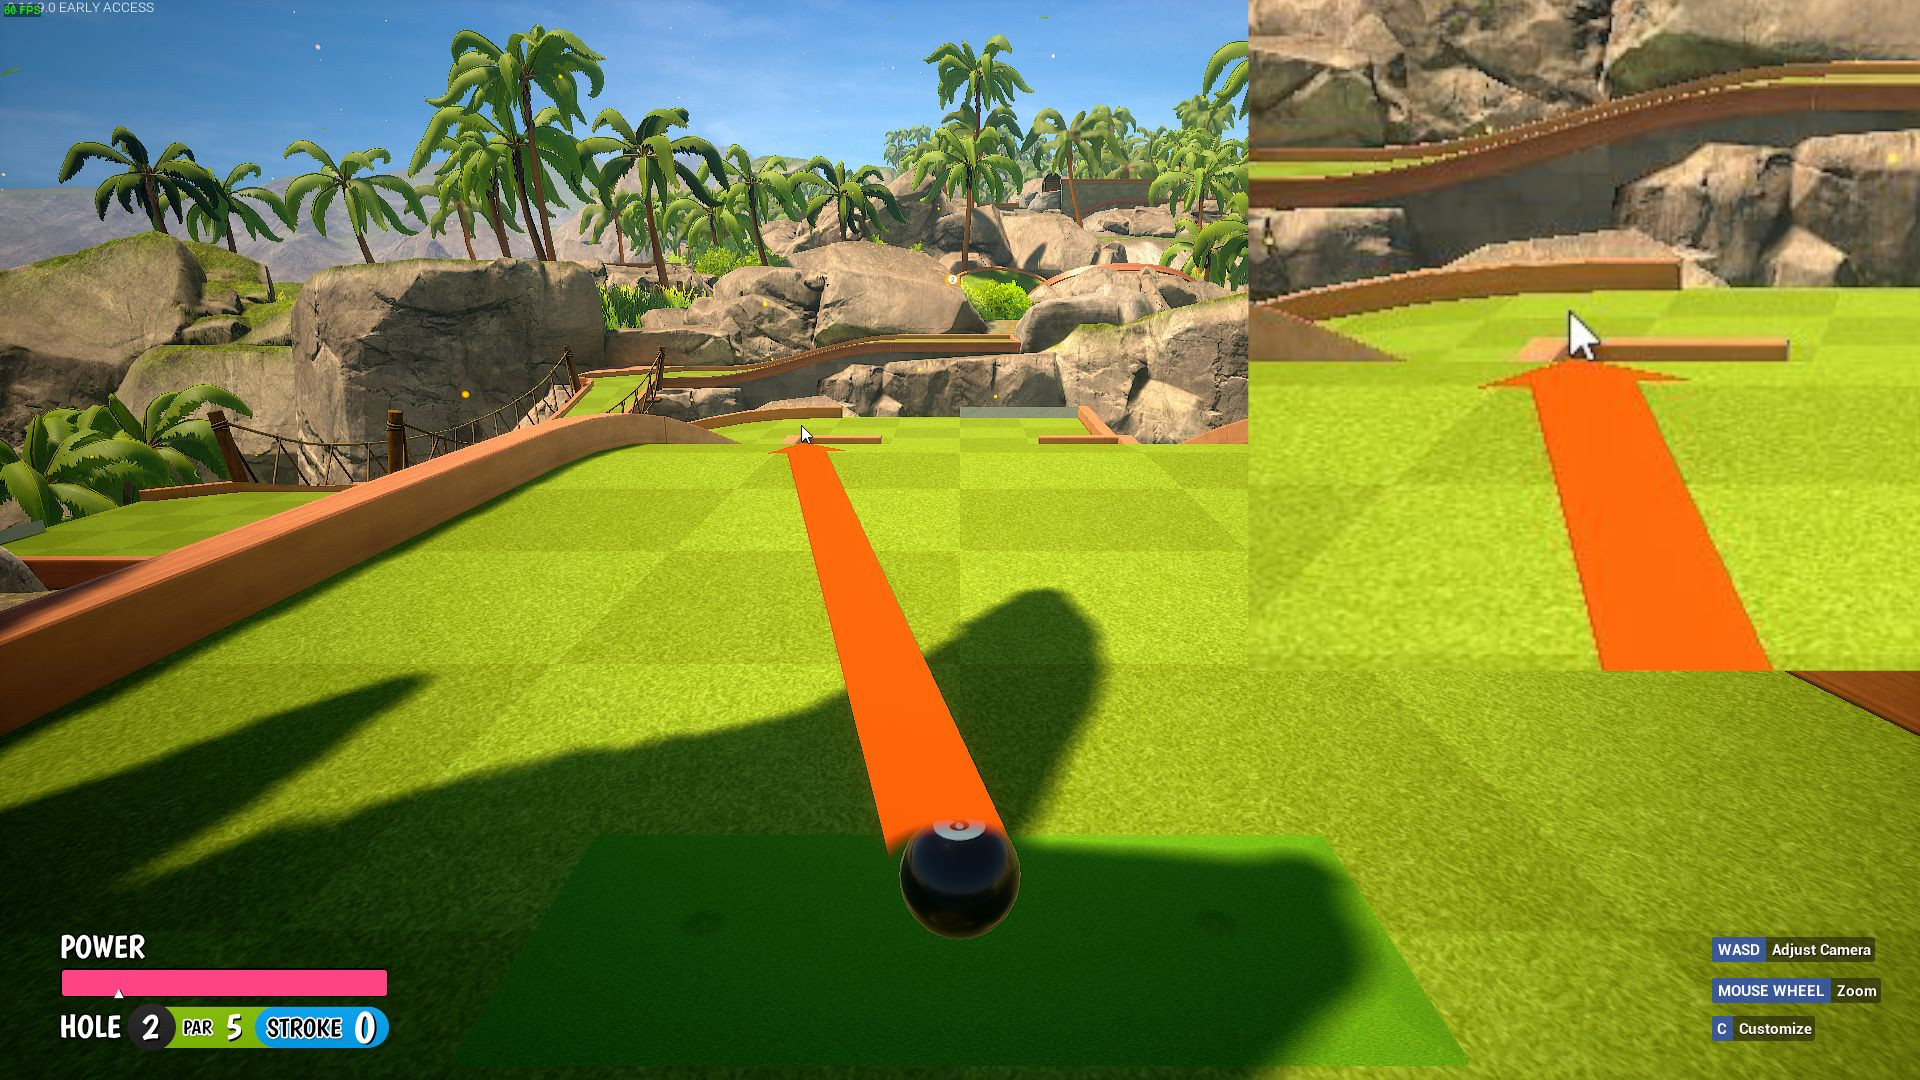
Power between Green&Blue close left across bridge.
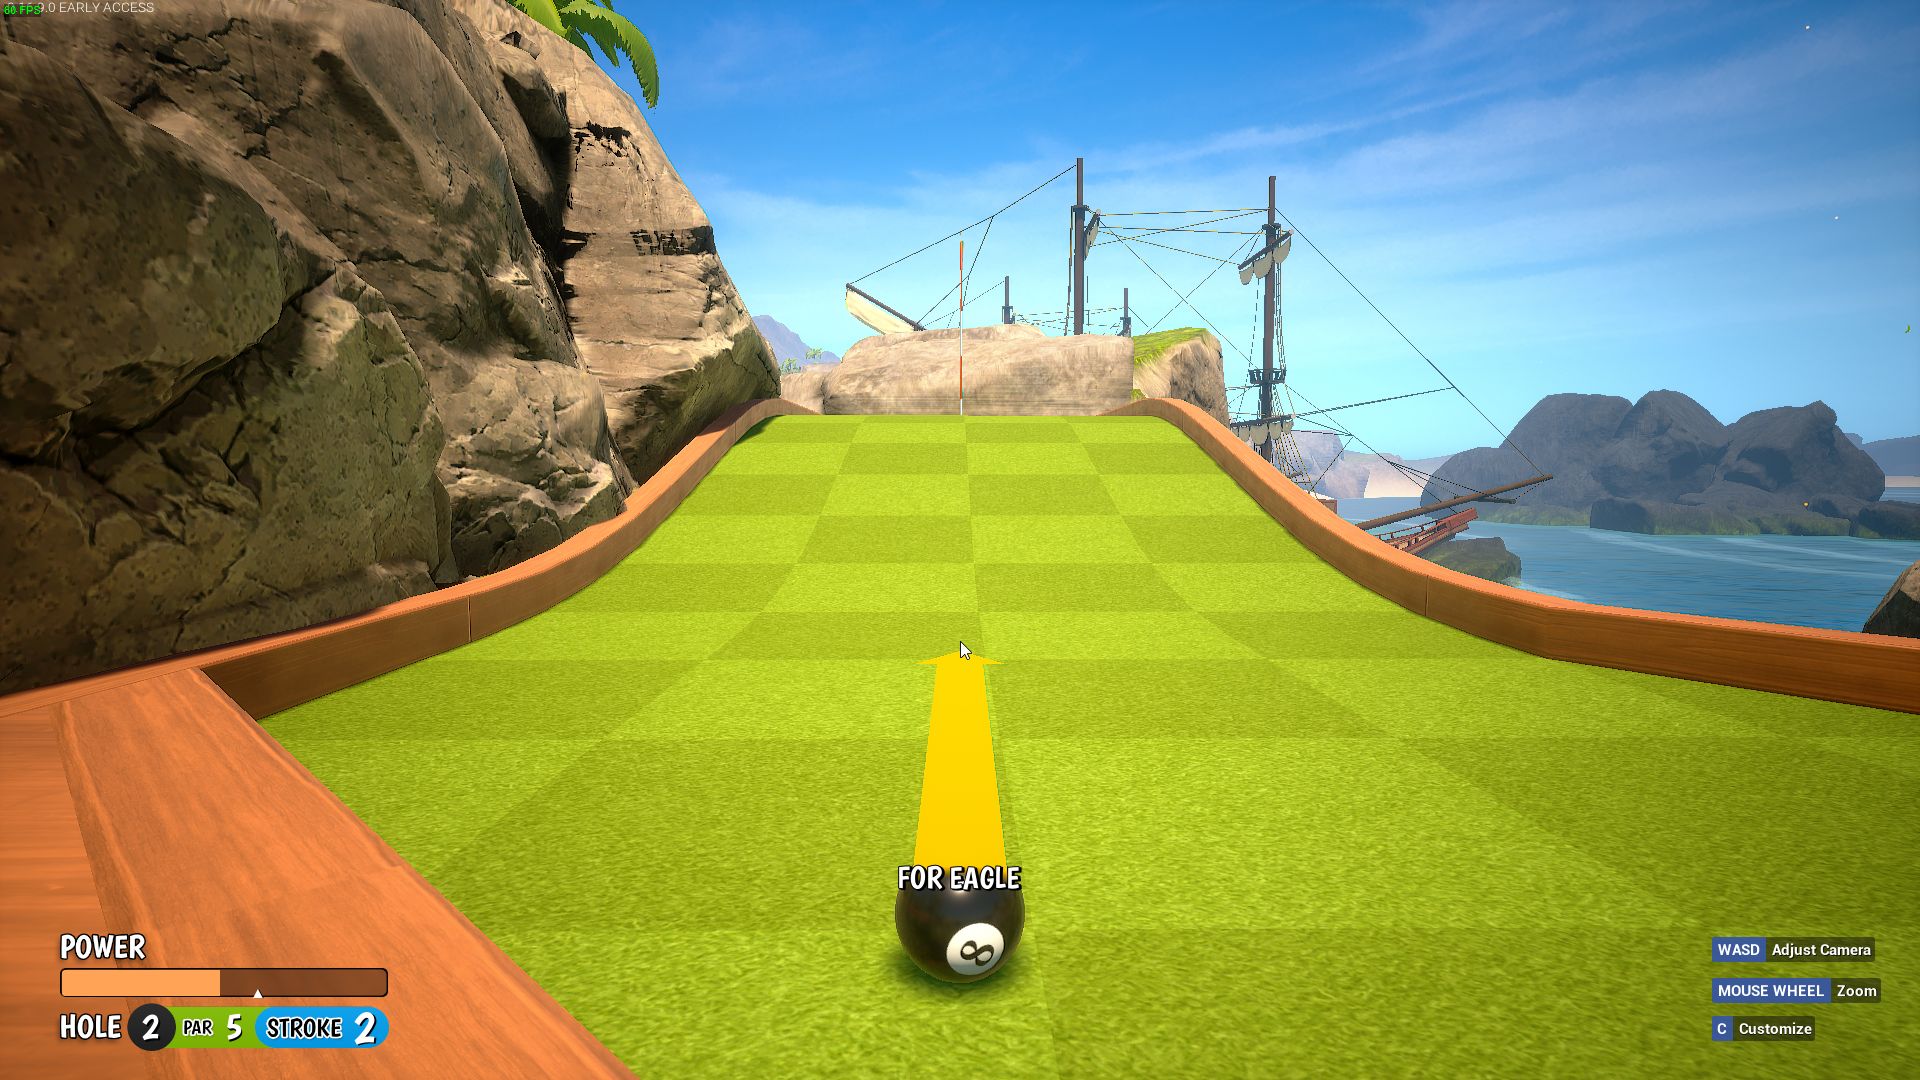
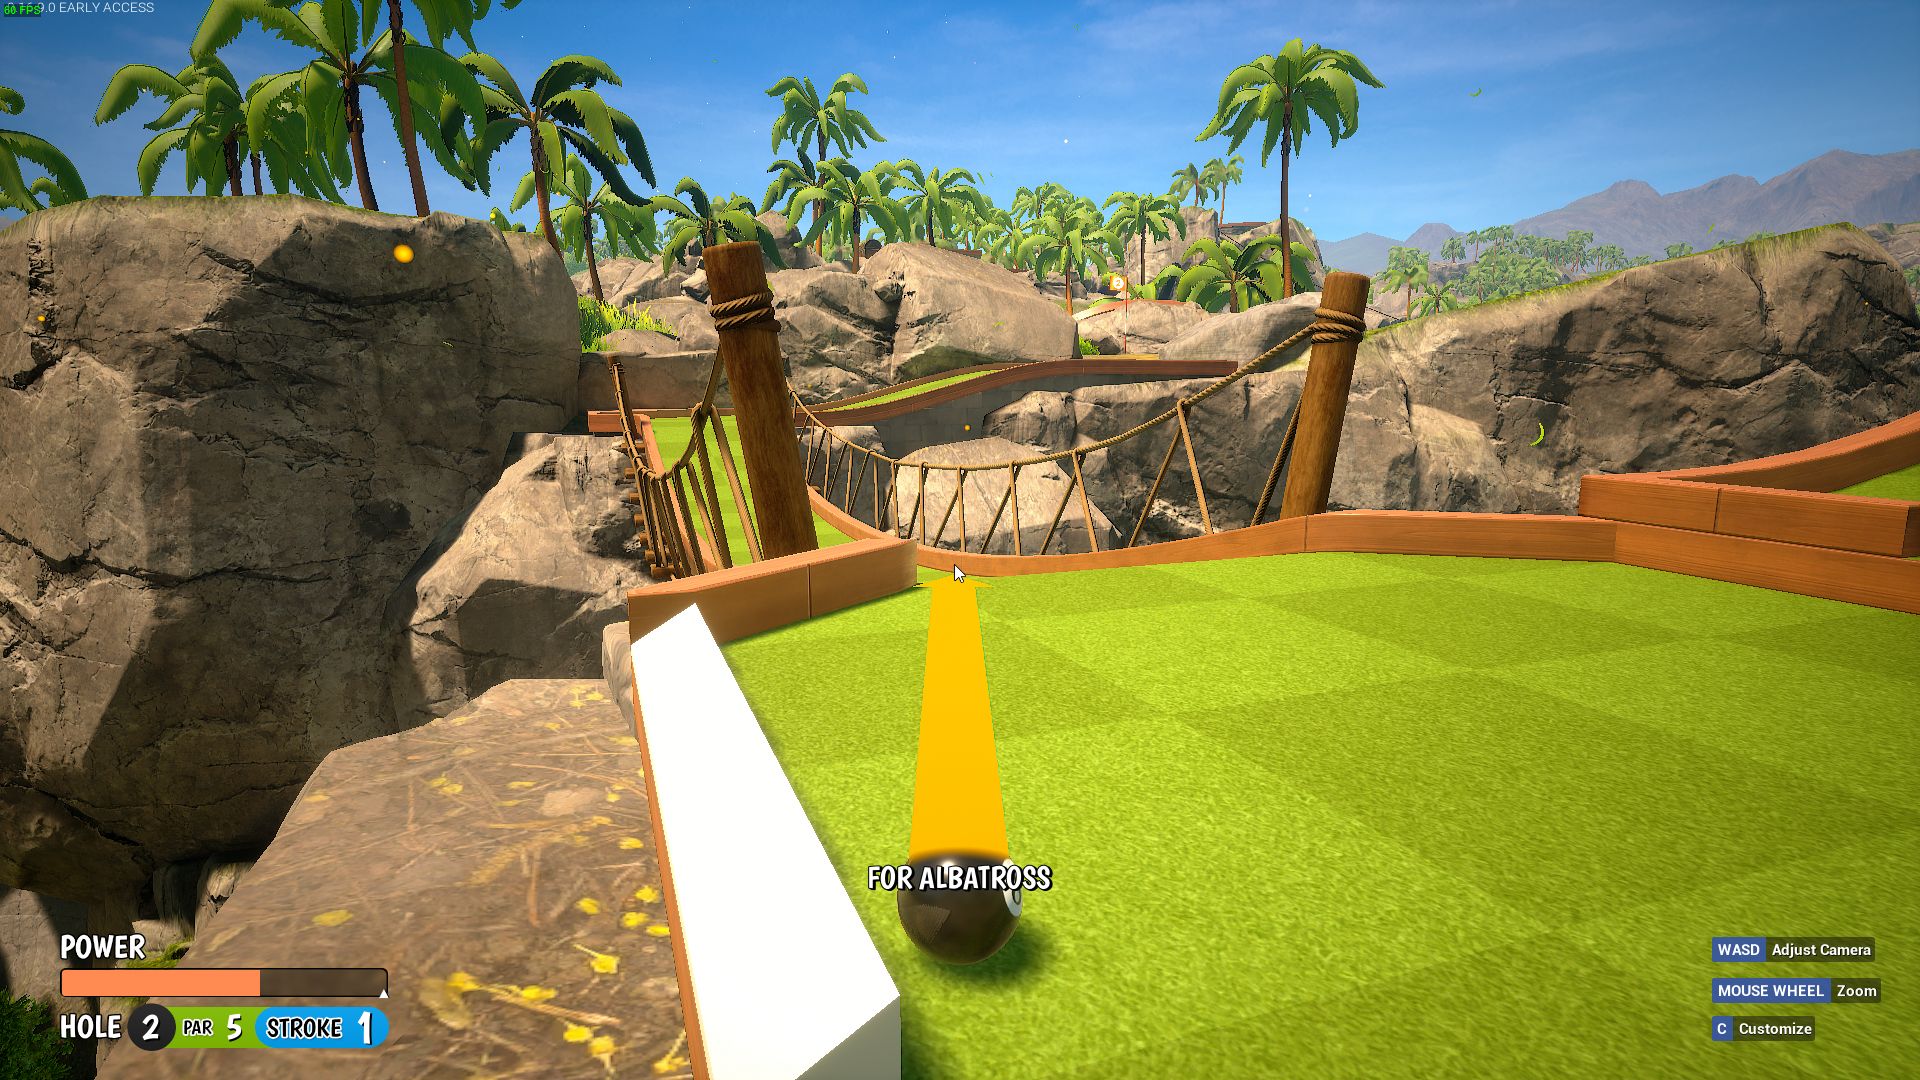 Power between R&5 – If your ball in not middle, take into account the slant of the hill when aiming.
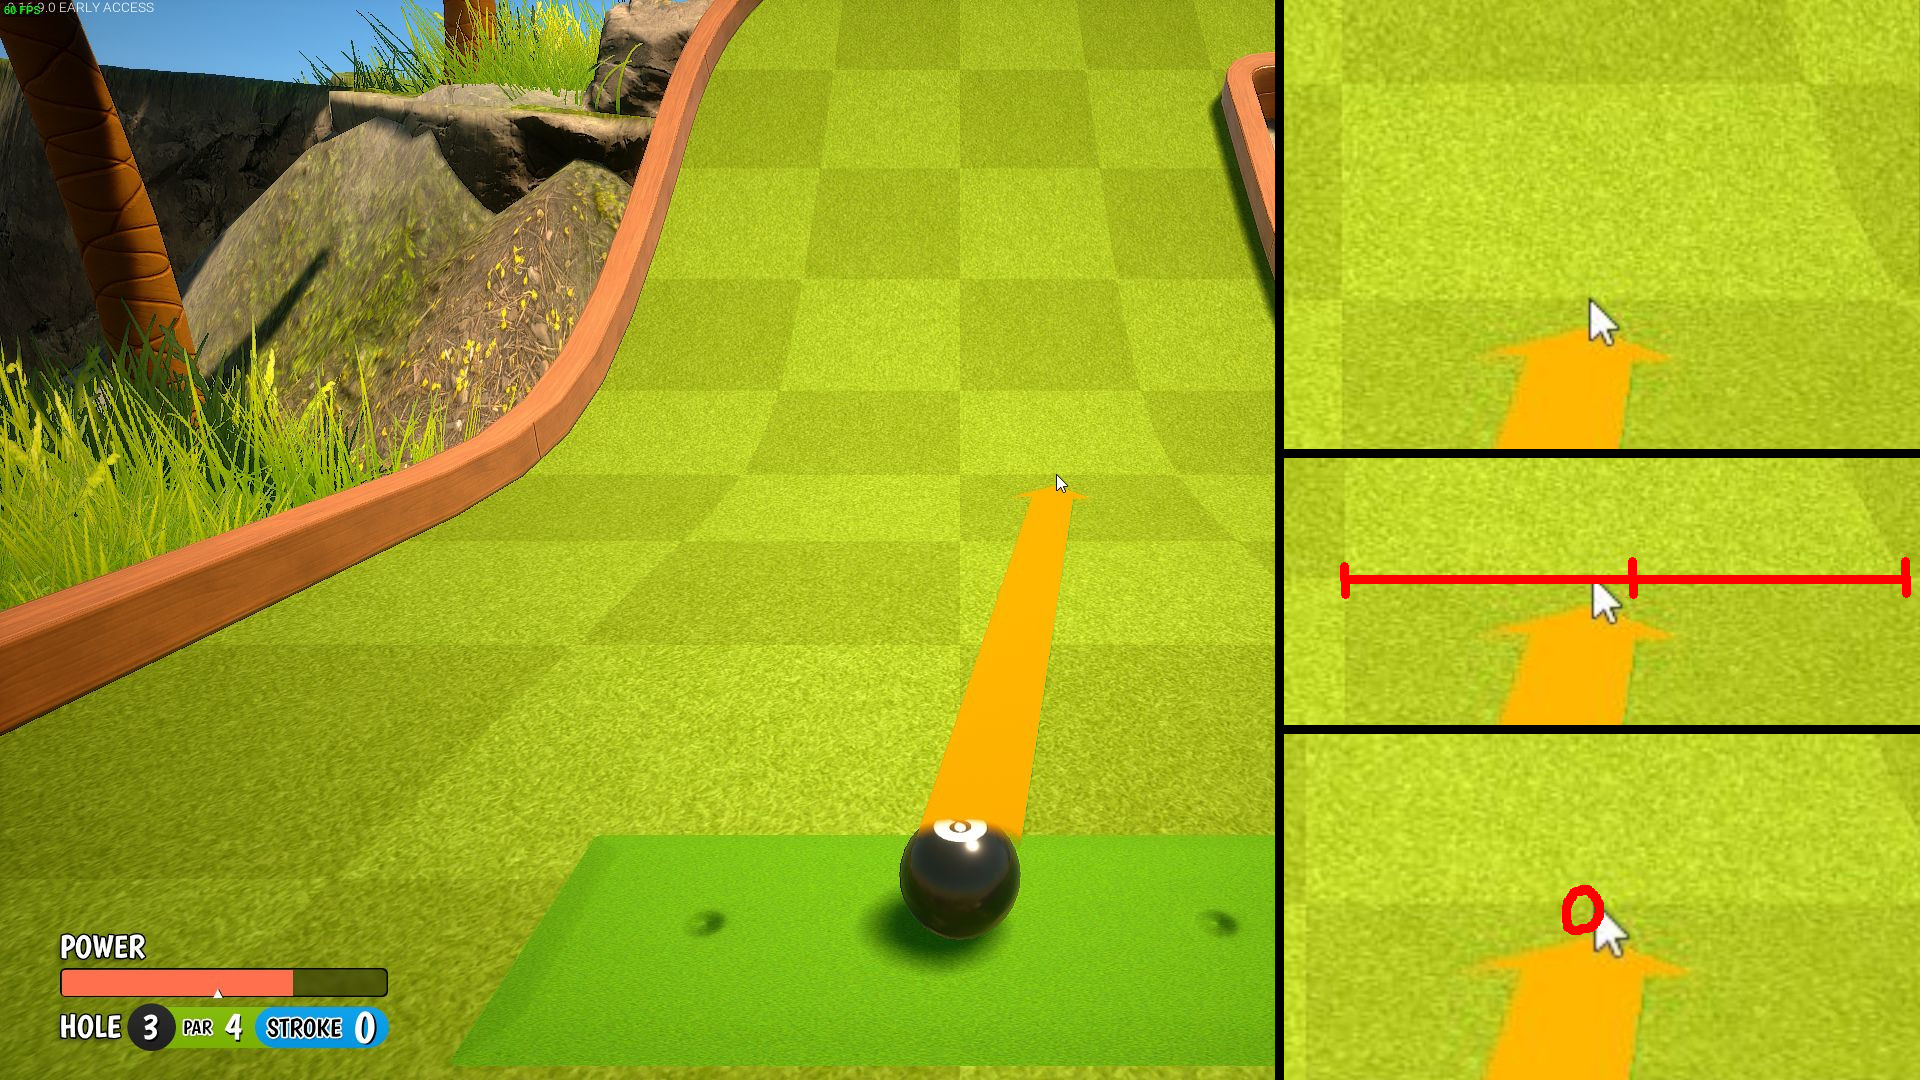
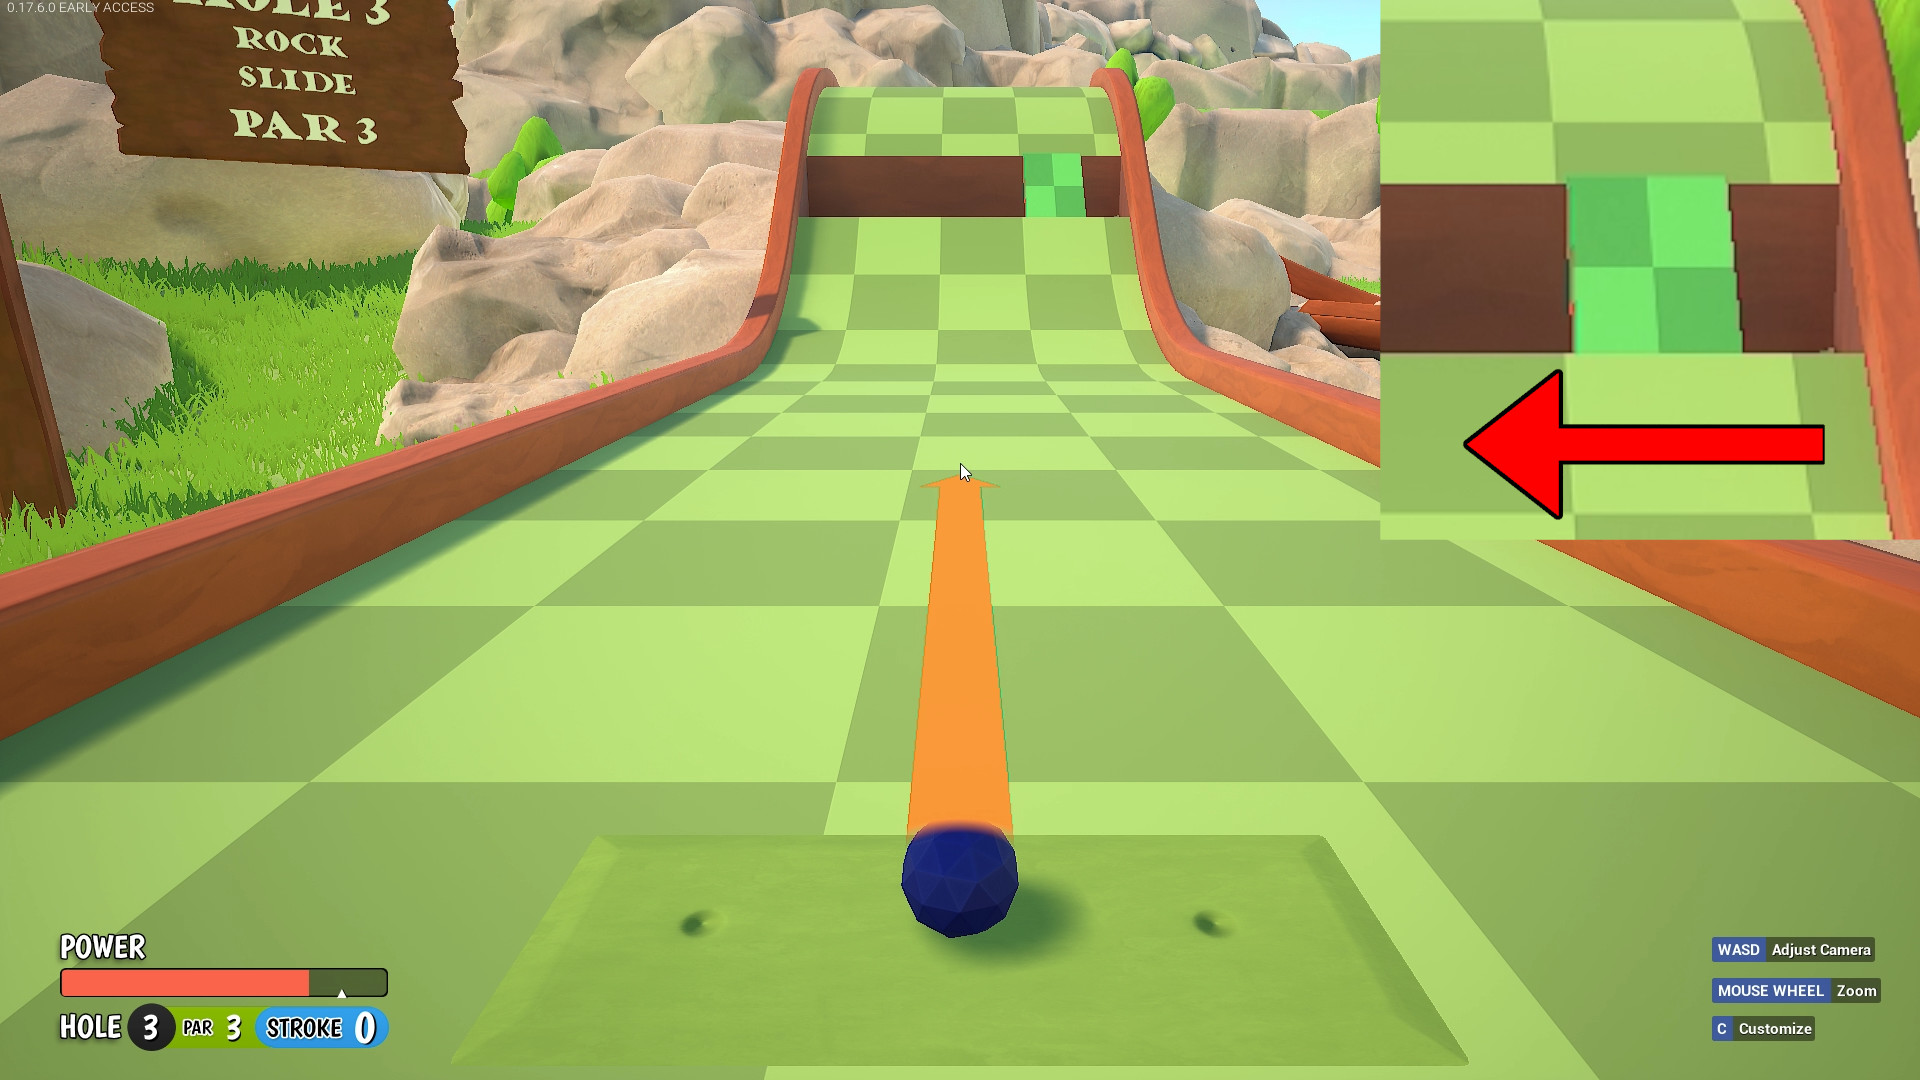
Hole 3 – HIO
personally I aim slightly right of this little white dot circled in the bottom right image, but it may be hard to see.
Hole 4 – HIO (no ach)

Hole 5
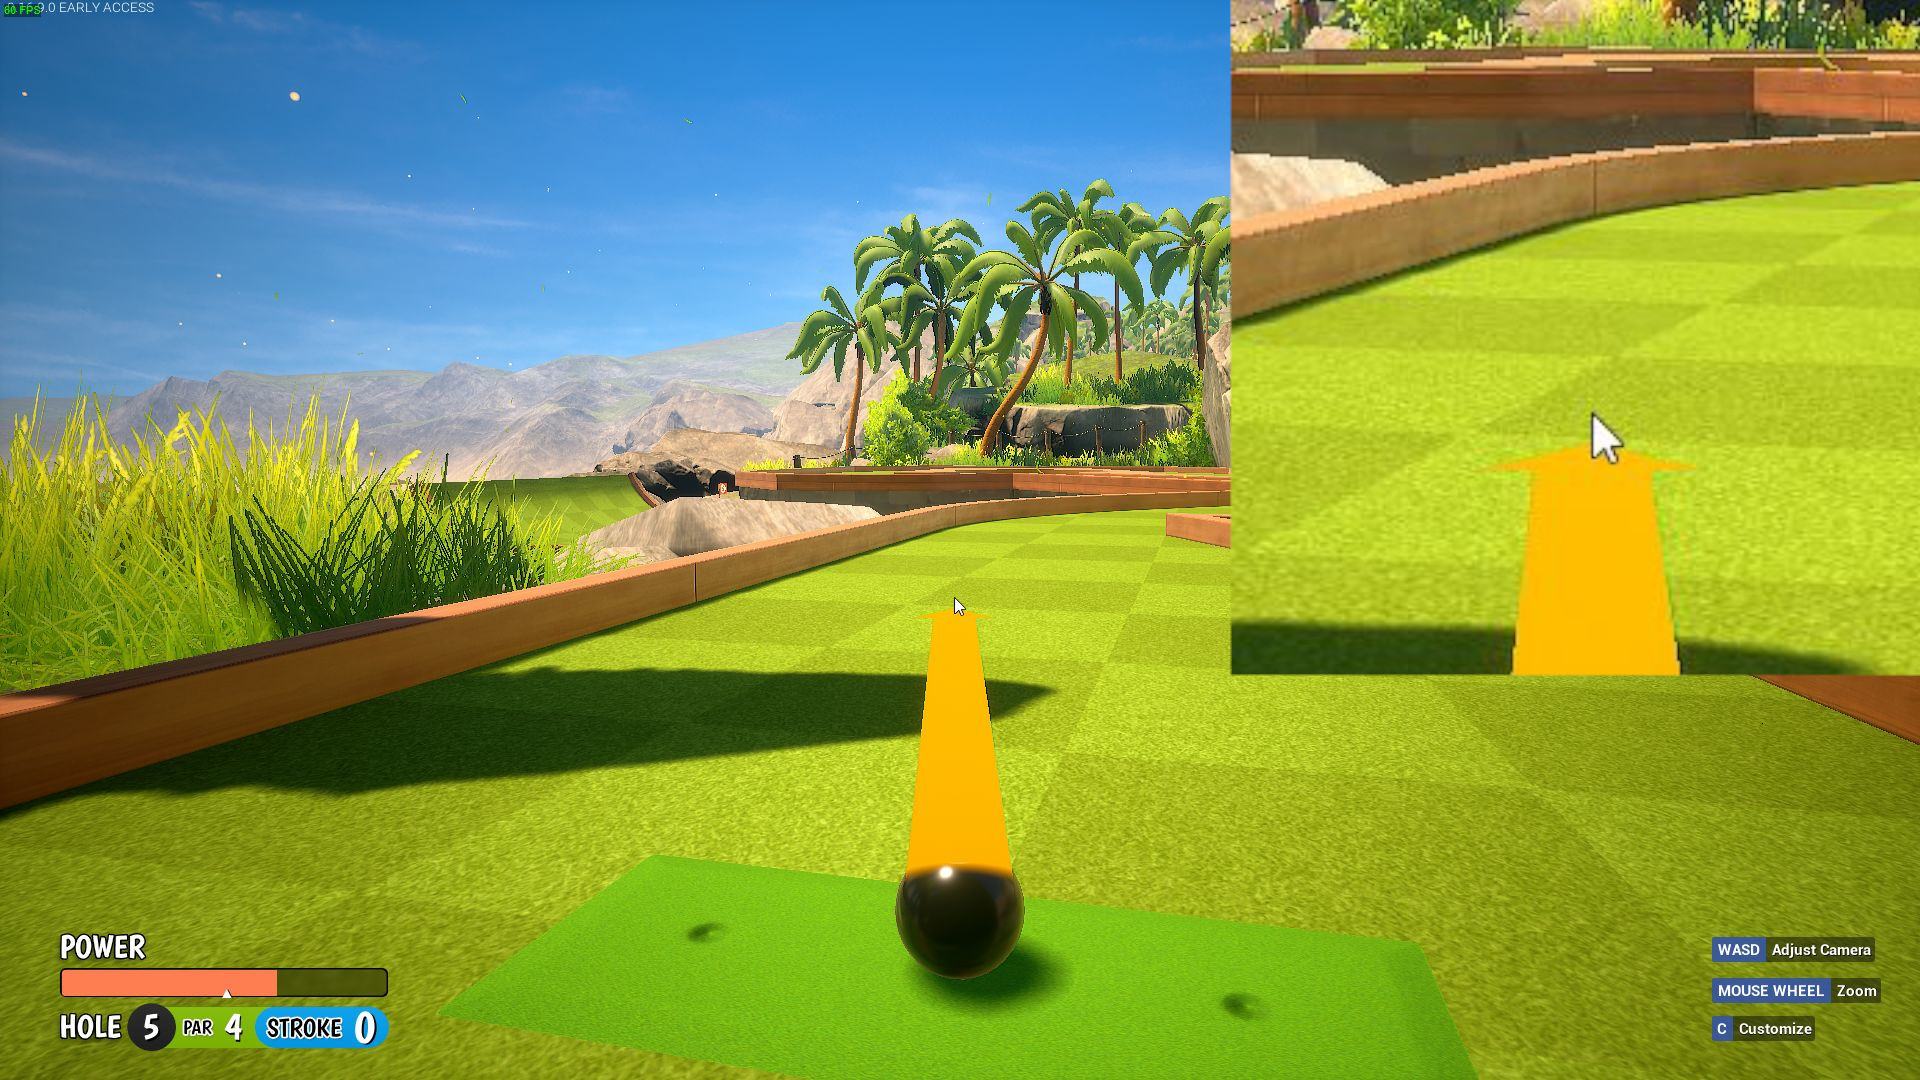 Simple shoot up the ramp toward the hole, Power R in par (very forgiving)
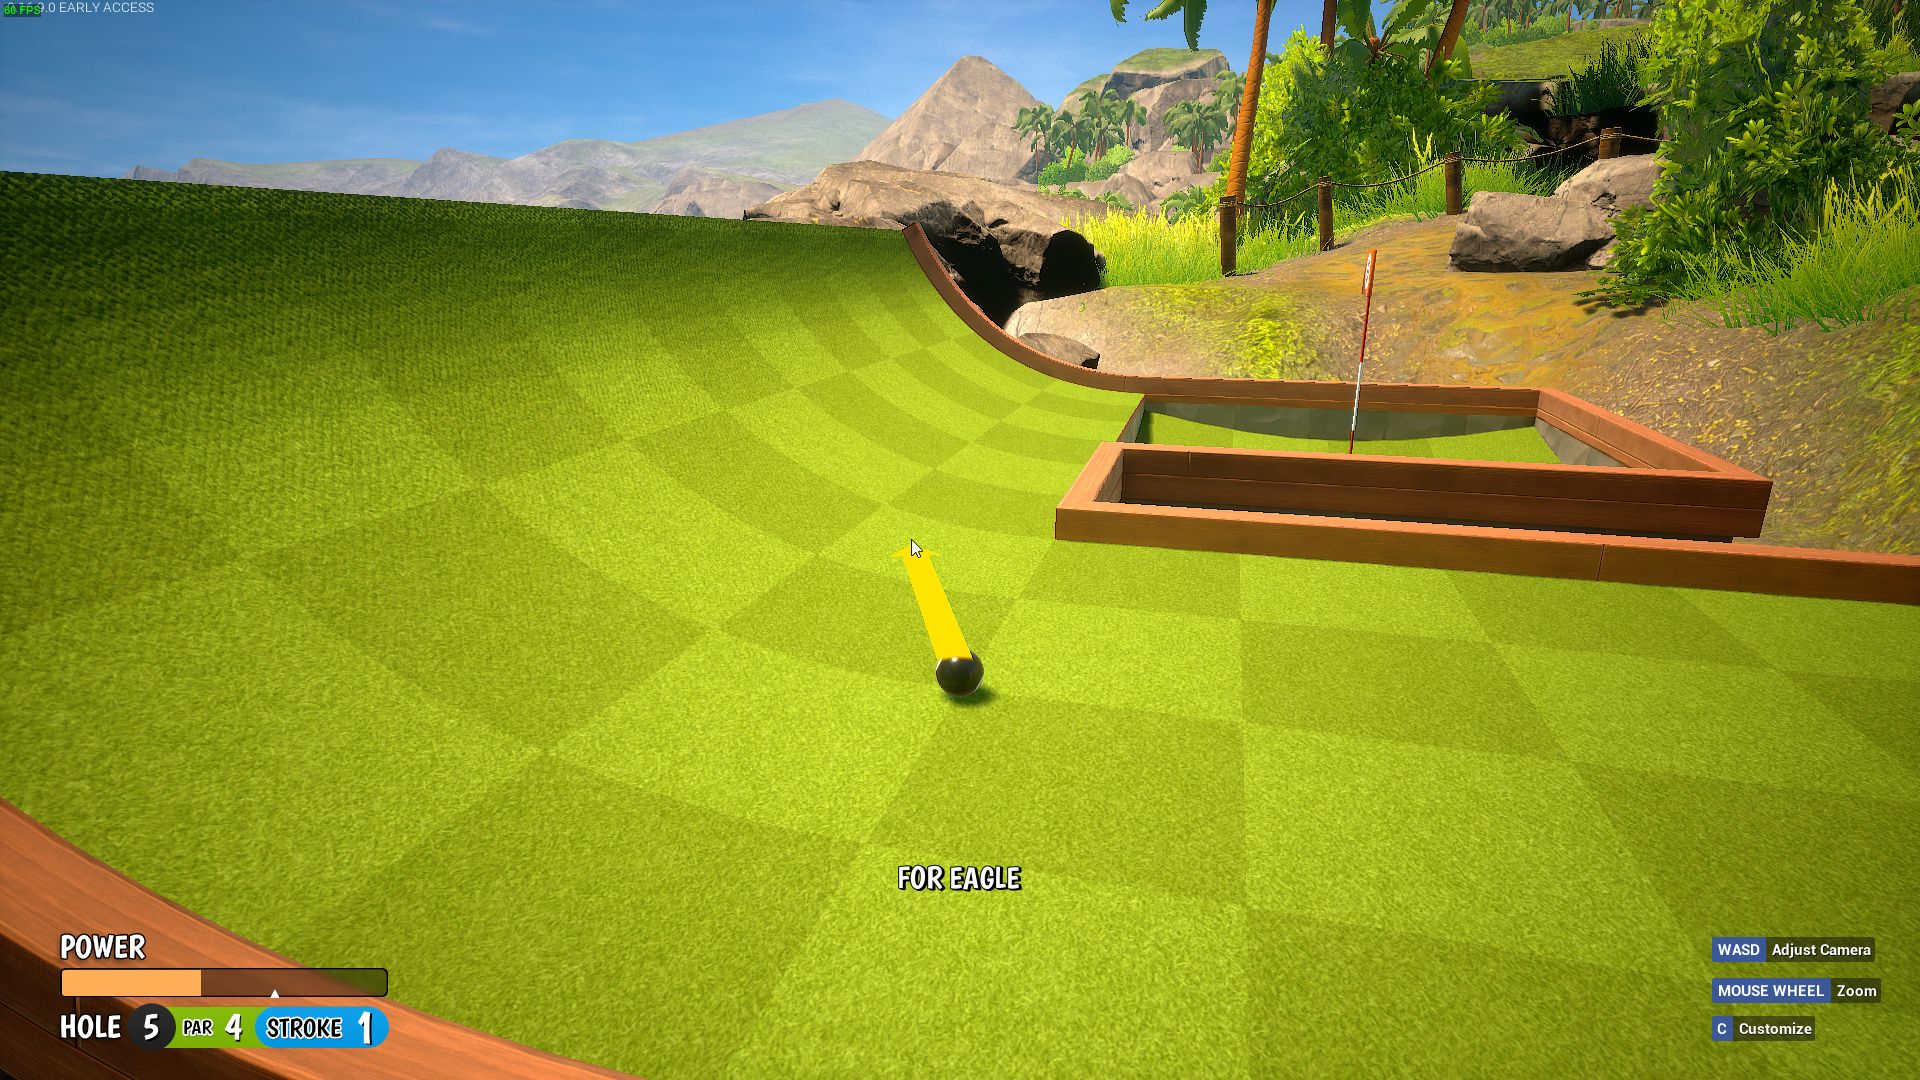
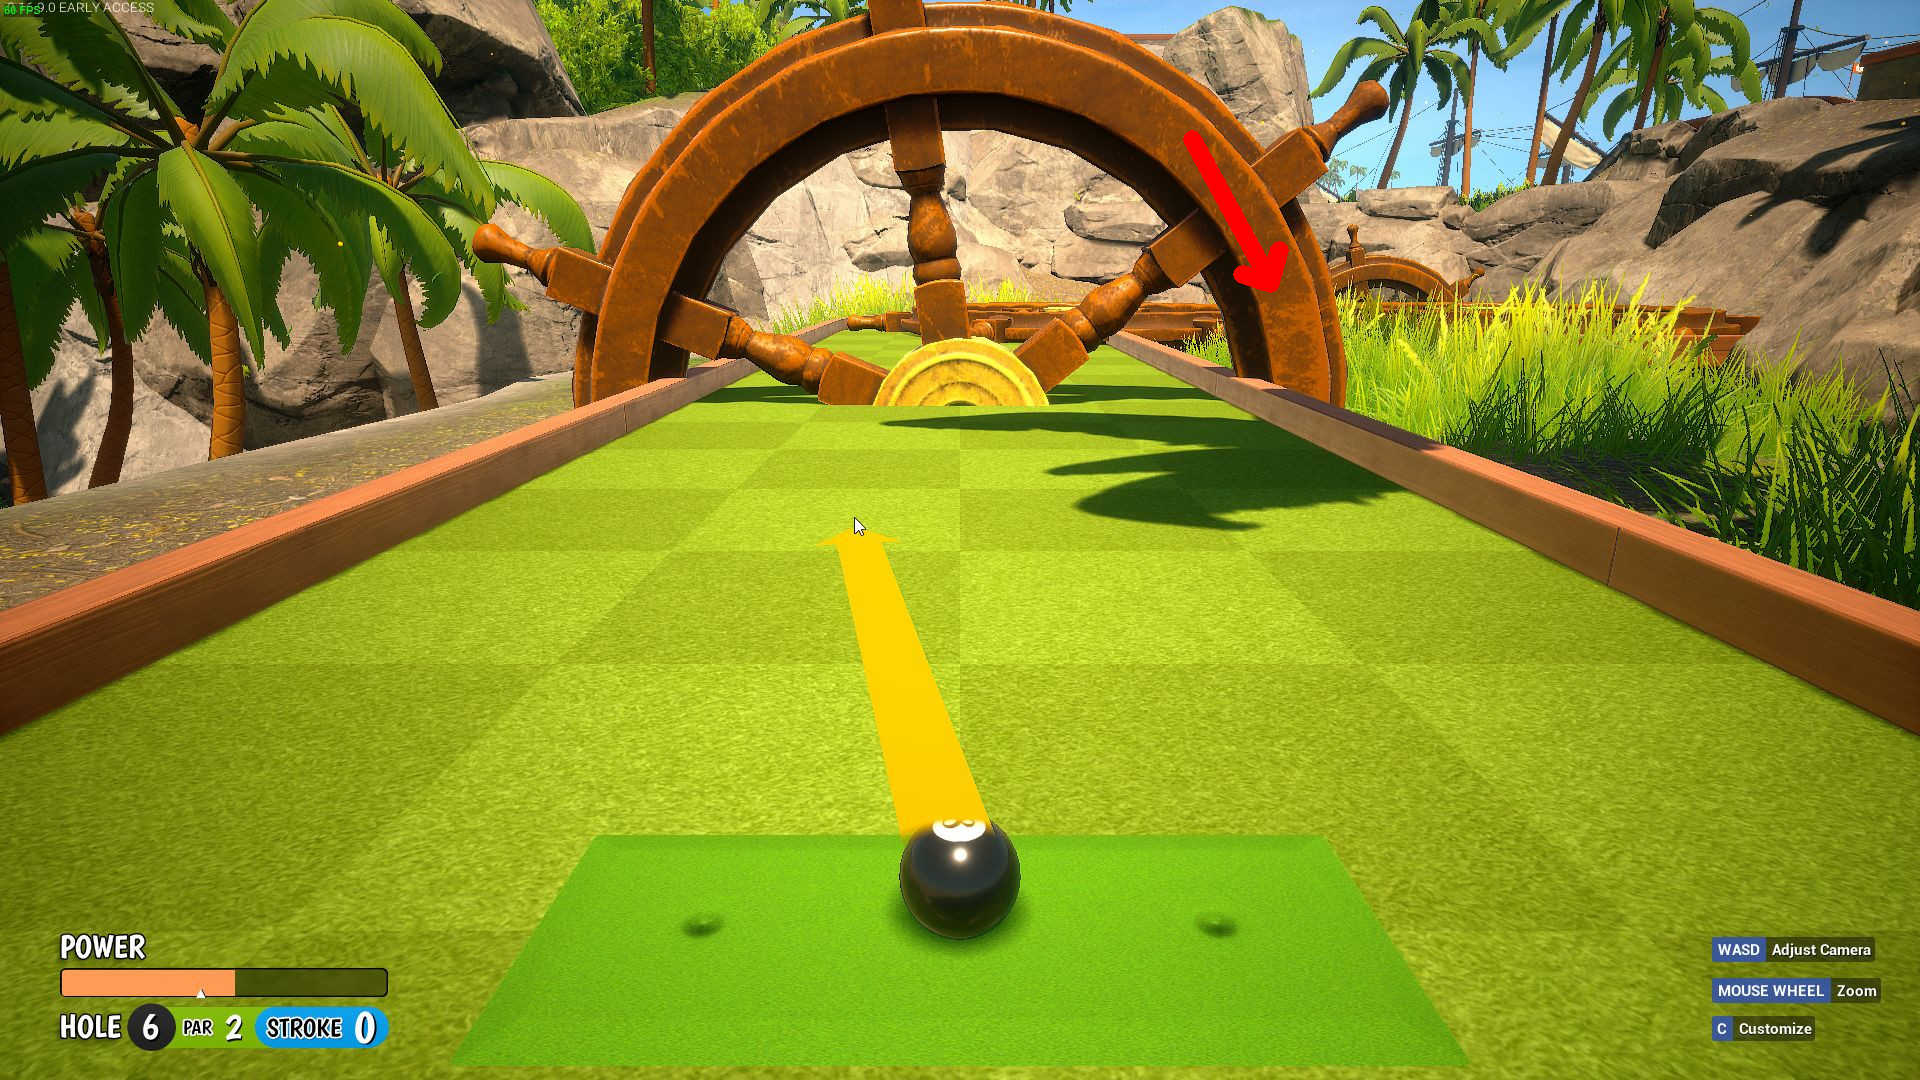
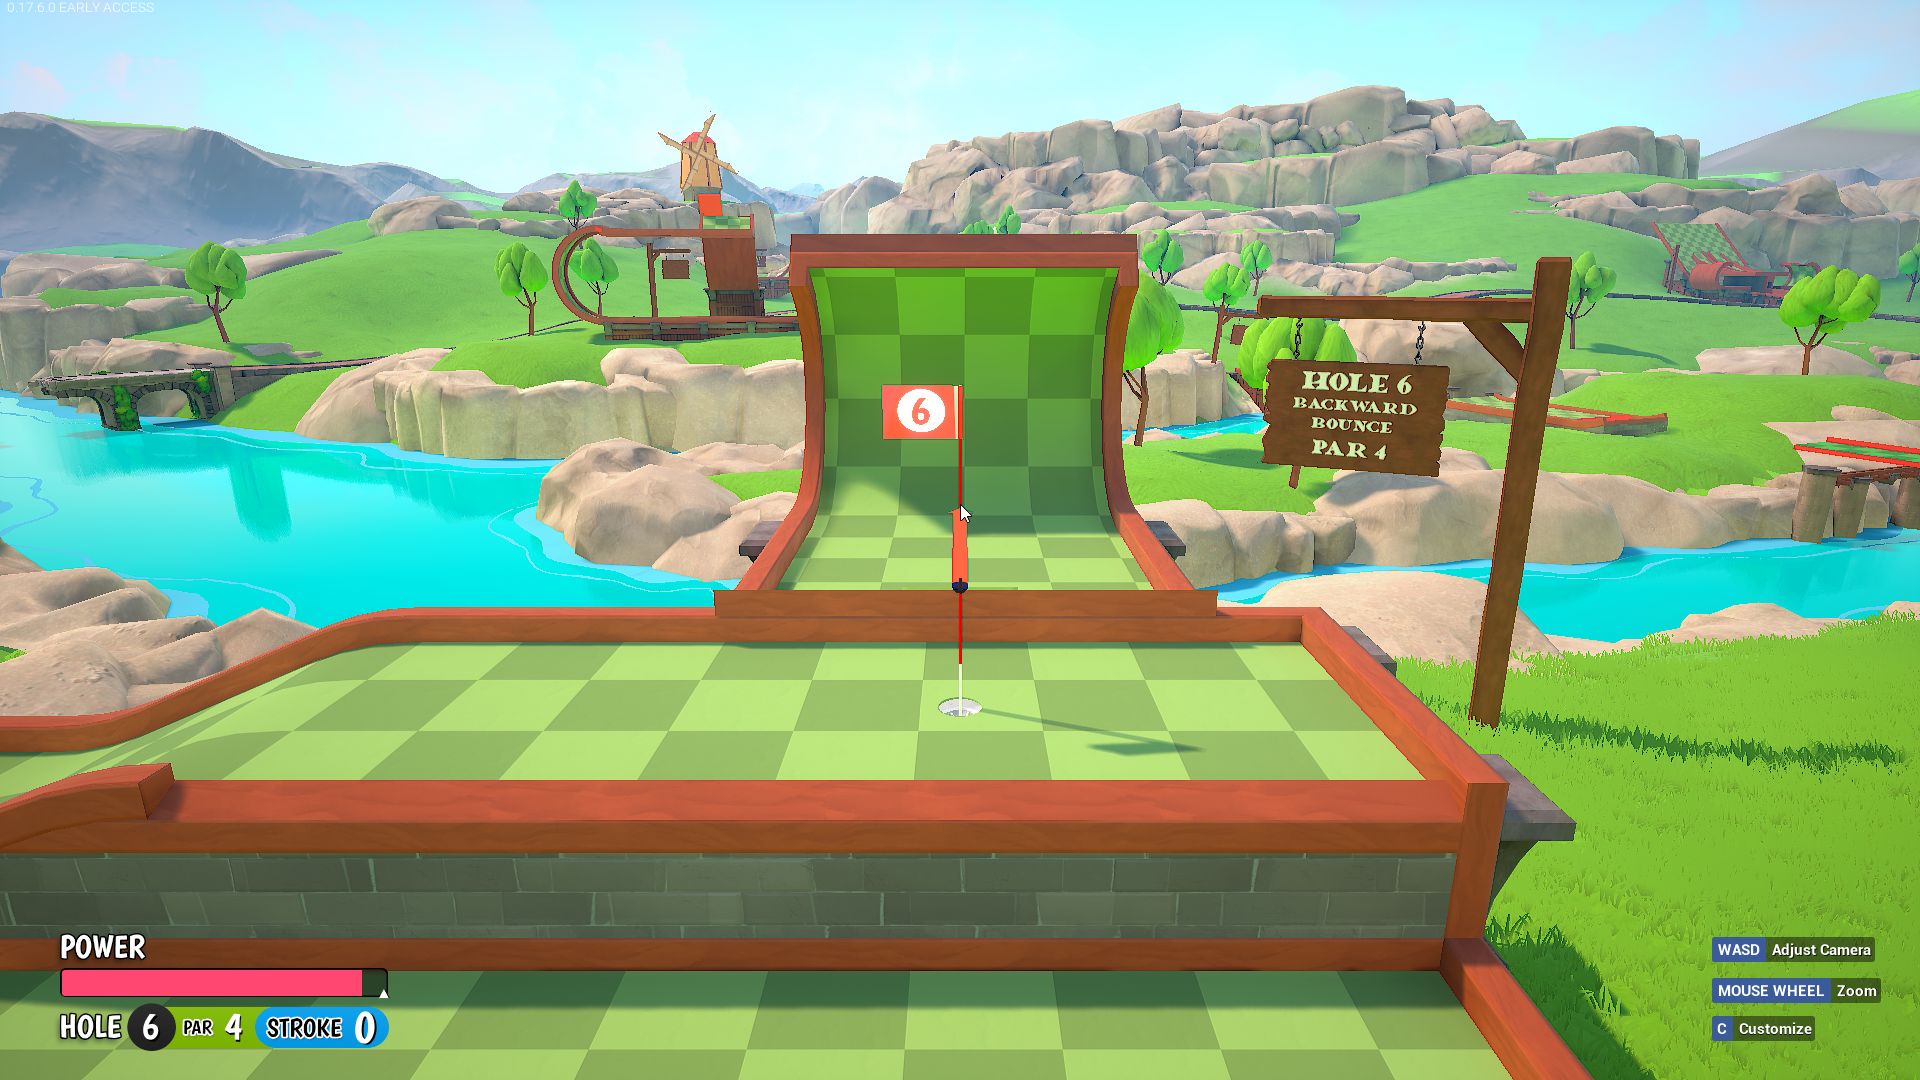
Hole 6 – HIO
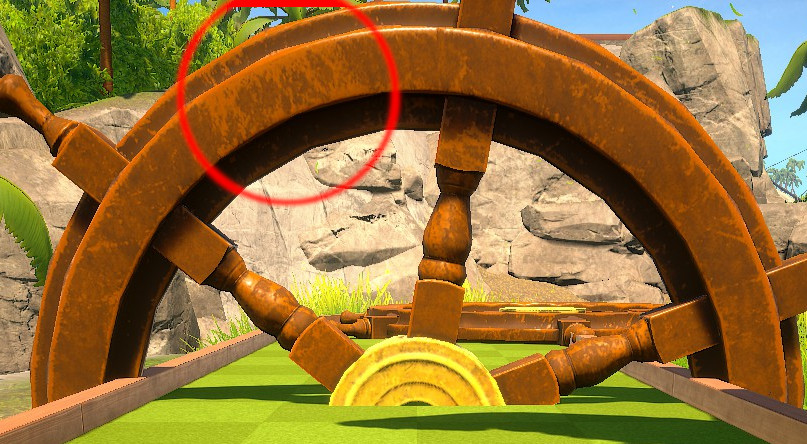
There are multiple timings that work, I will provide 2 below.
1st option, Power 2 in “par 2” shoot the one after/below the “scratchy” pattern.
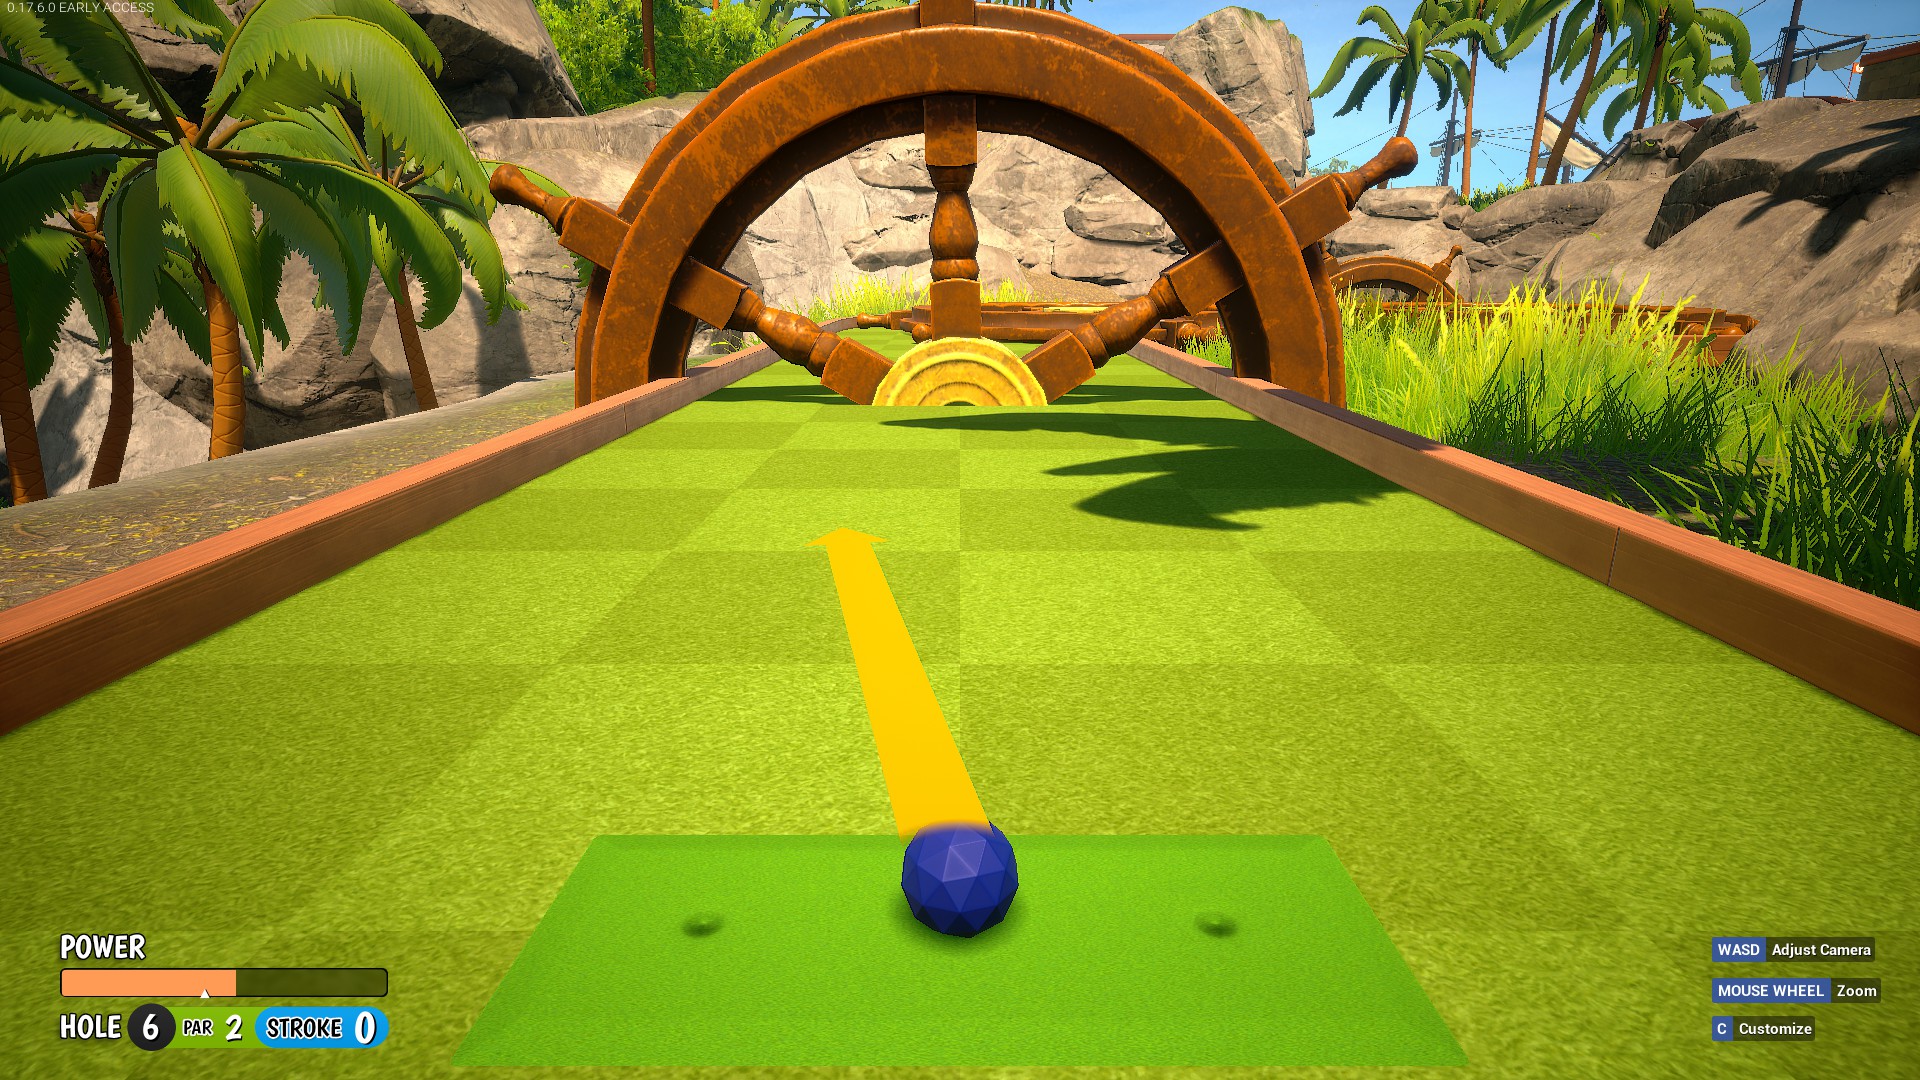 2nd option, Power 2 in “par 2” shoot as the “scratchy” pattern goes into the ground on the left.
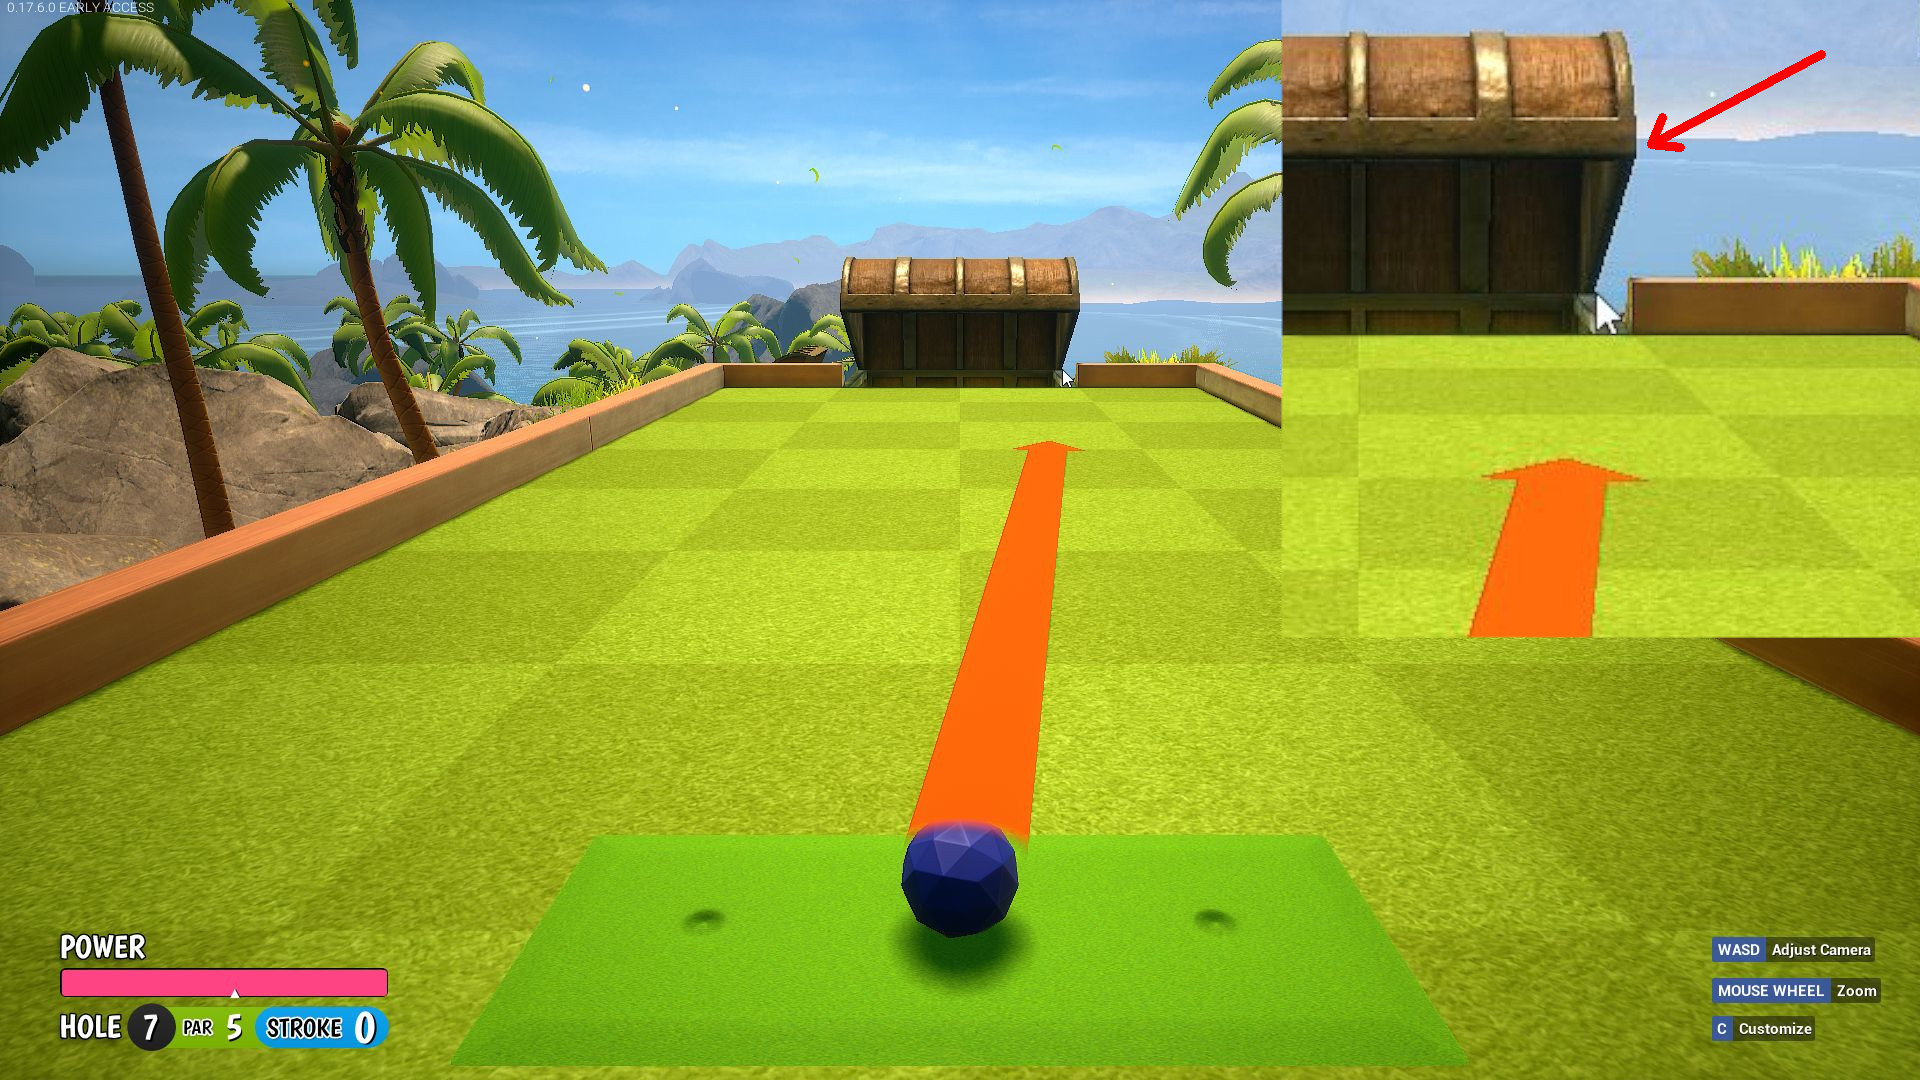
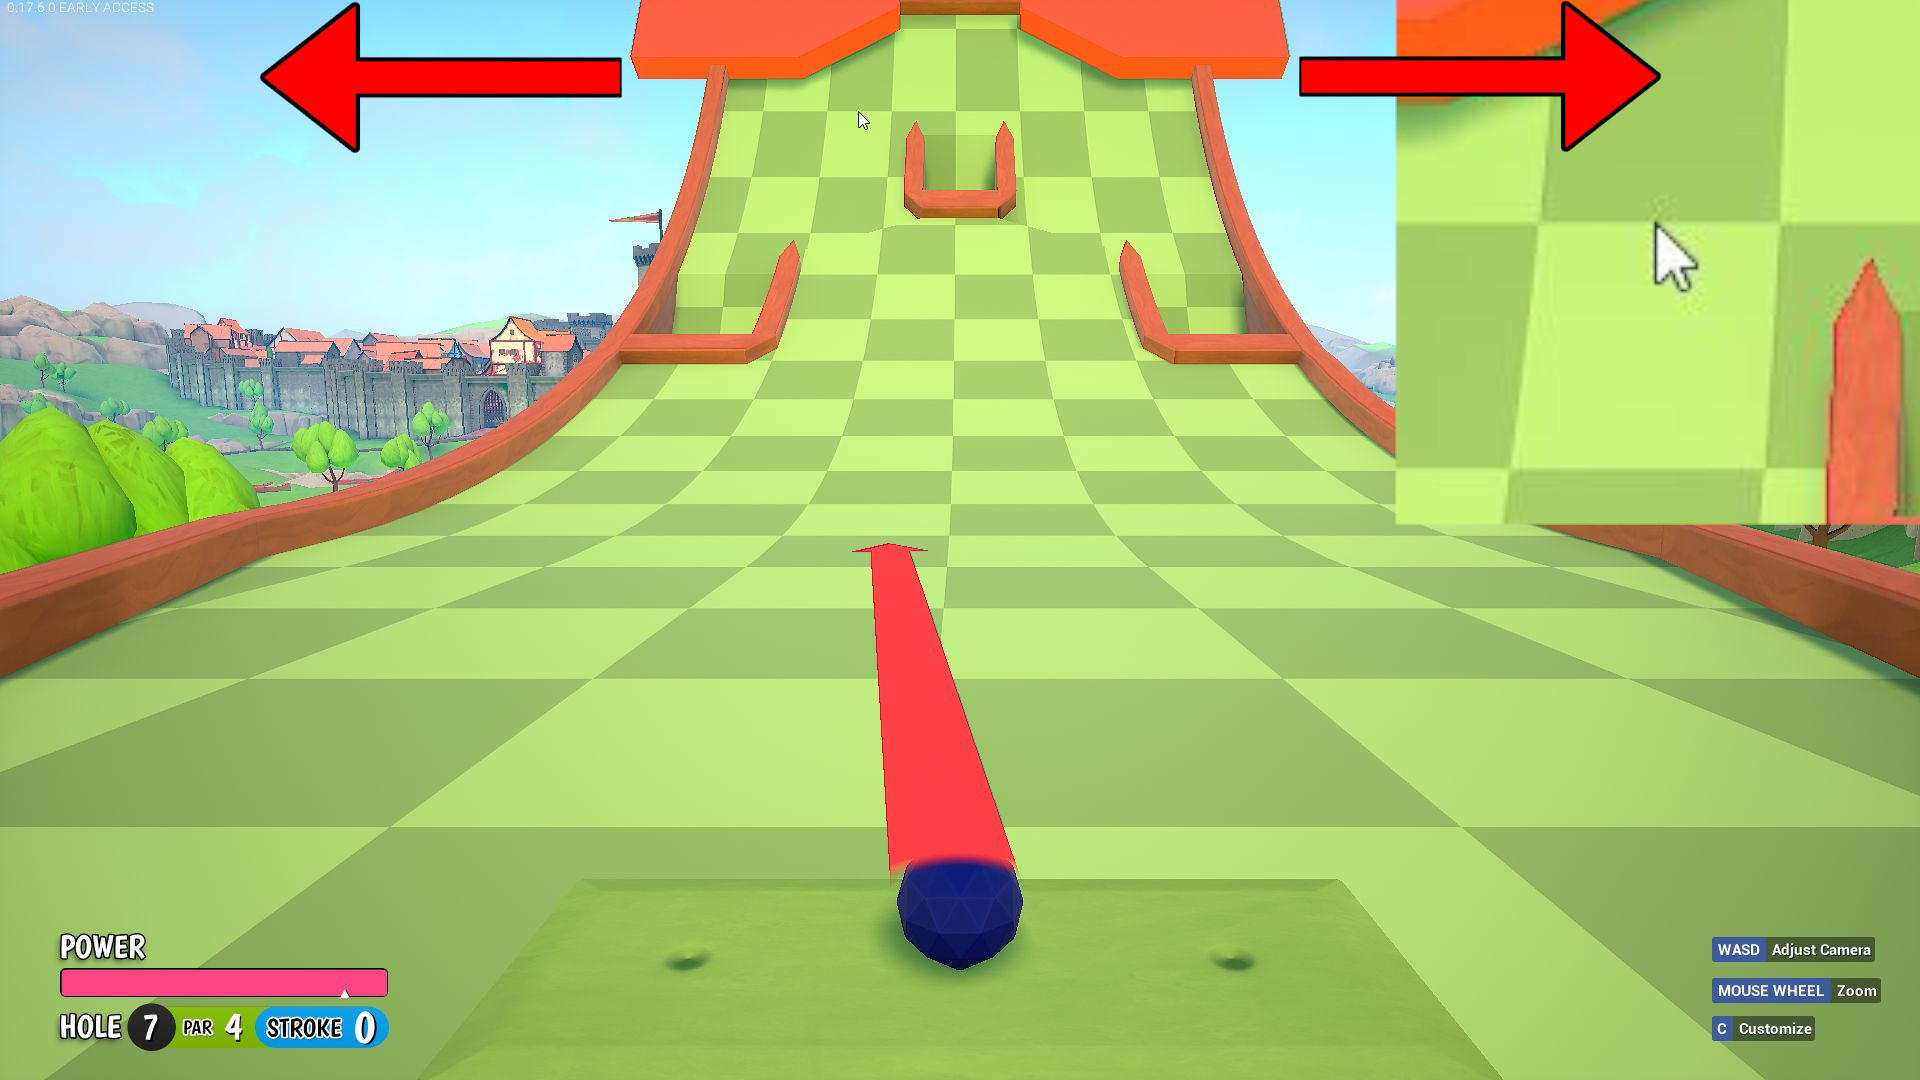
Hole 7
Place the cursor in the very corner edge of the opening on the right side of the chest,
Timing as the chest is half open.. more specifically when bottom edge of the top of the chest passes the white line in the water in the background as shown in screenshot.
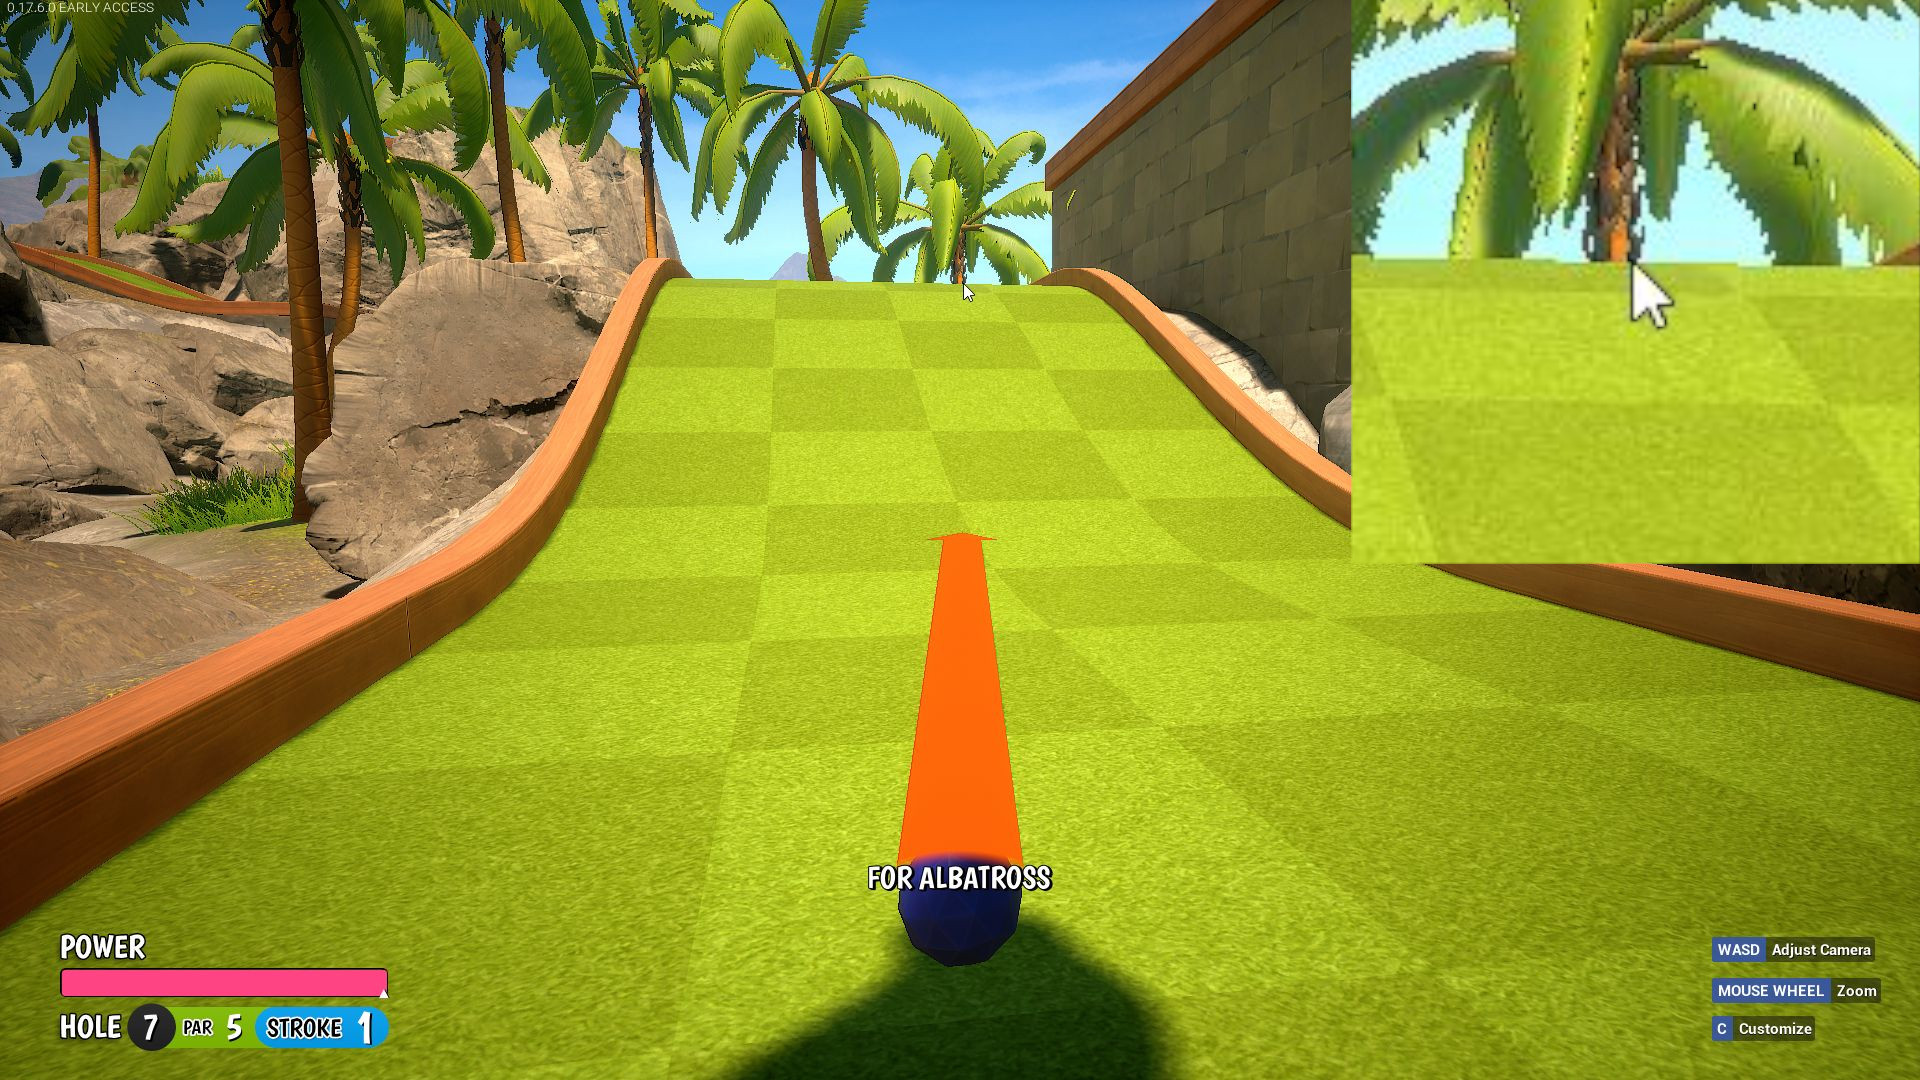
 2nd shot will vary a bit depending on the position you land in, Ideally you want to be on the middle/left half, the right side is much harder.
I’ll provide a handful of images with aims, choose the one that best matches your position.
1
 2
2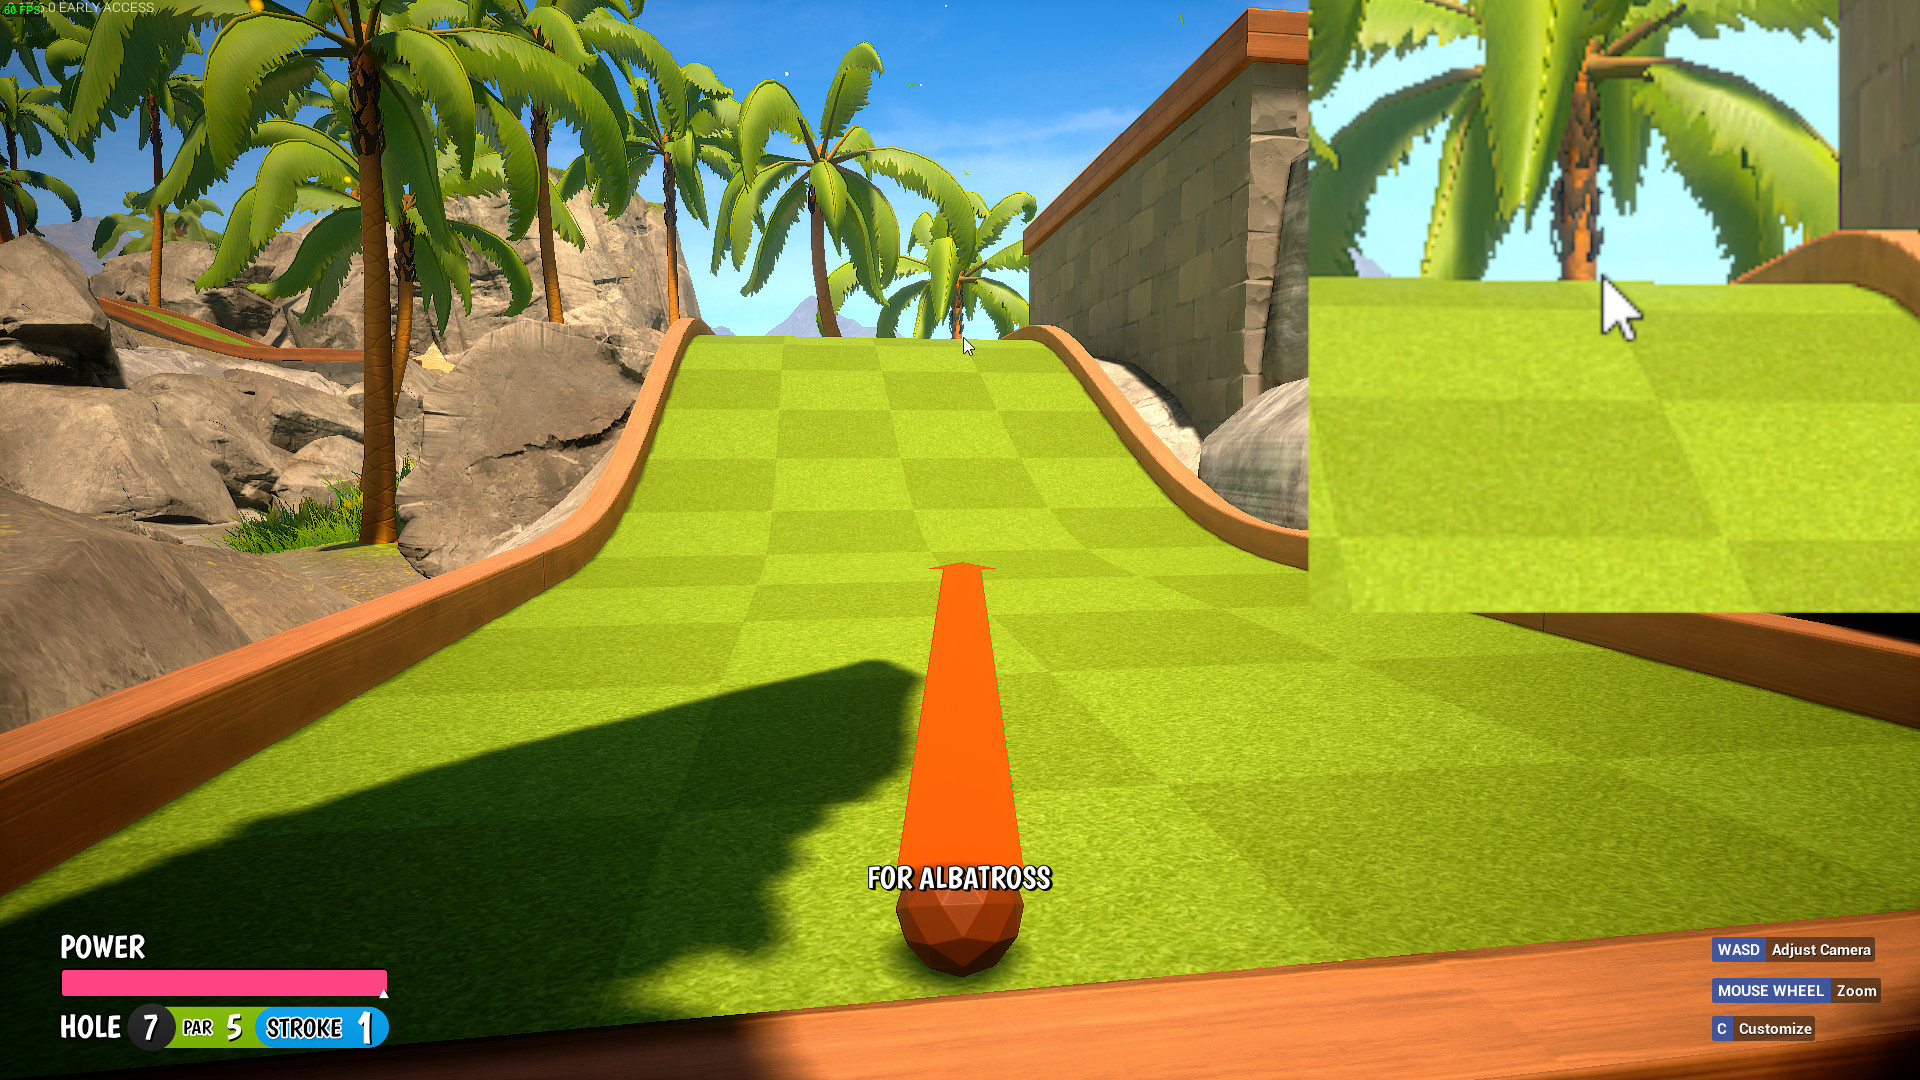 3
3 4
4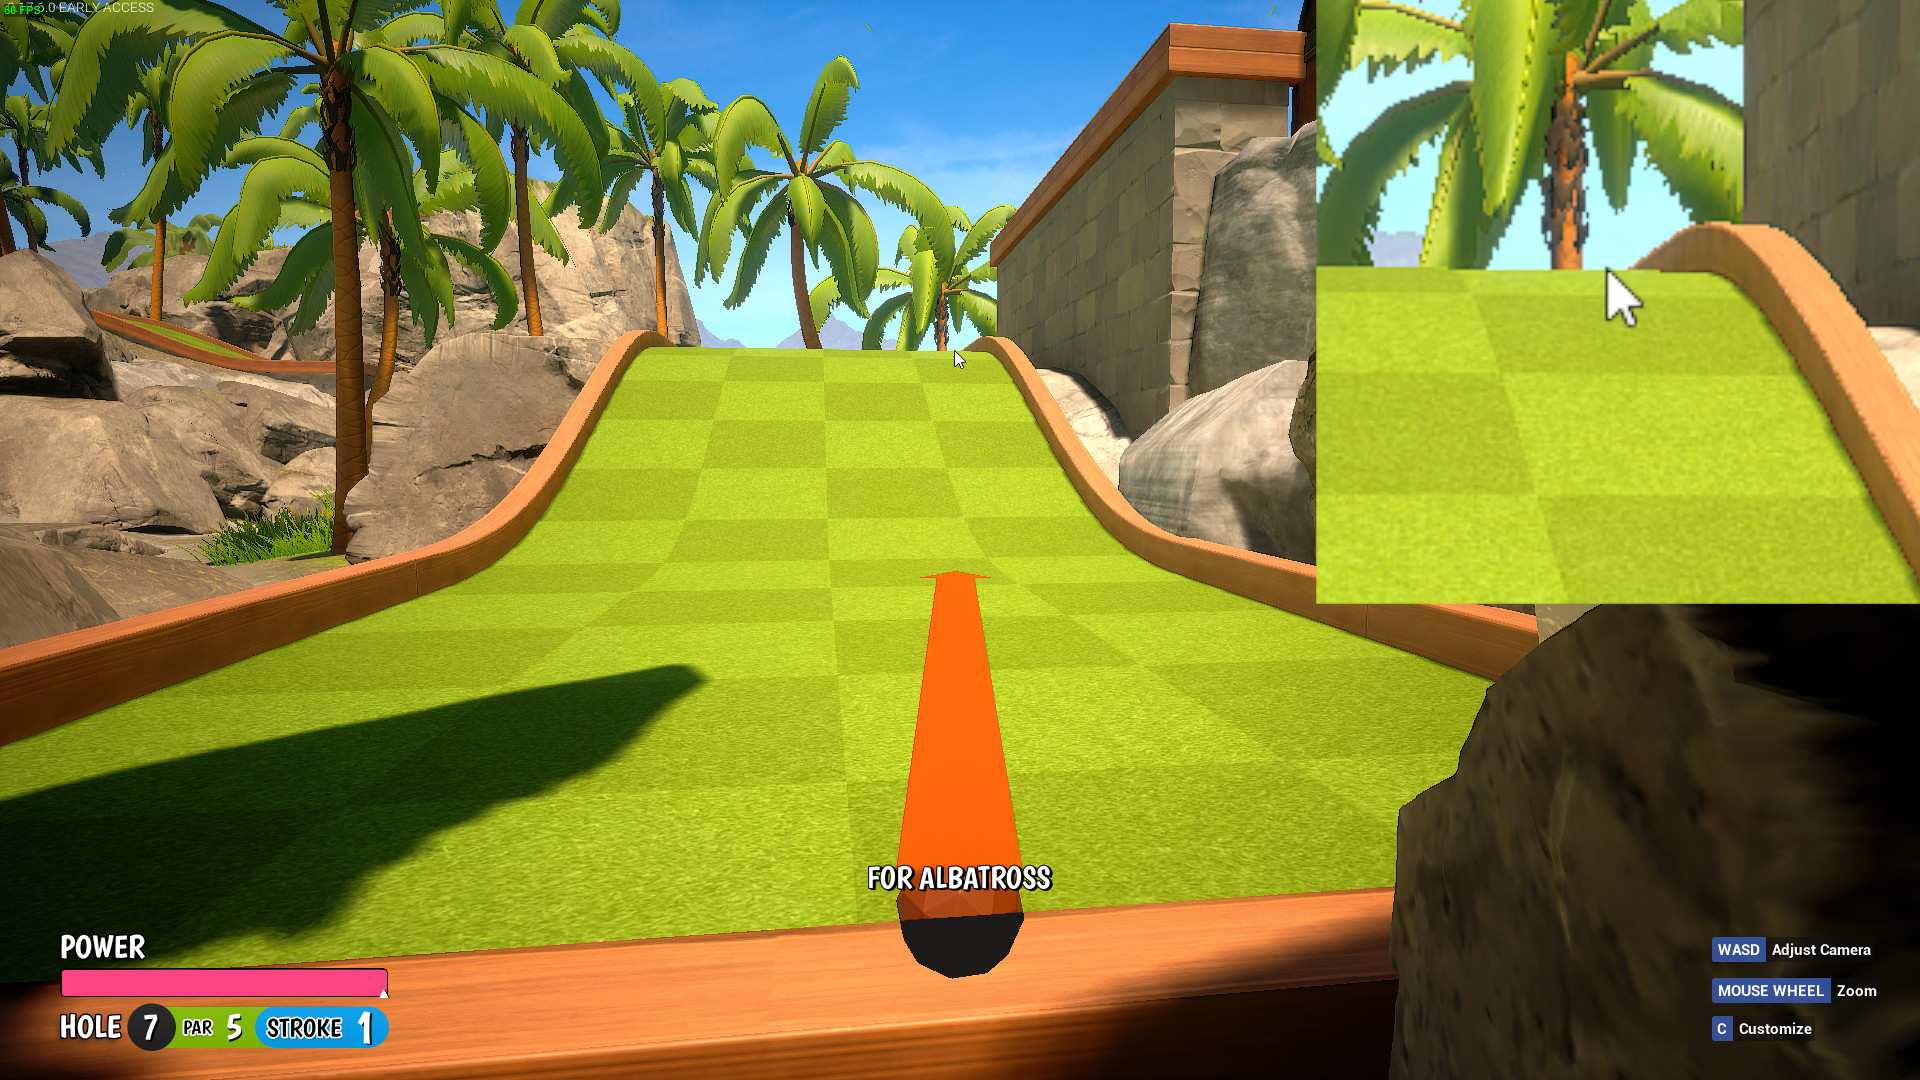 5
5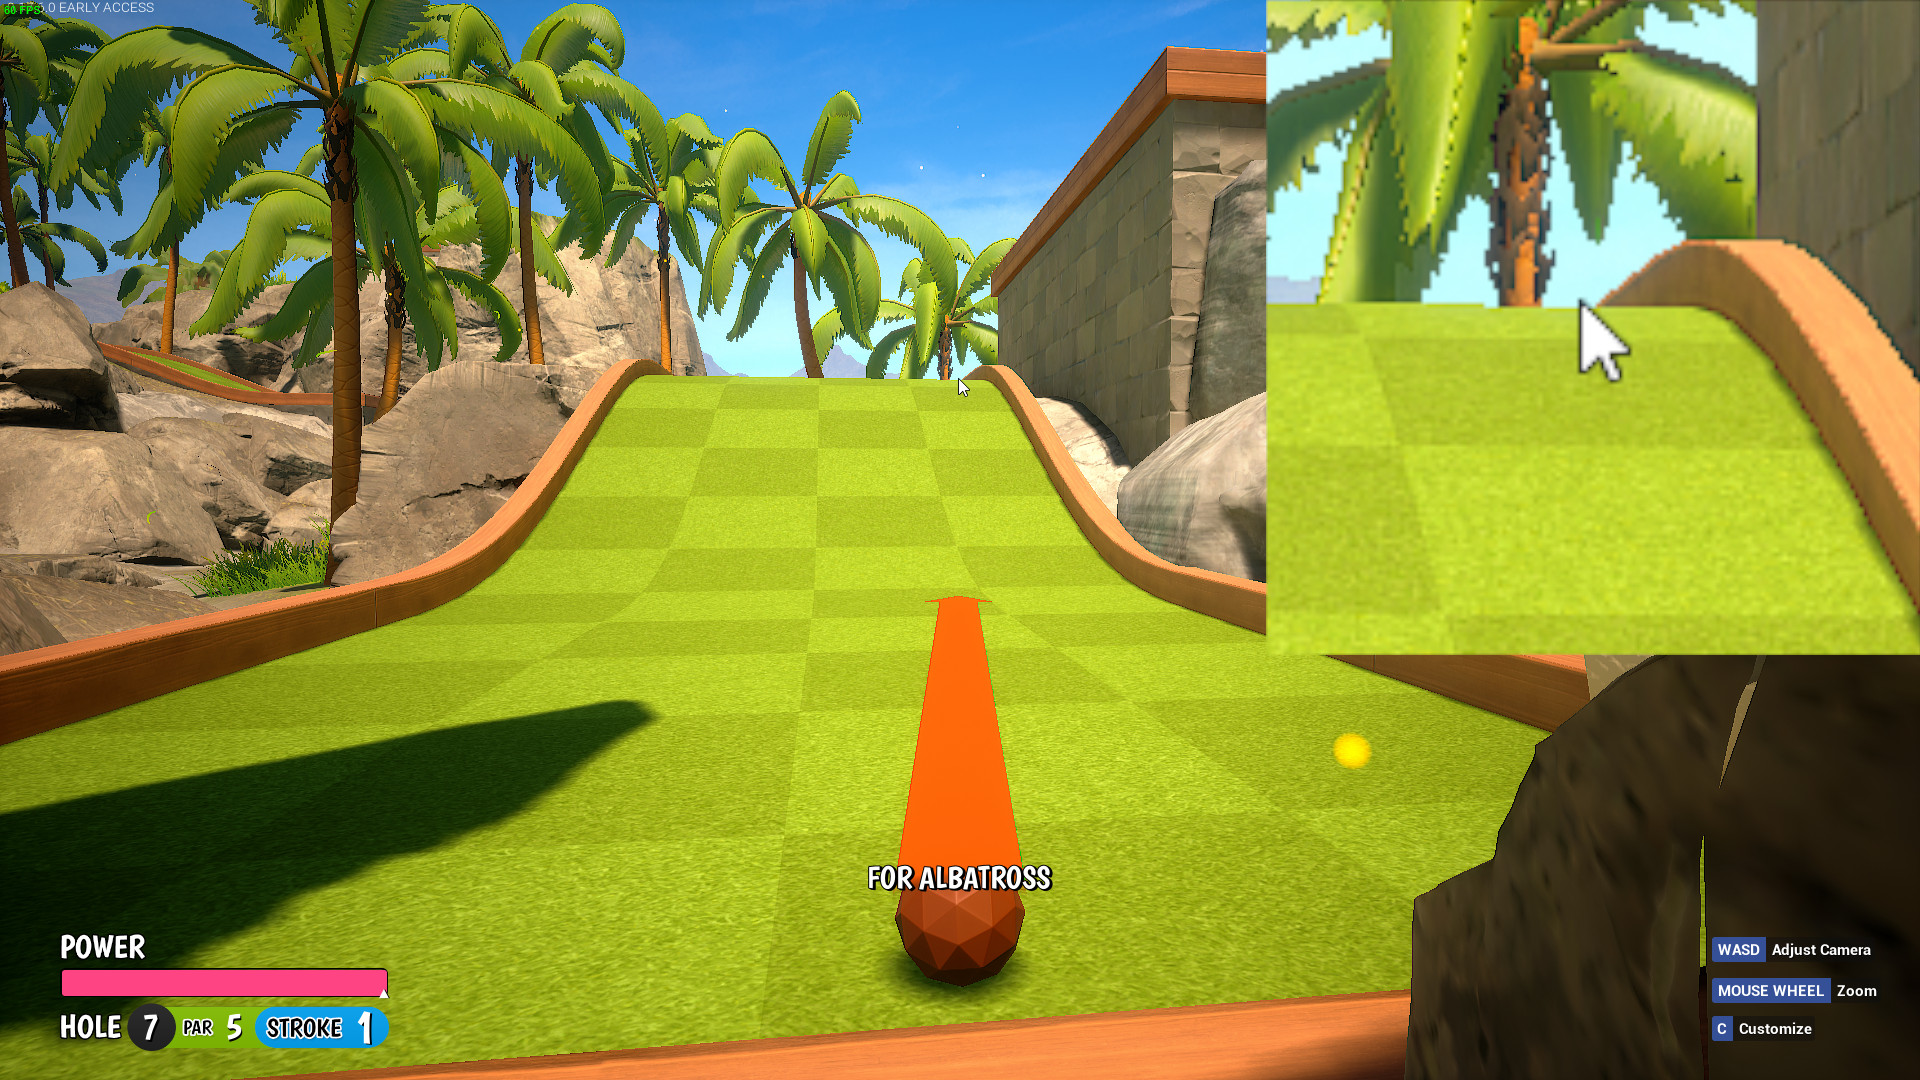 6 – Power E
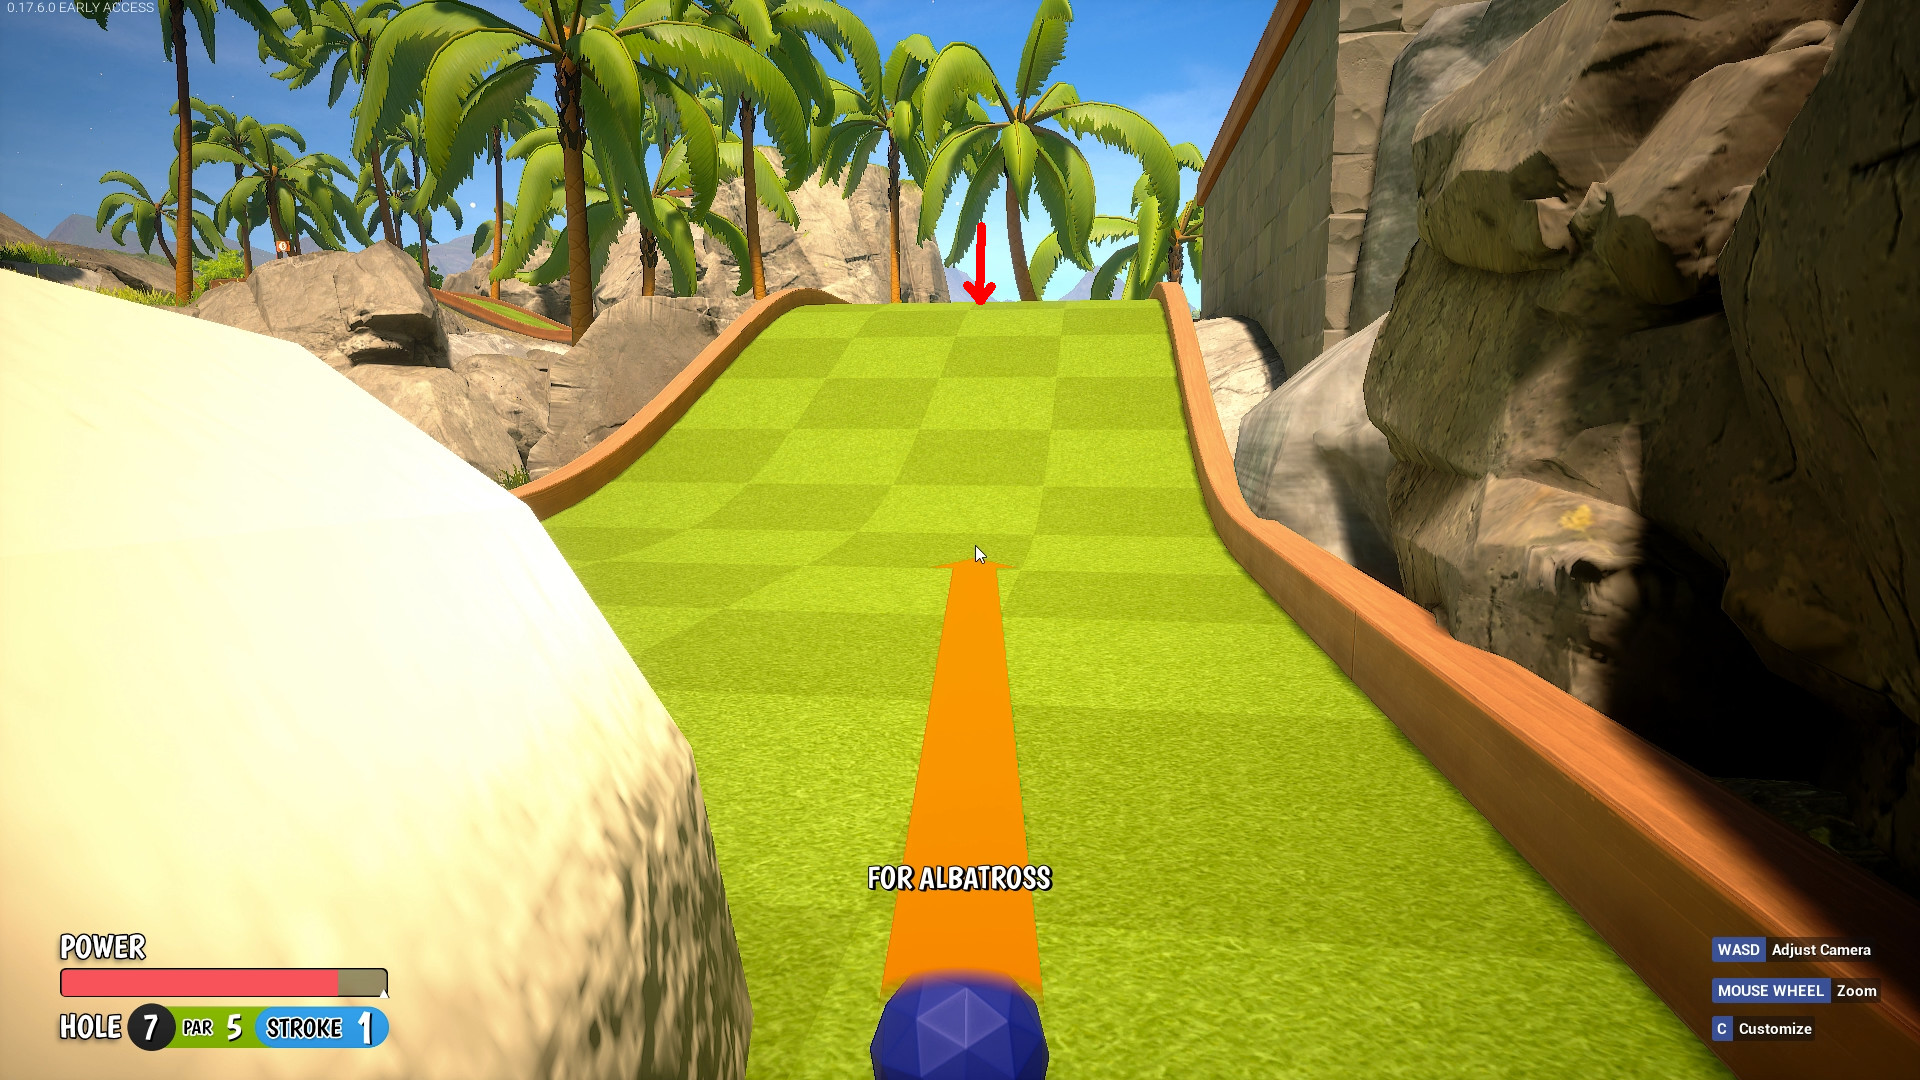 7 – Power E
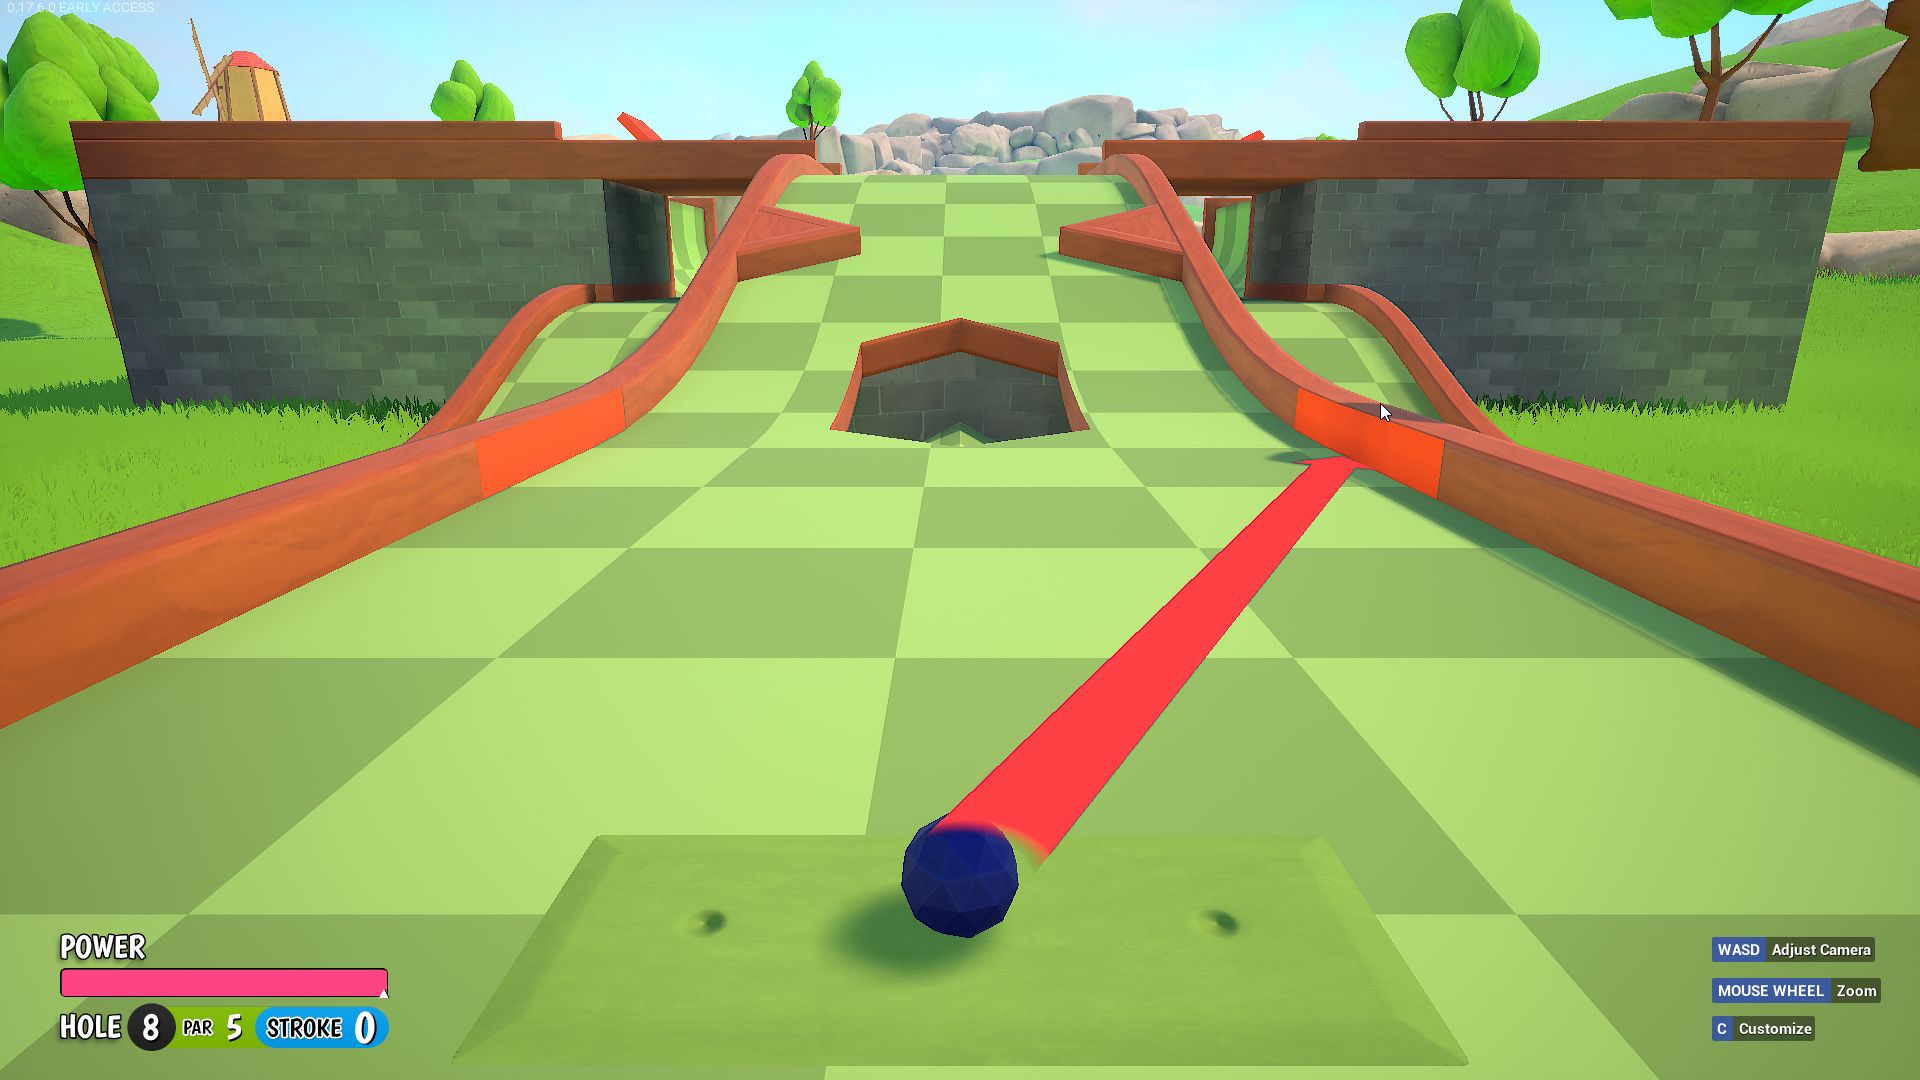
Hole 8
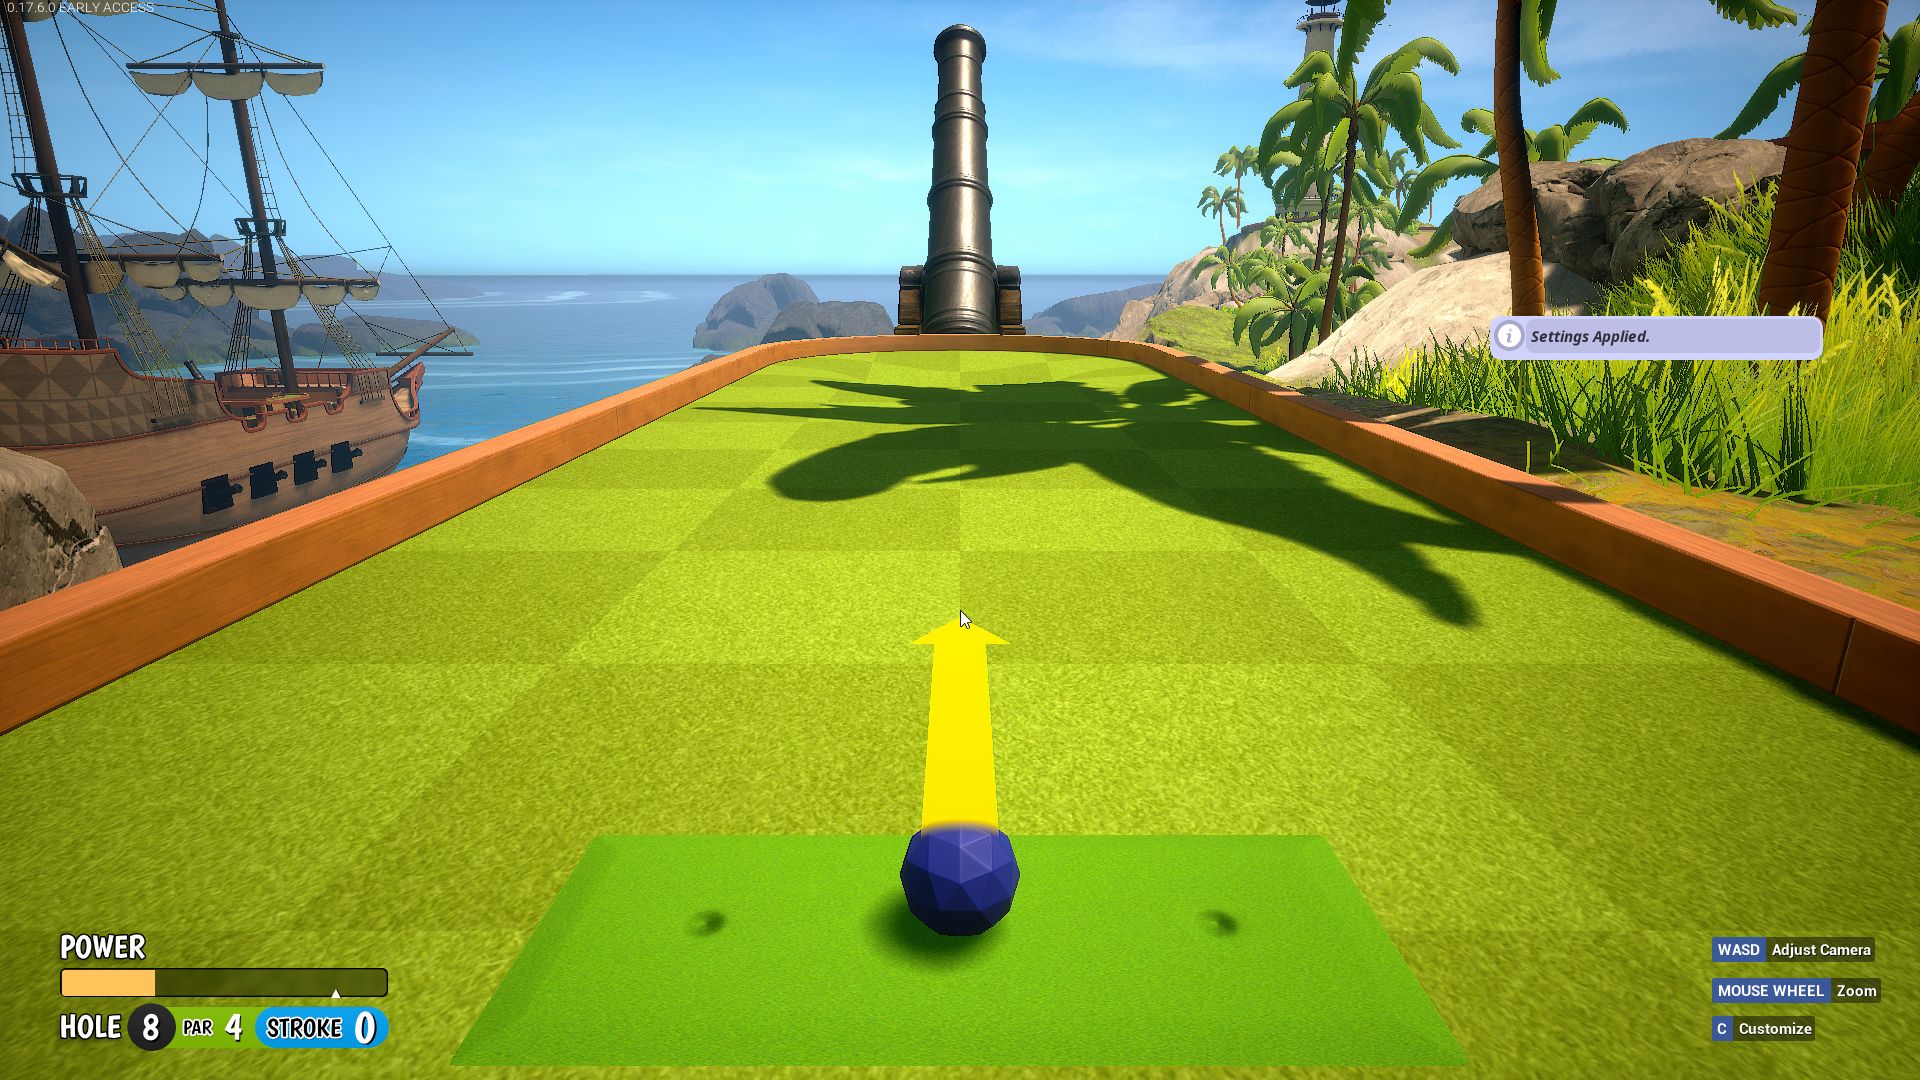 2nd shot power E in “Hole” into the cannon.
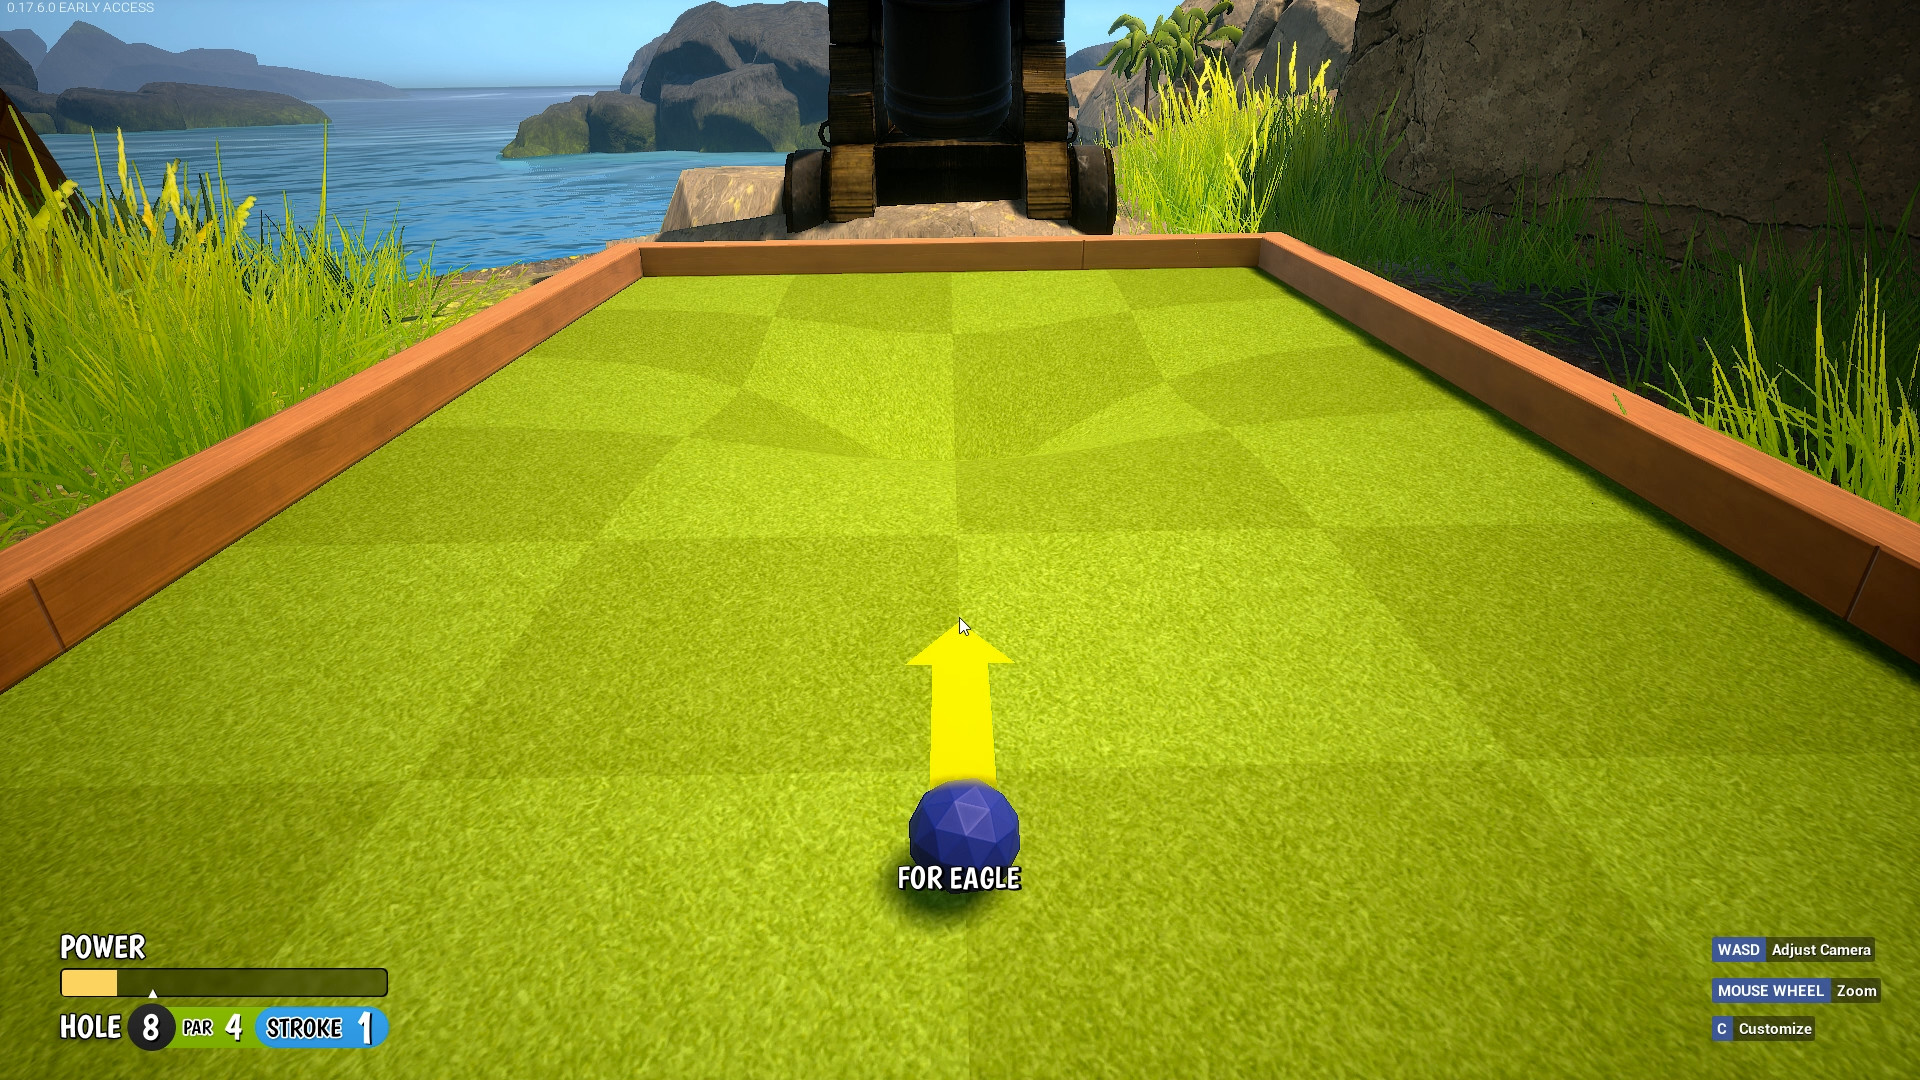 3rd shot power S straight into the hole.
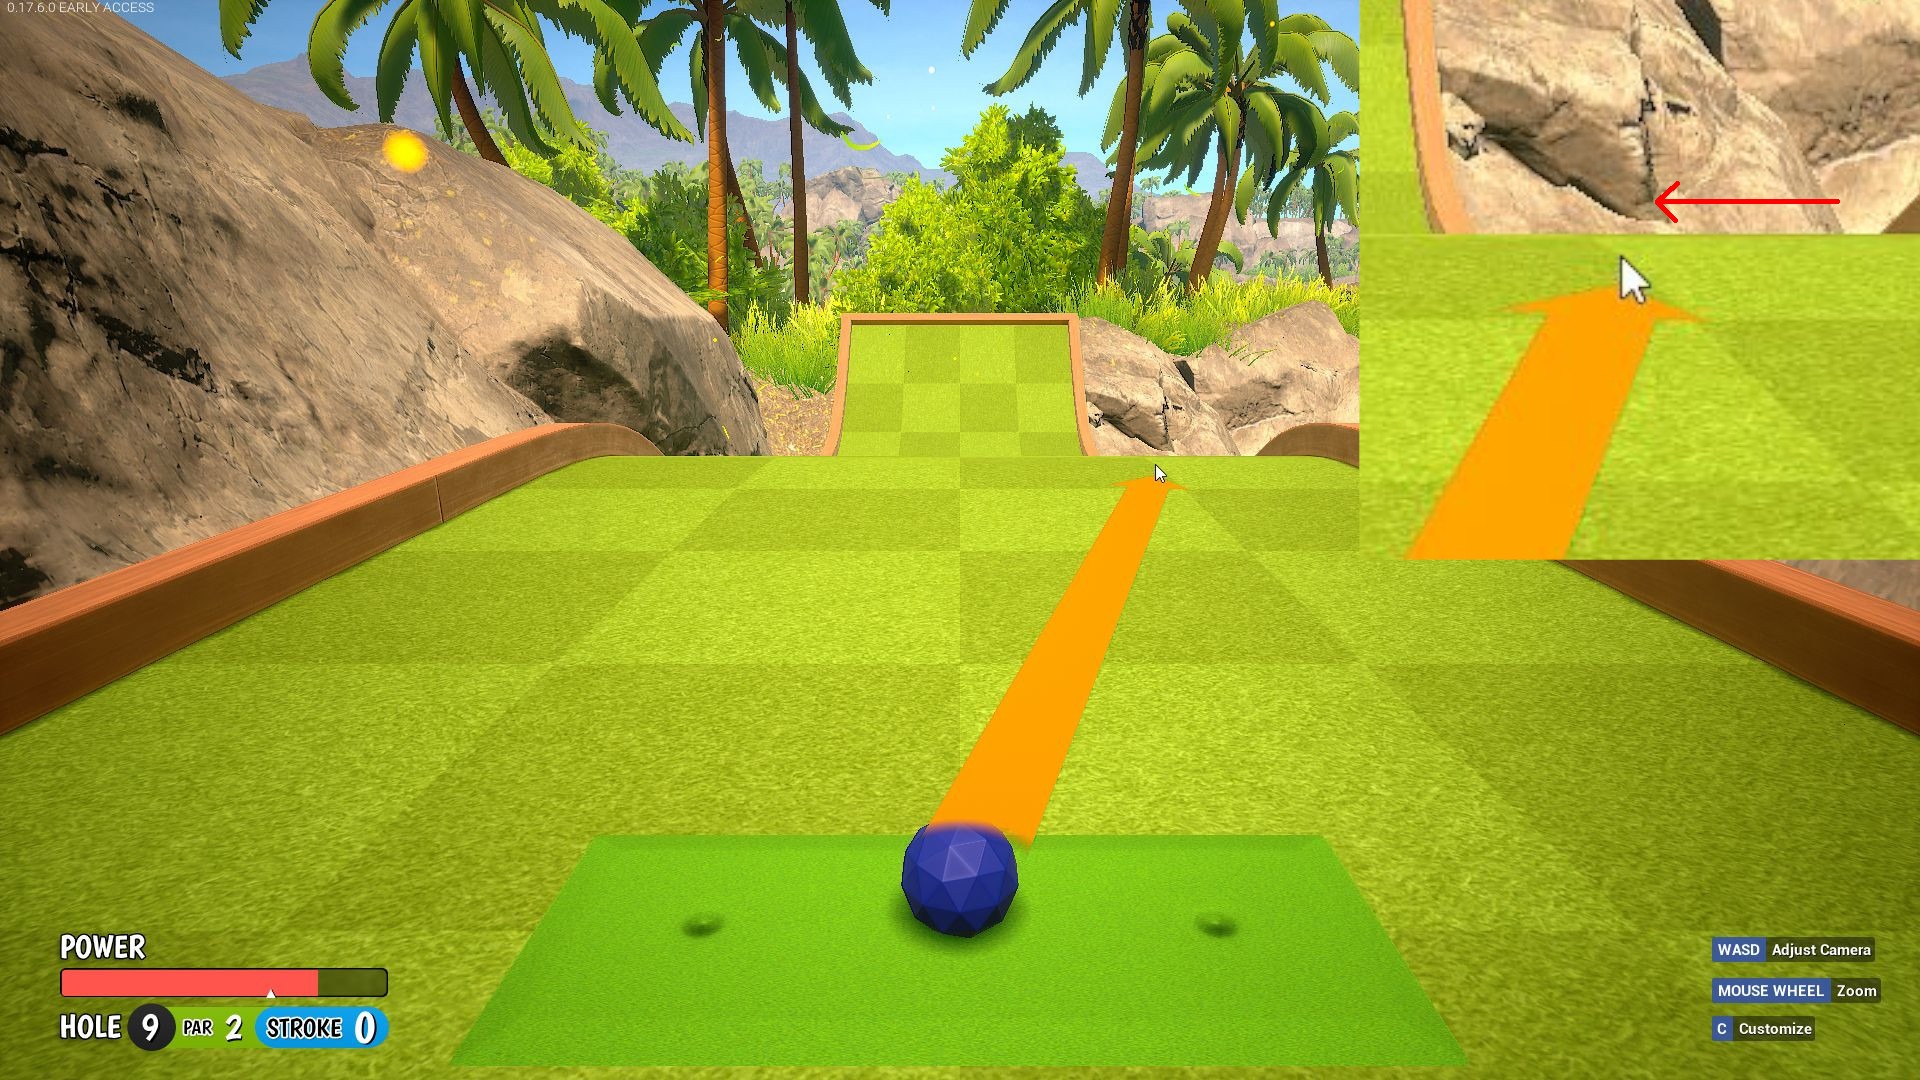
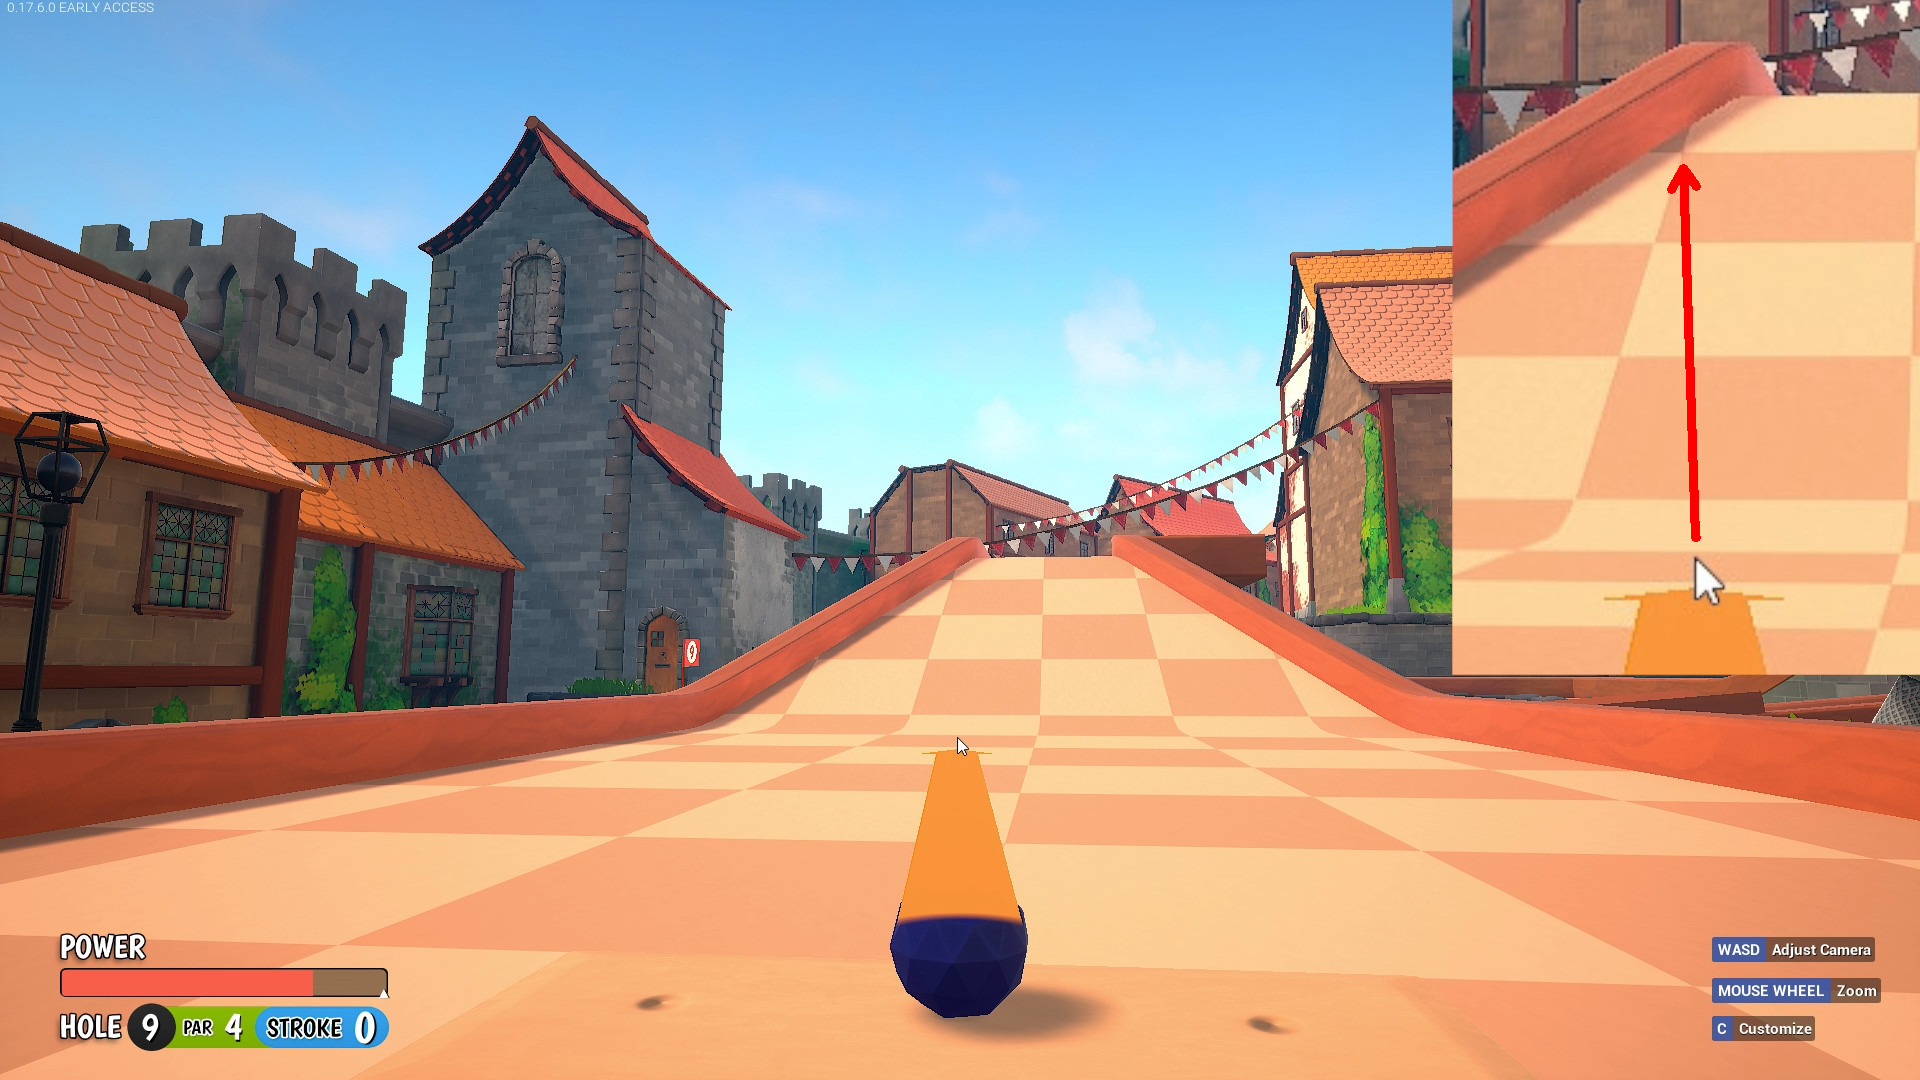
Hole 9 – HIO (no ach)
1. No camera move option:
Aim at the corner of this black thingy on the rock, pull mouse back to power O/K or align the cursor with the texture on the ground…hard to explain, see screenshot lmao.
 2. Position camera as seen in screenshot, Aim 1/4 between the crack on the wall and texture change on the ground.
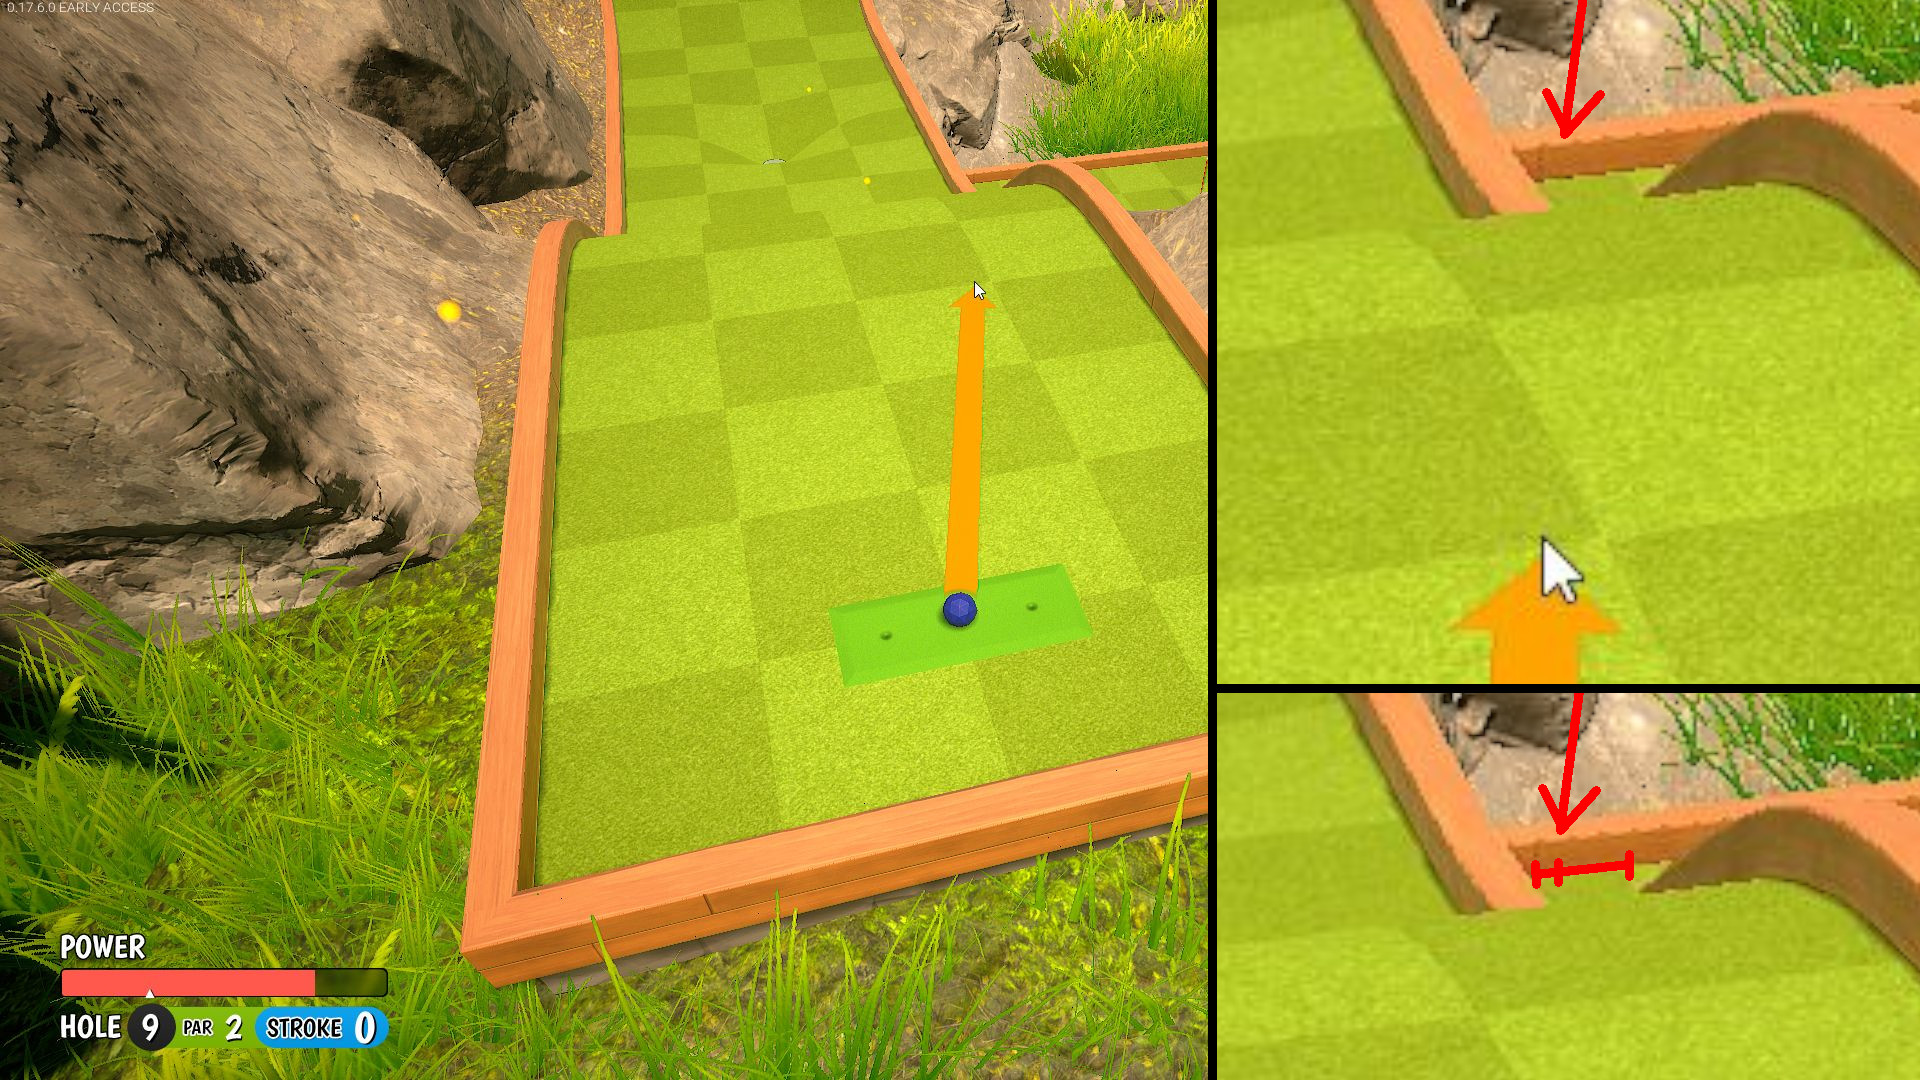
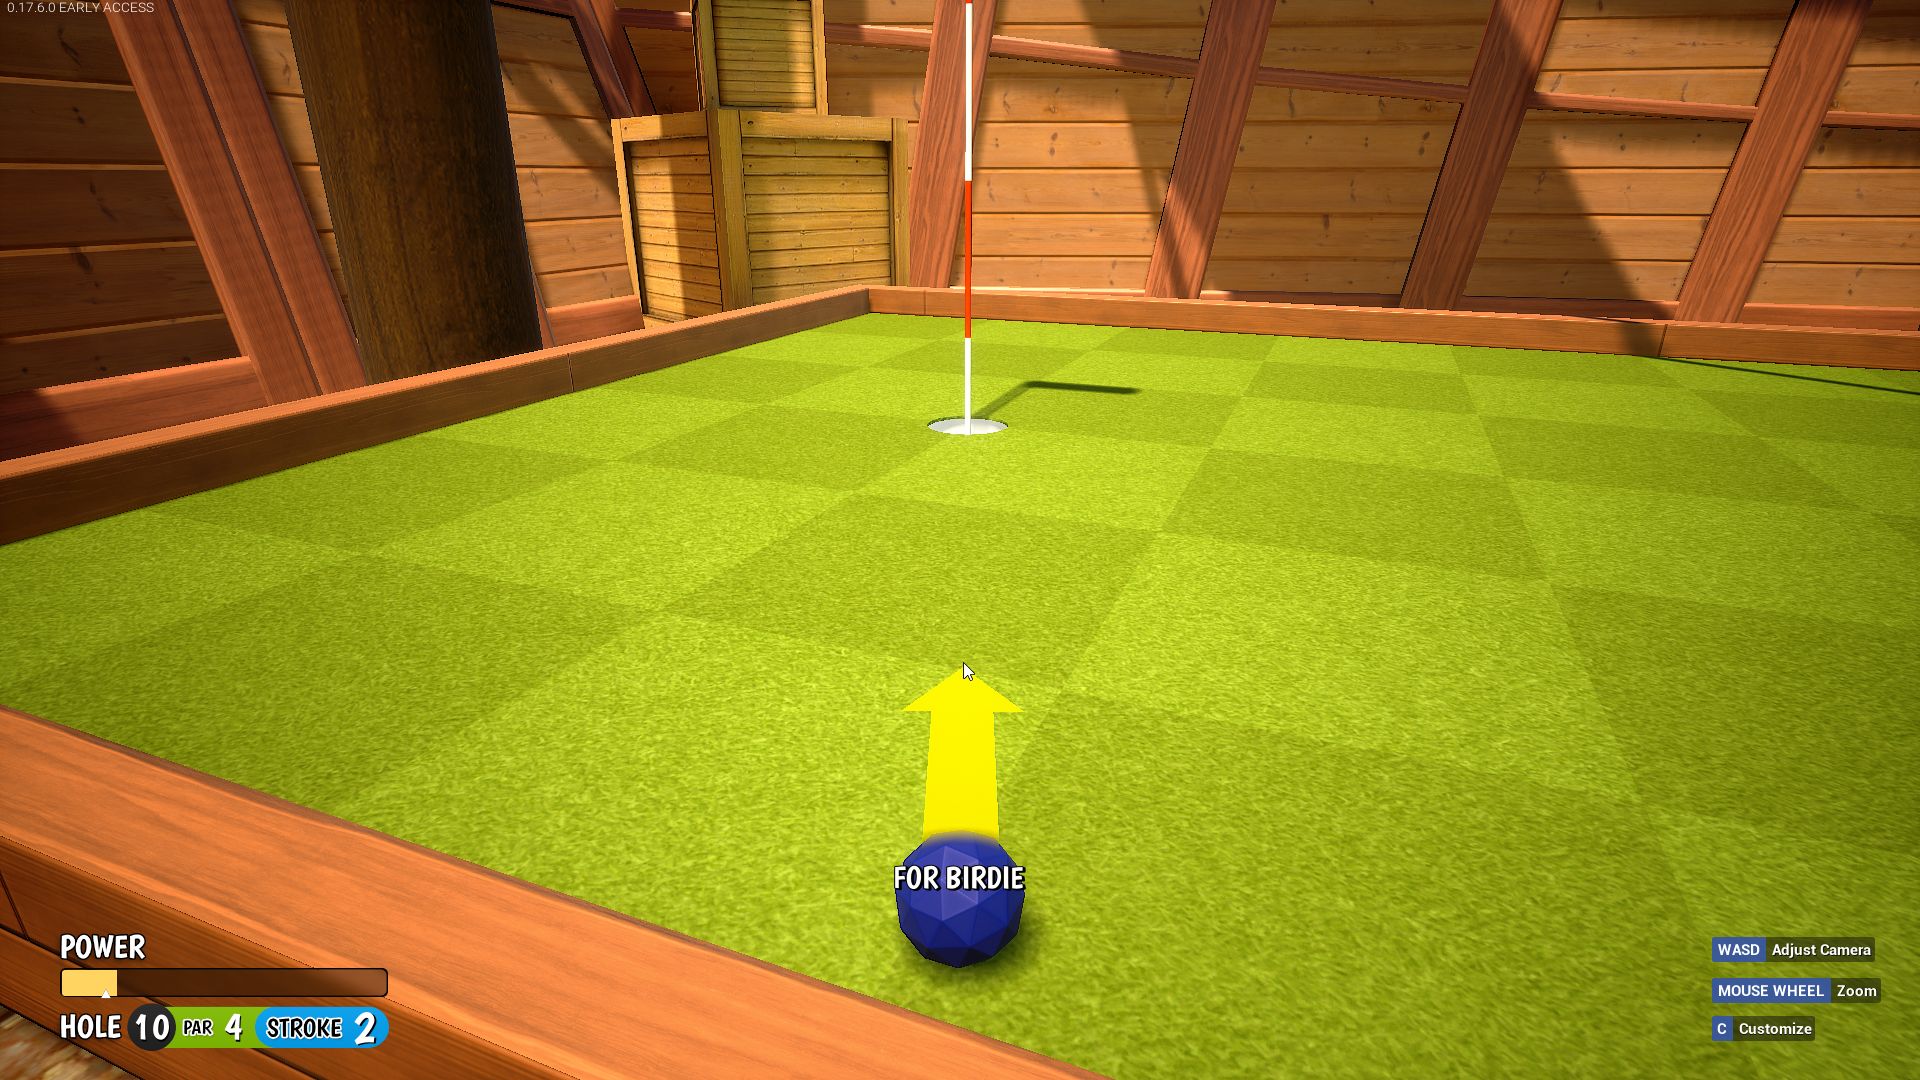
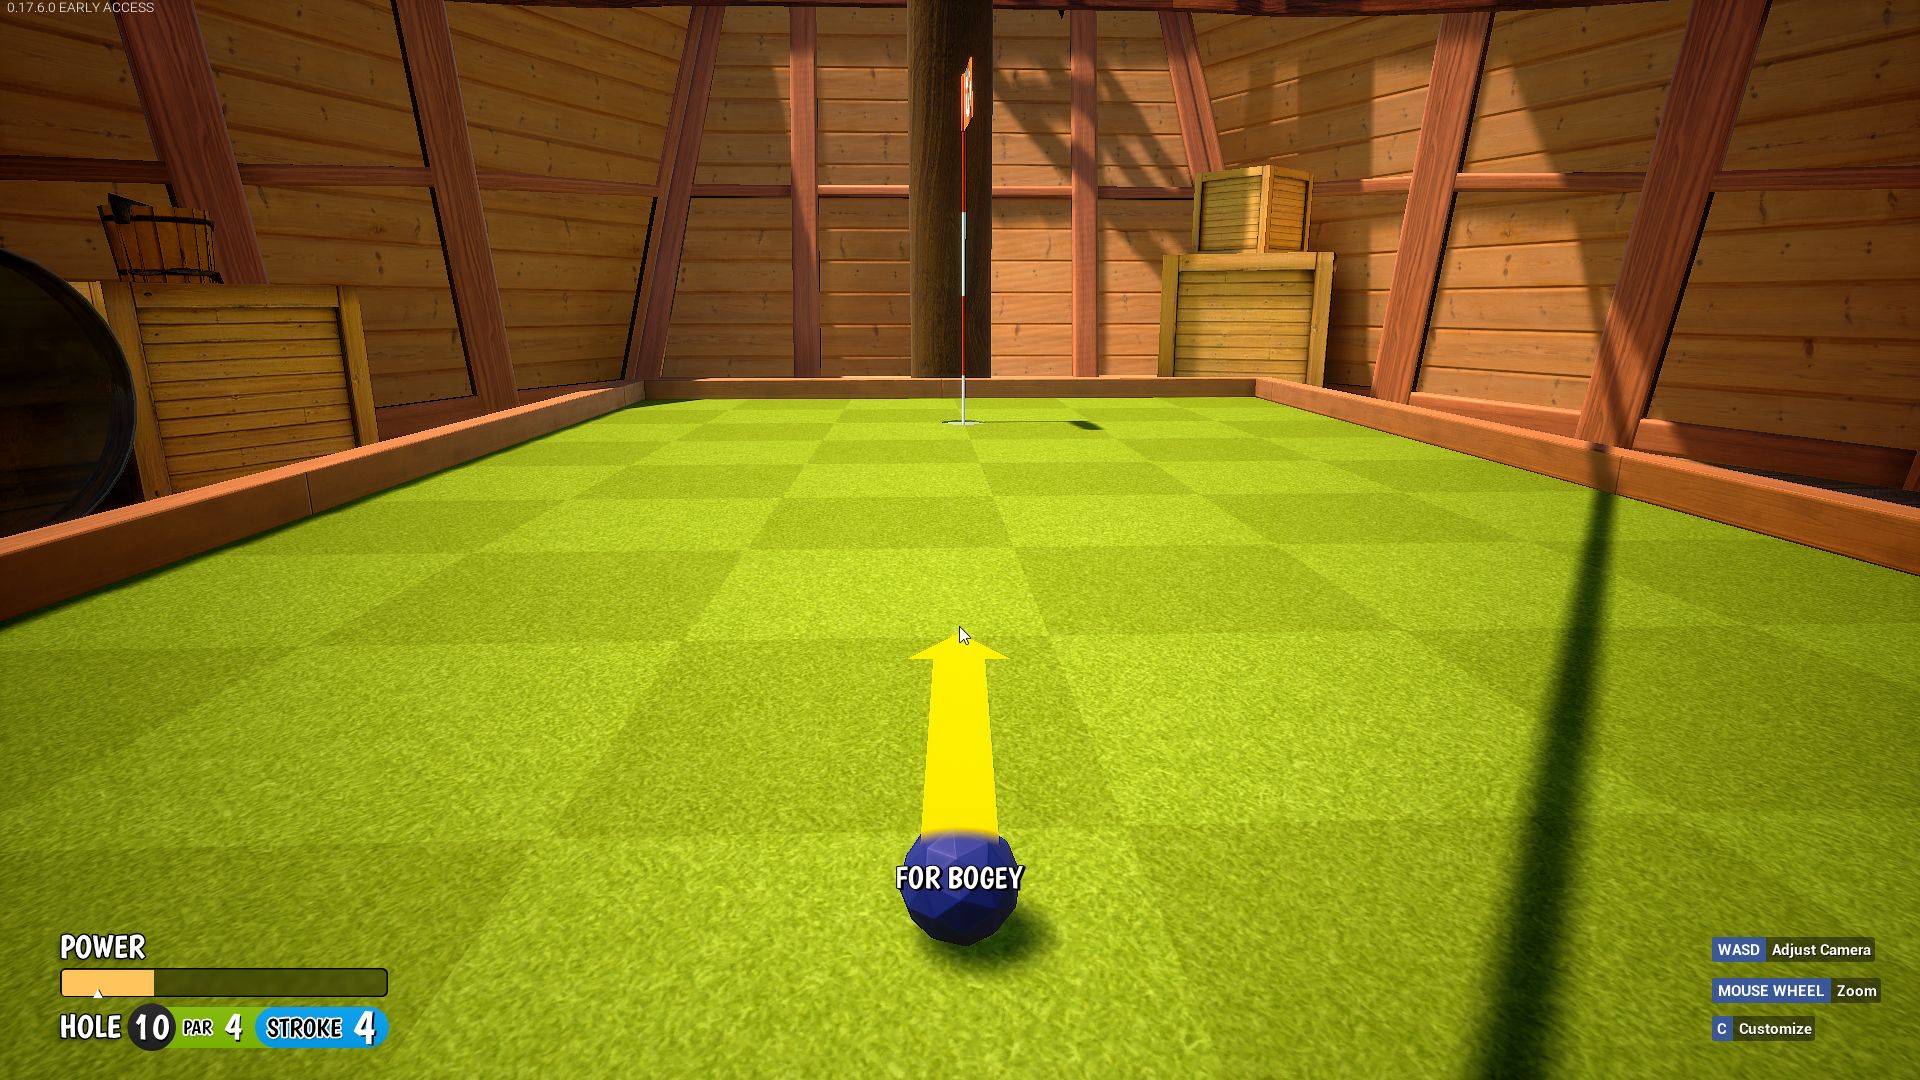
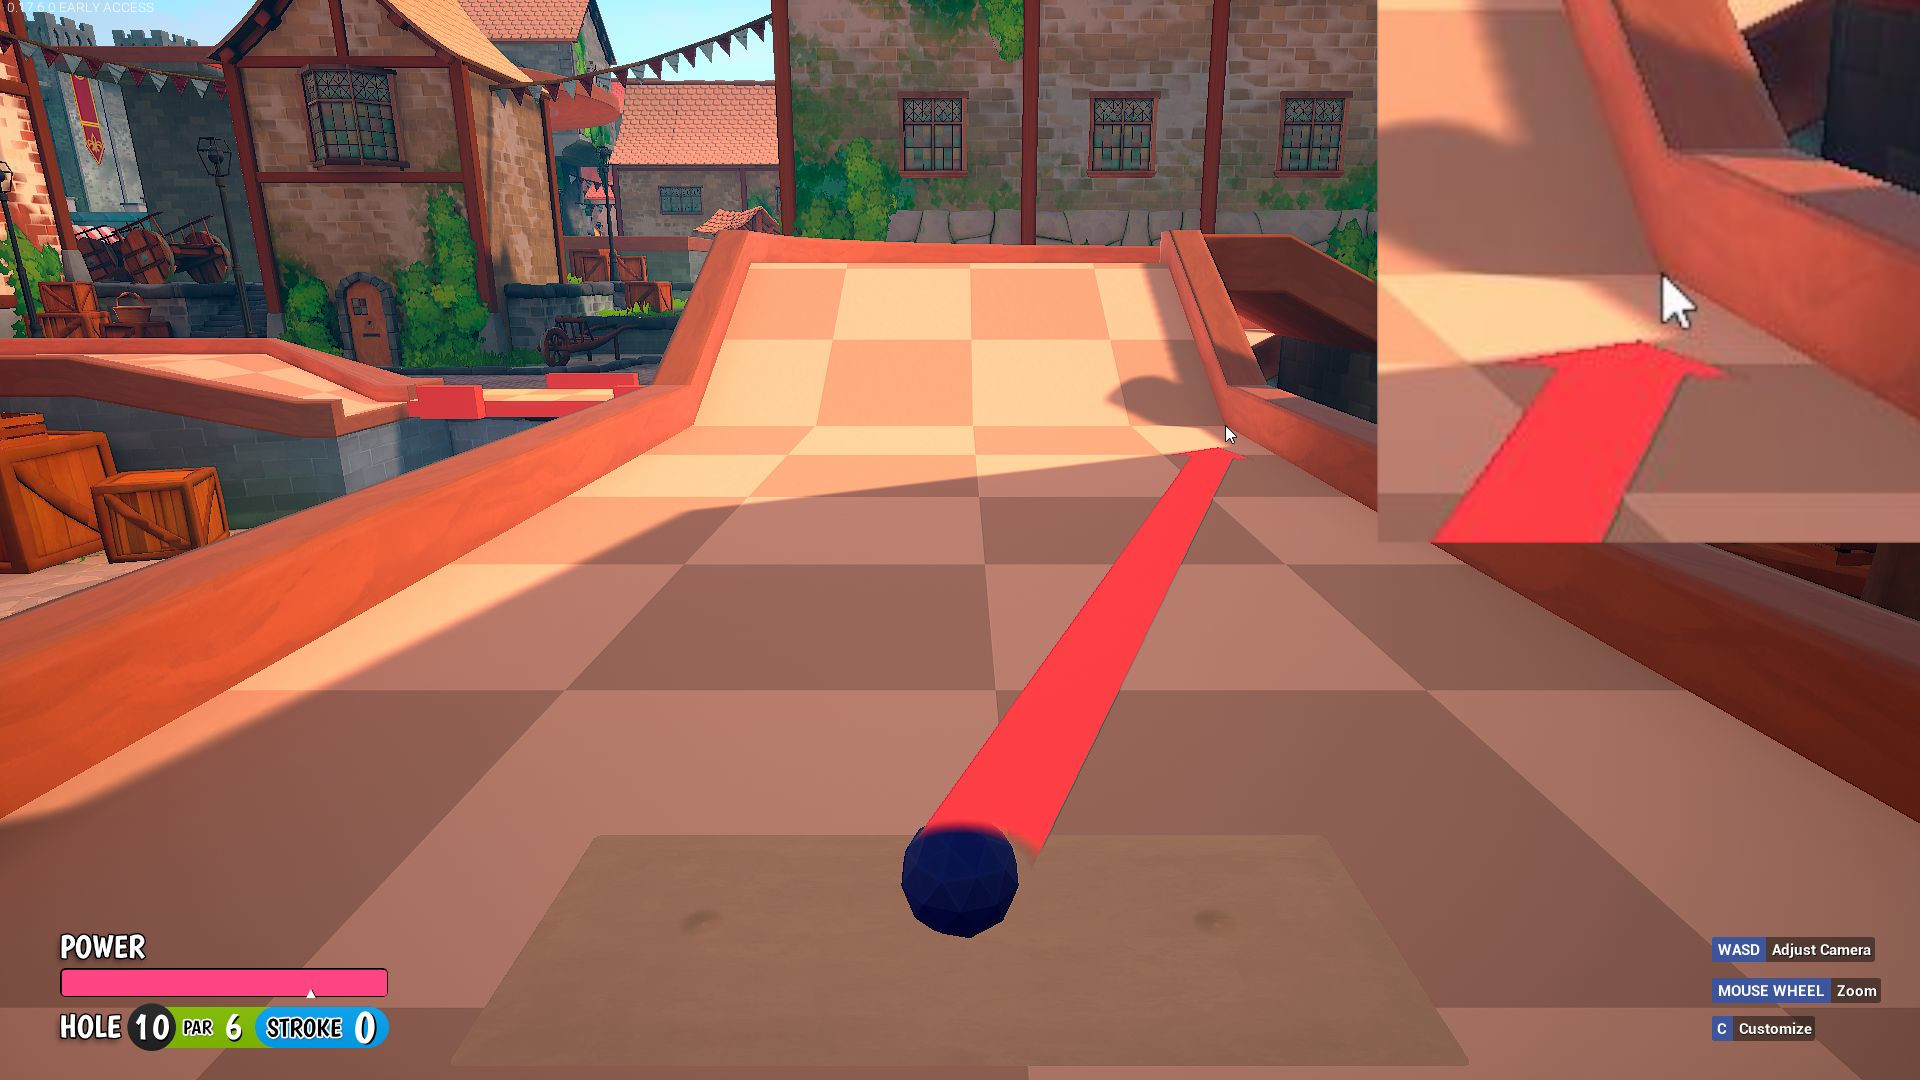
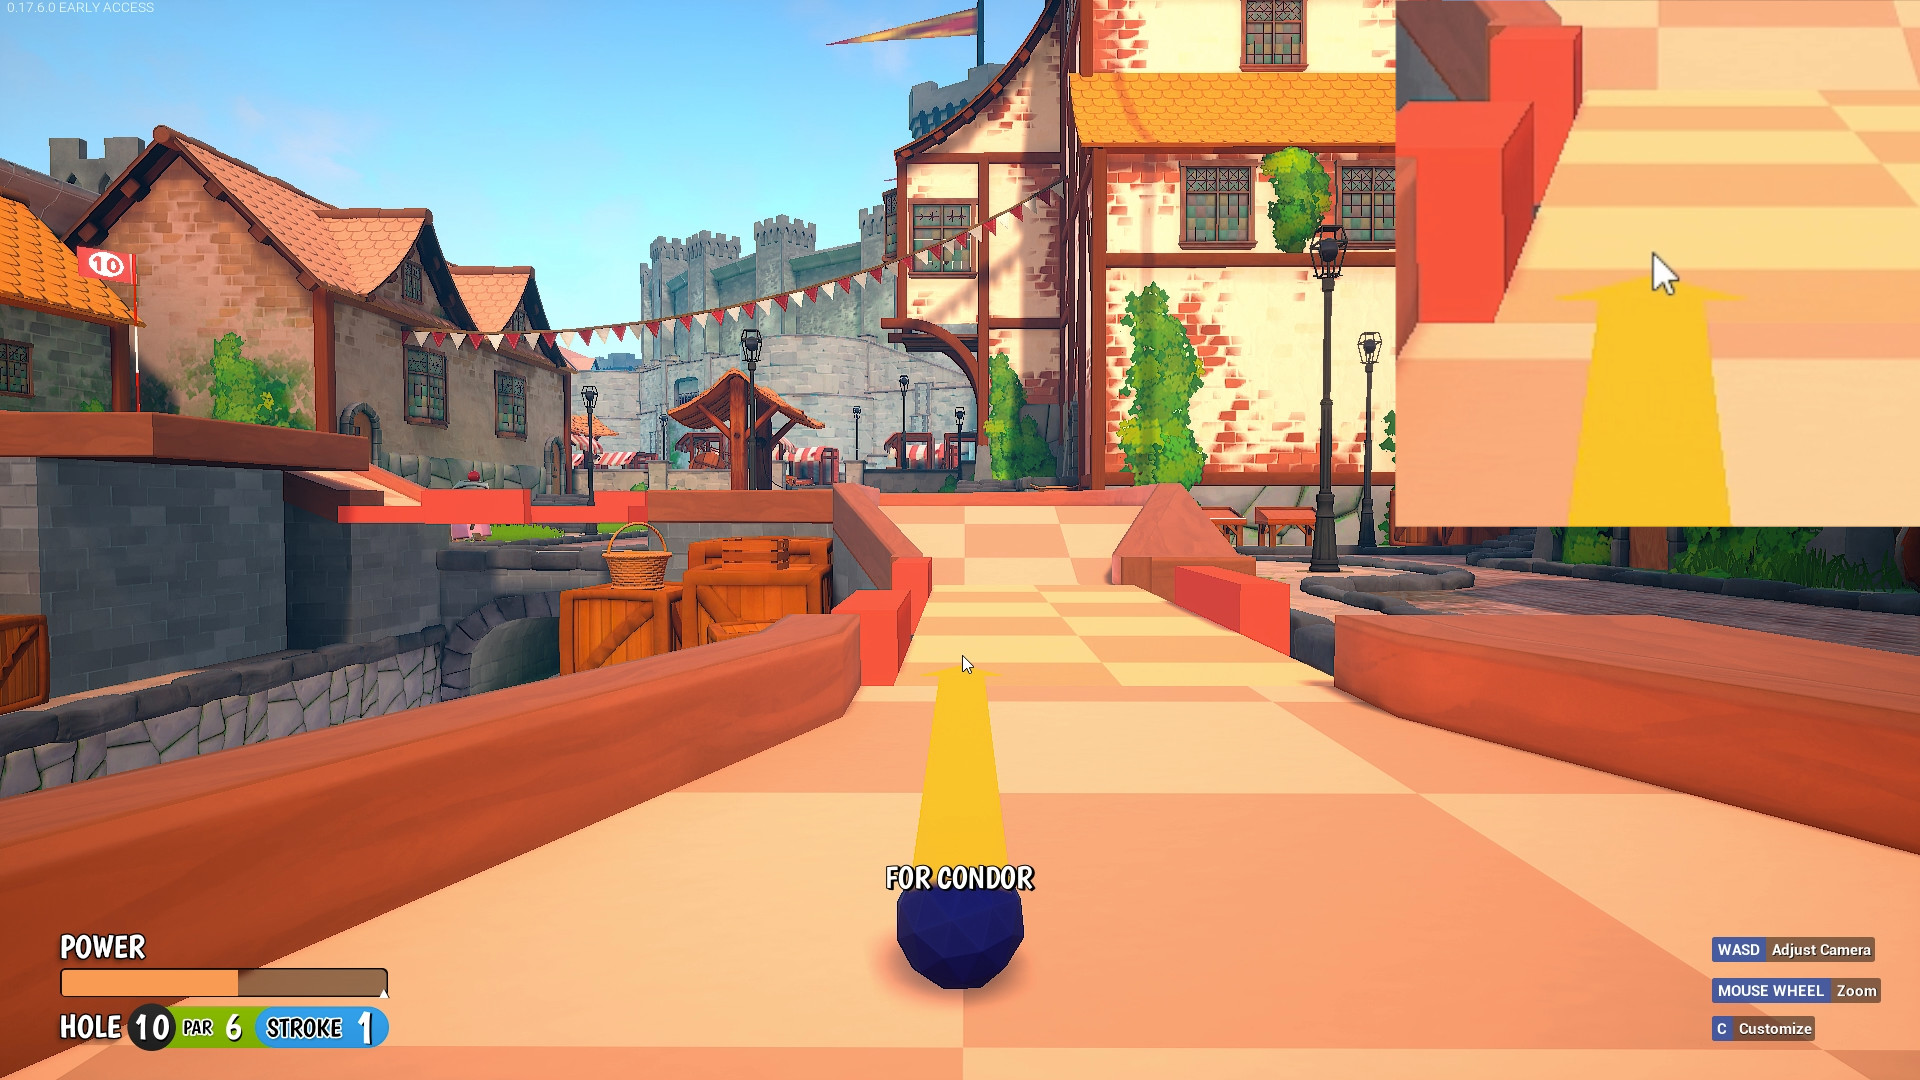
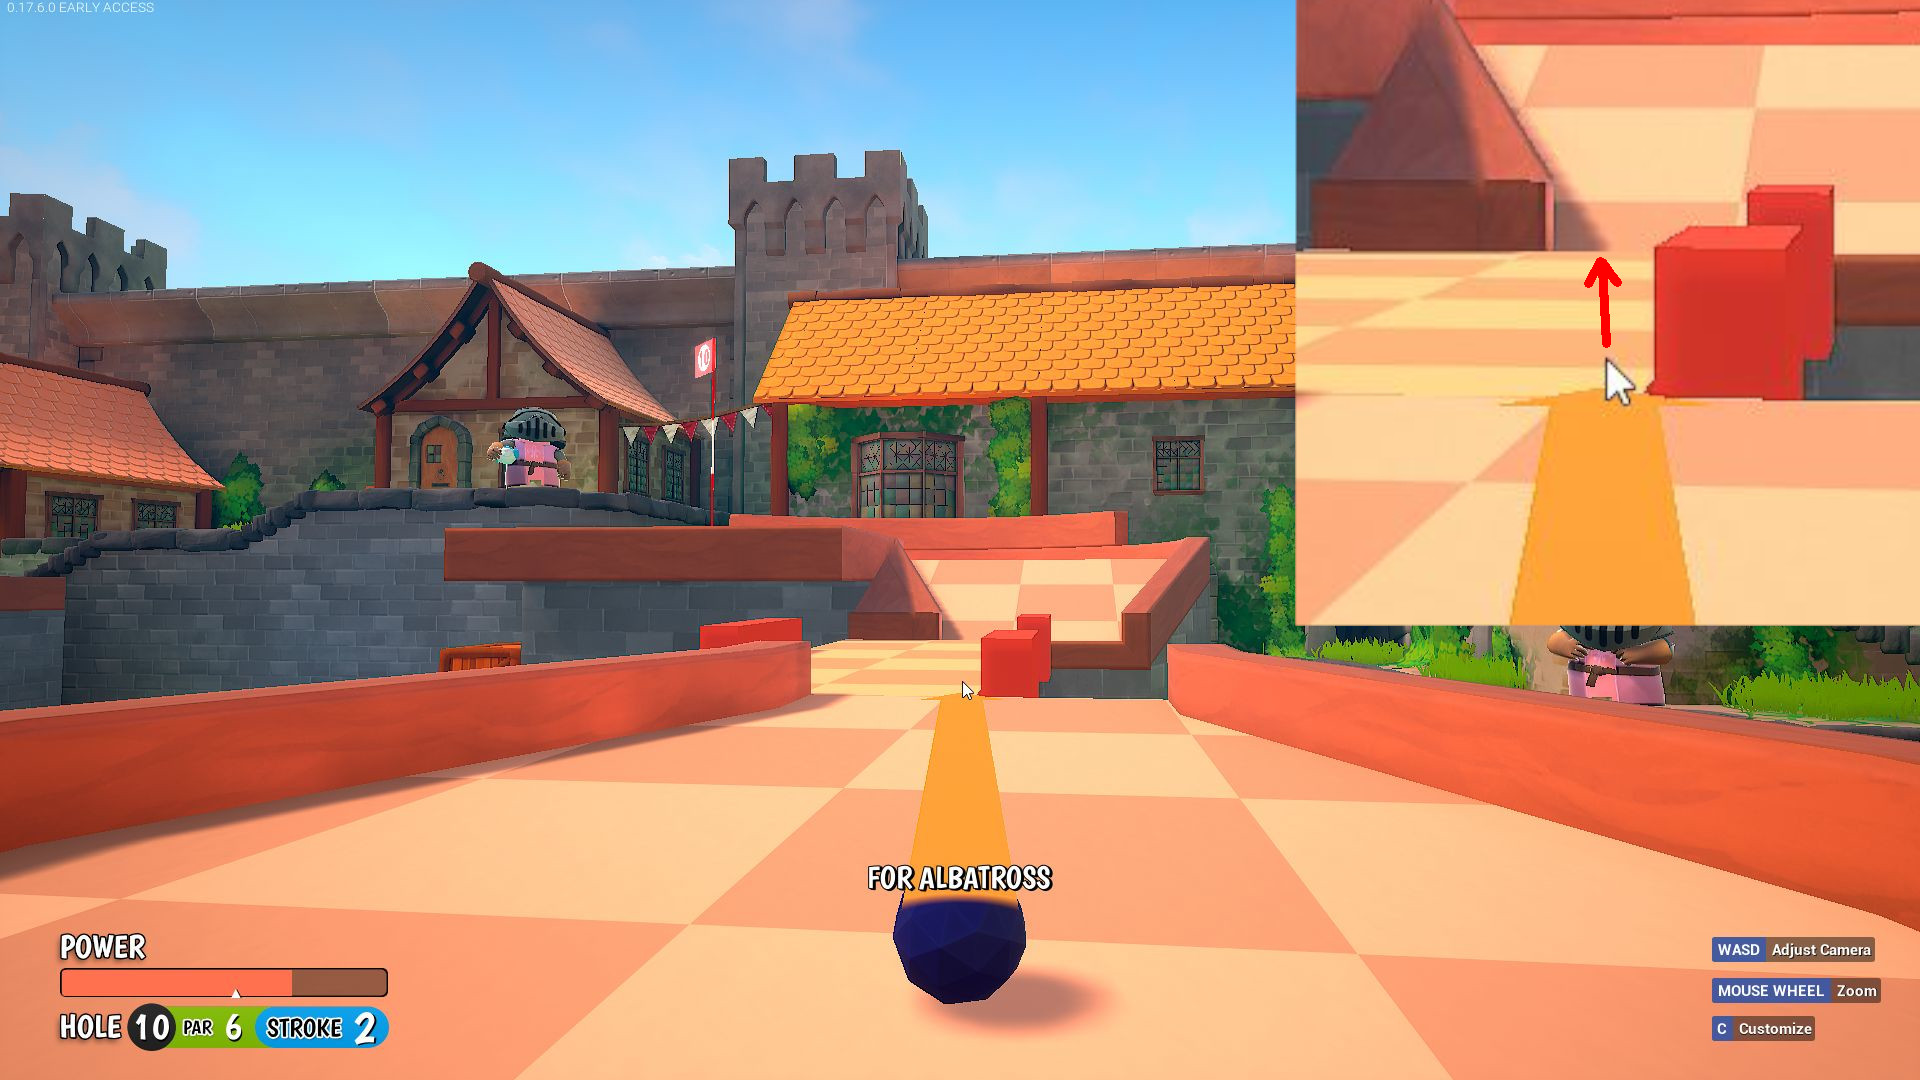
Hole 10
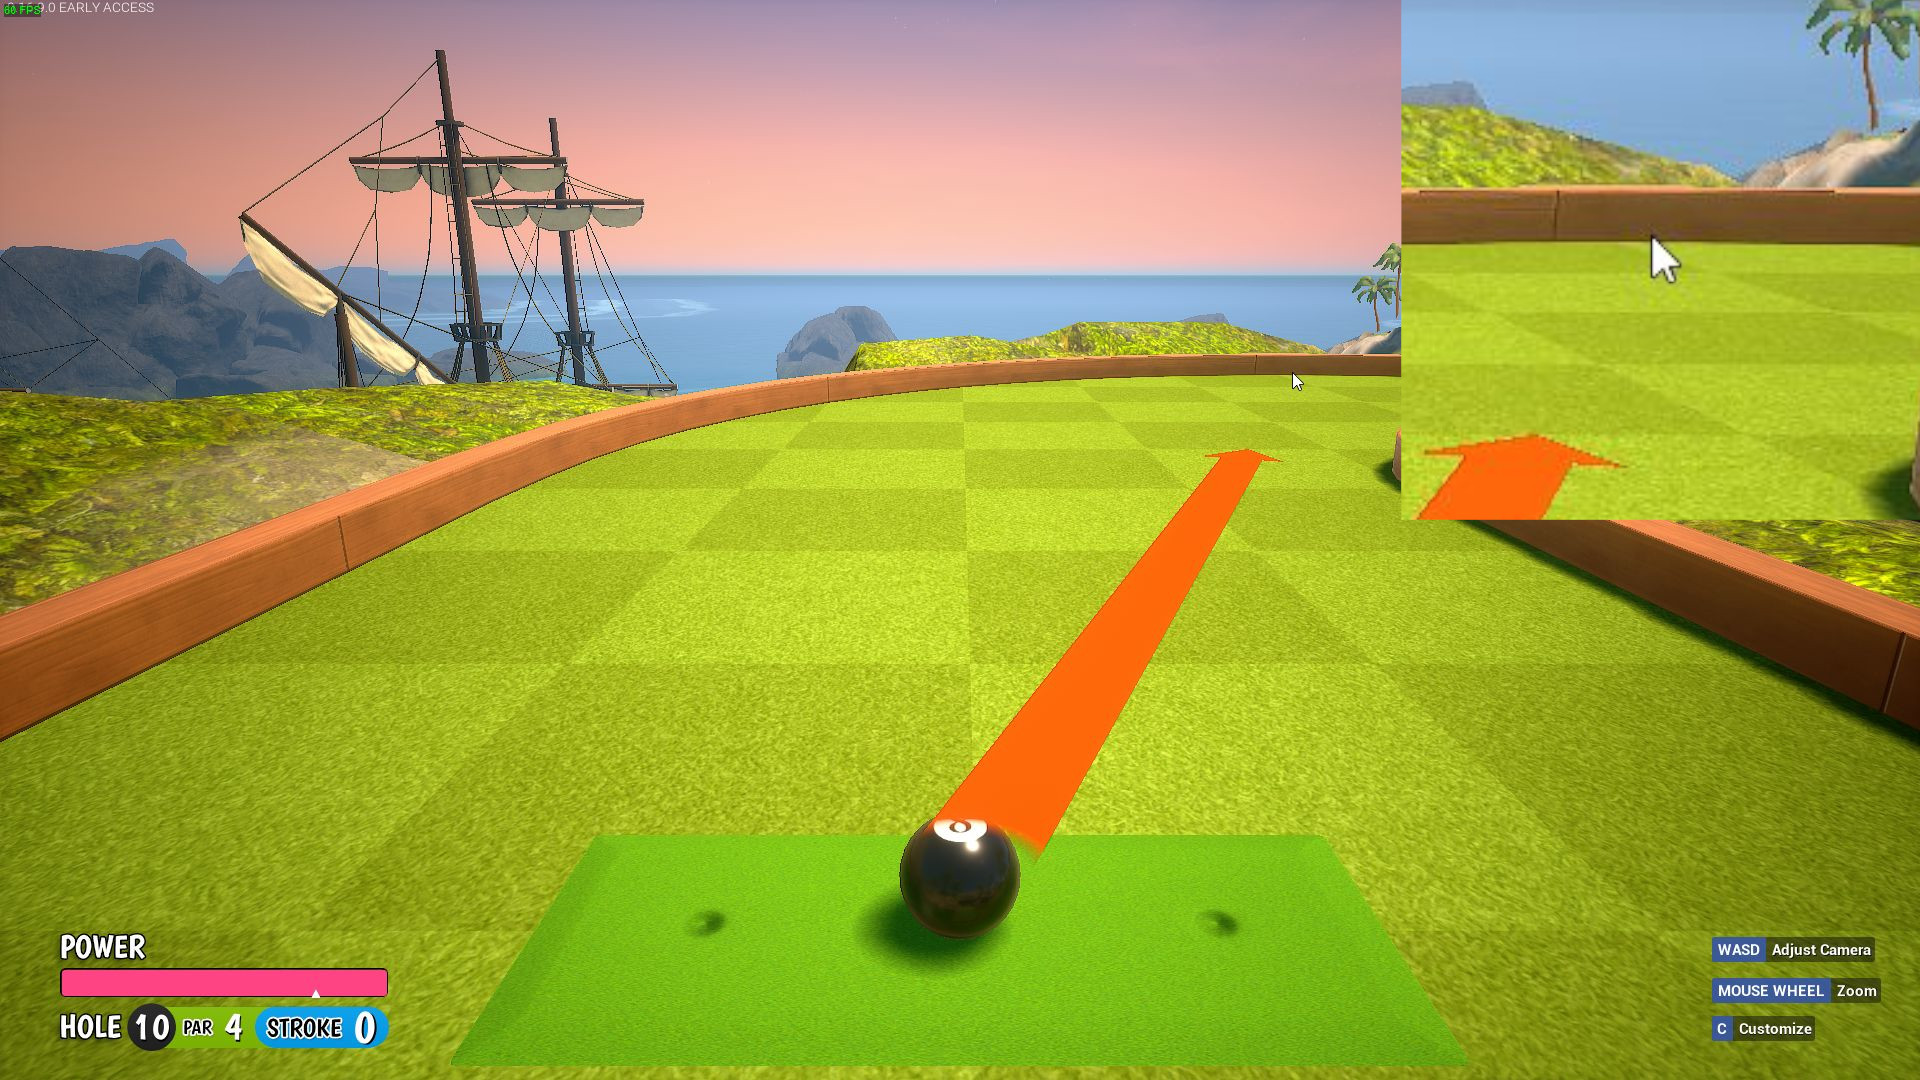 2nd Tap in hole Power E in “Hole” (position/power may vary)
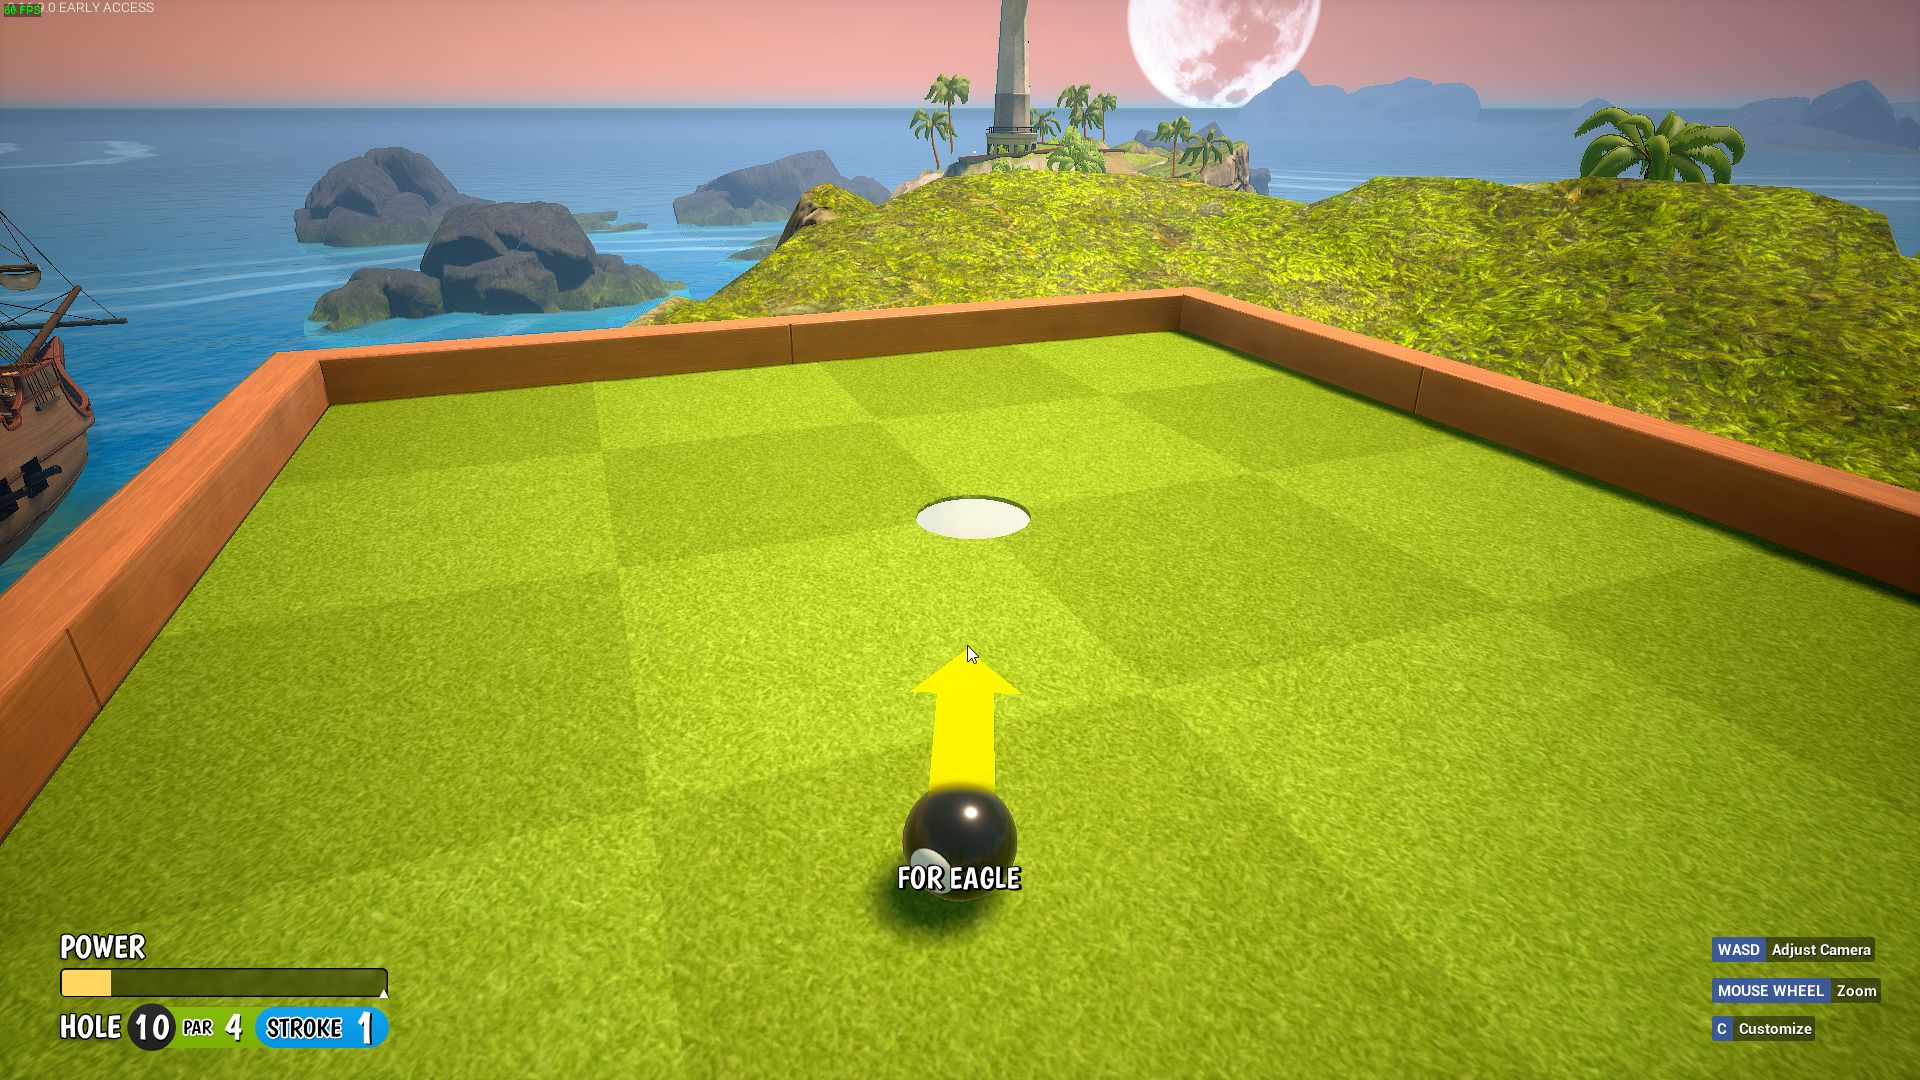 If you’re extremely lucky you just got HI2, but most likely not.
Put into the hole, Power will vary based on ball position, Here’s 2 examples:
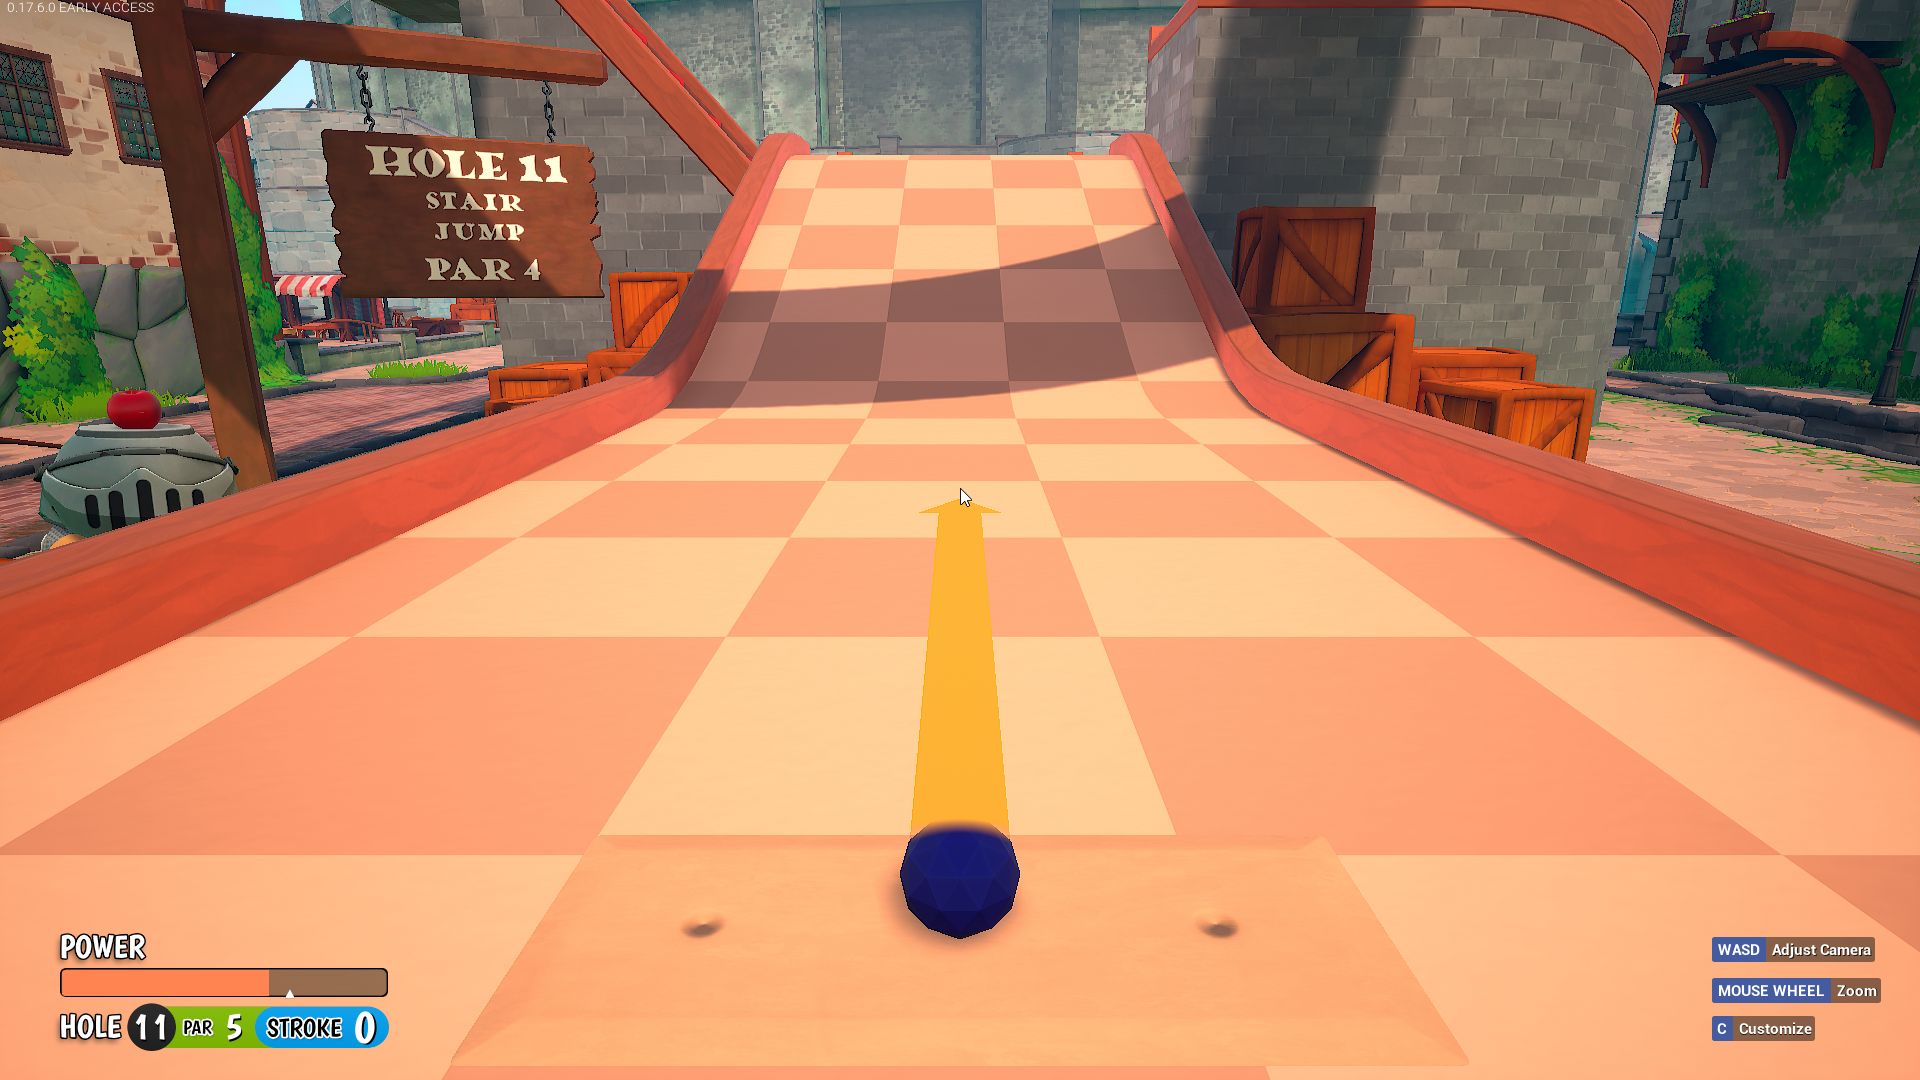
Hole 11
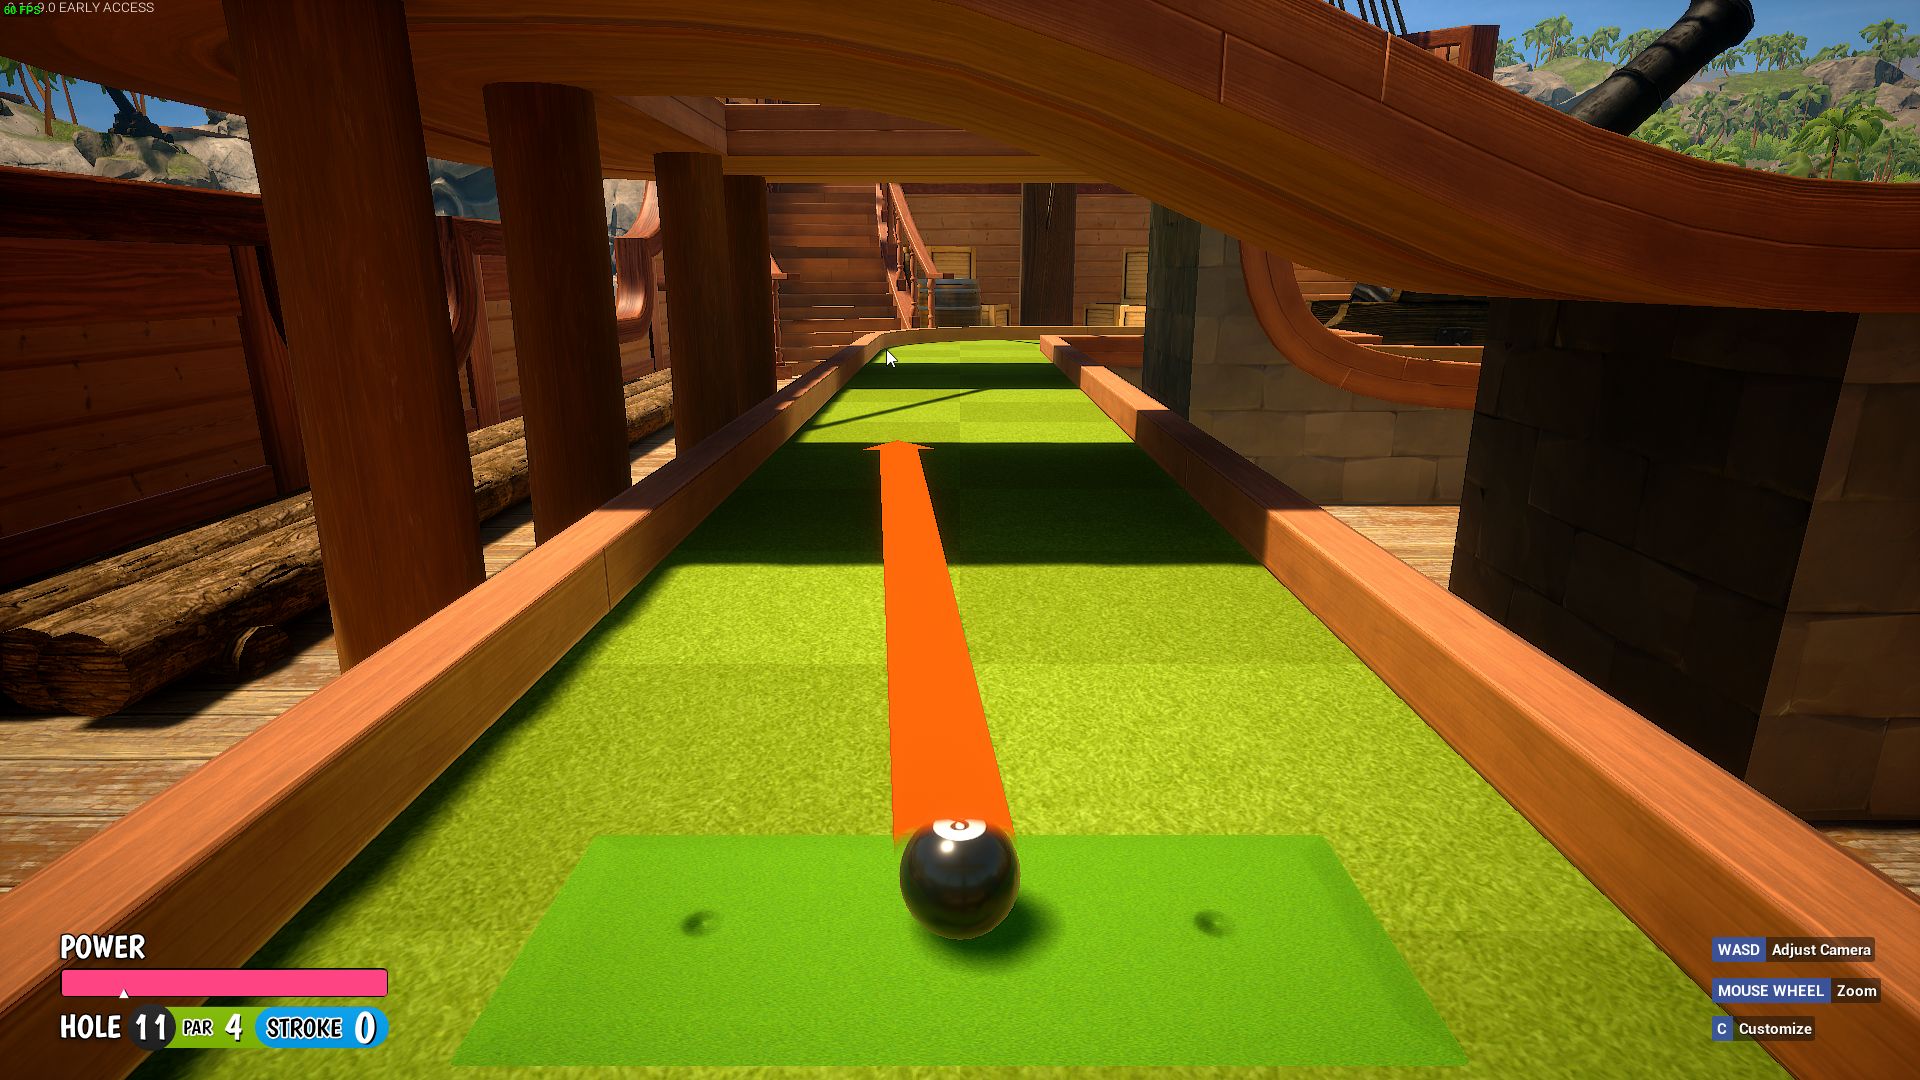
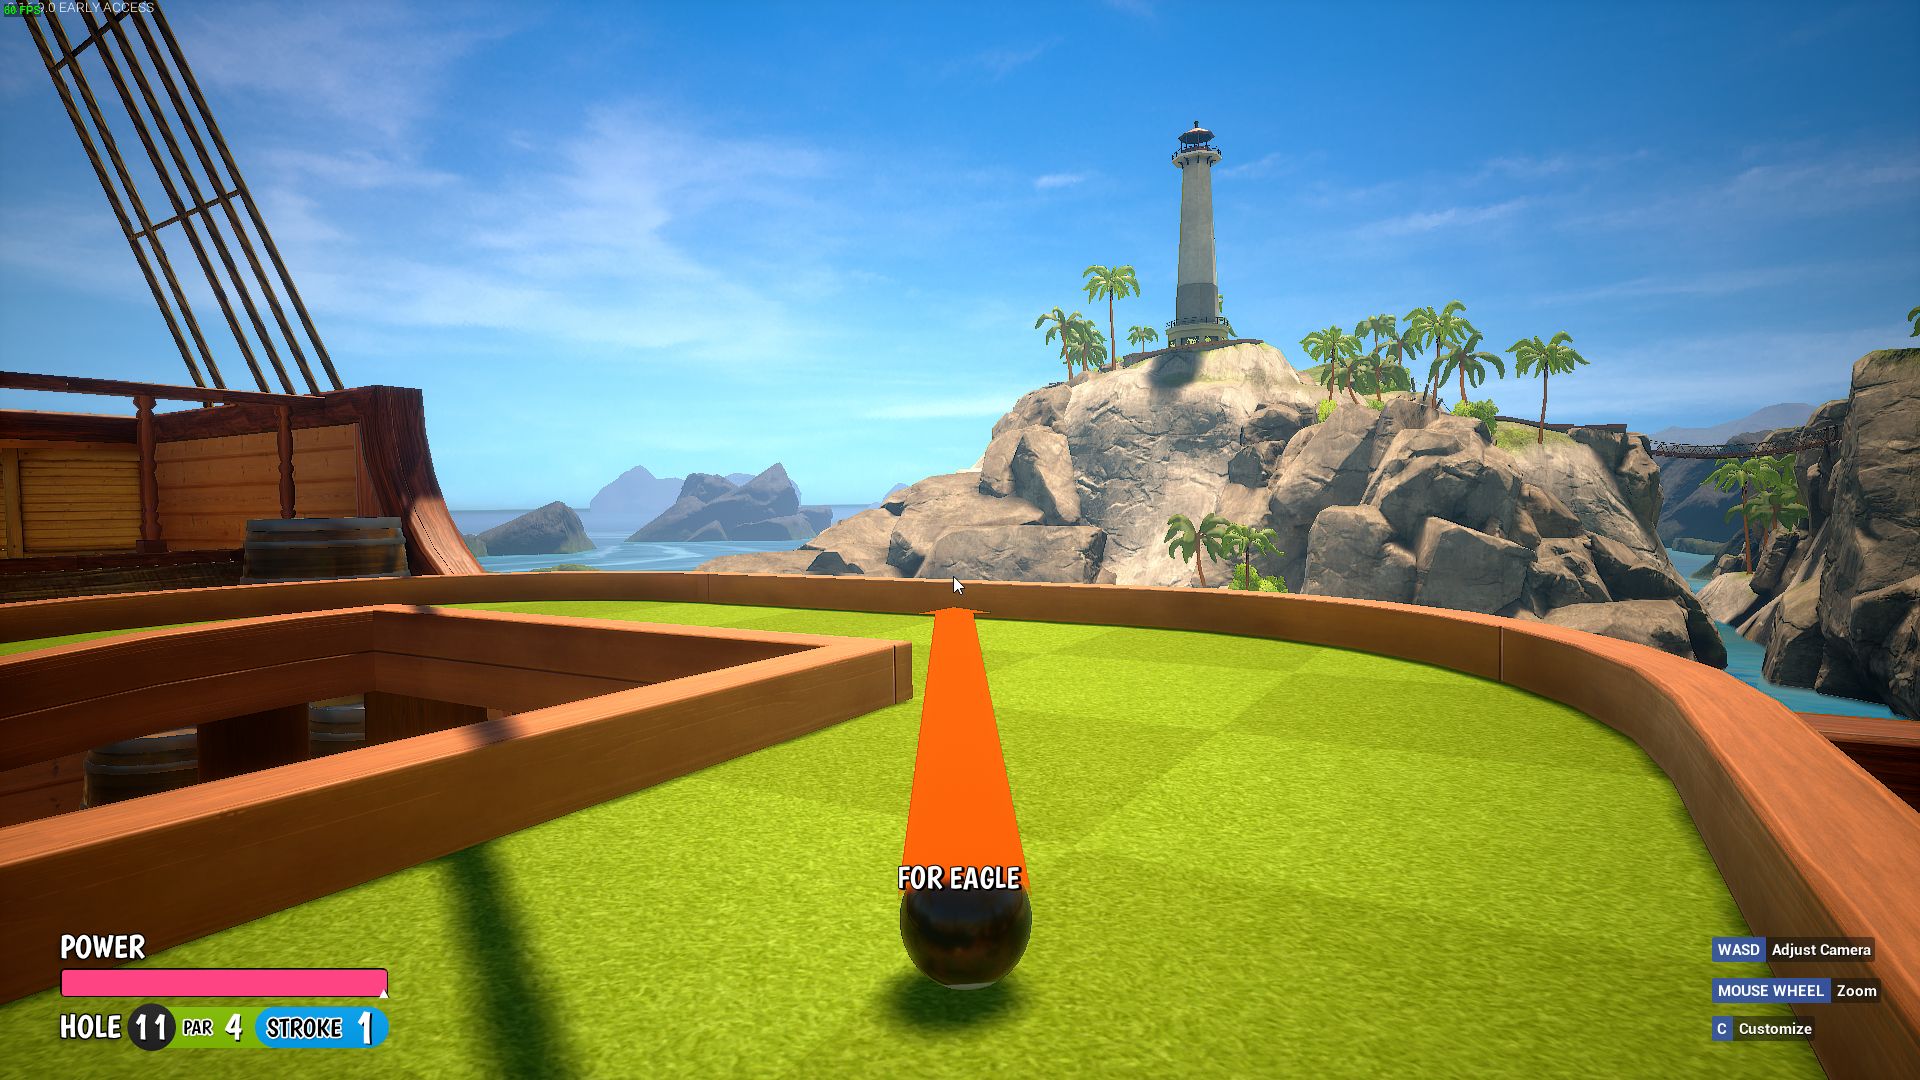 If you’re extremely lucky, you just got HI2, if not.. Tap in.
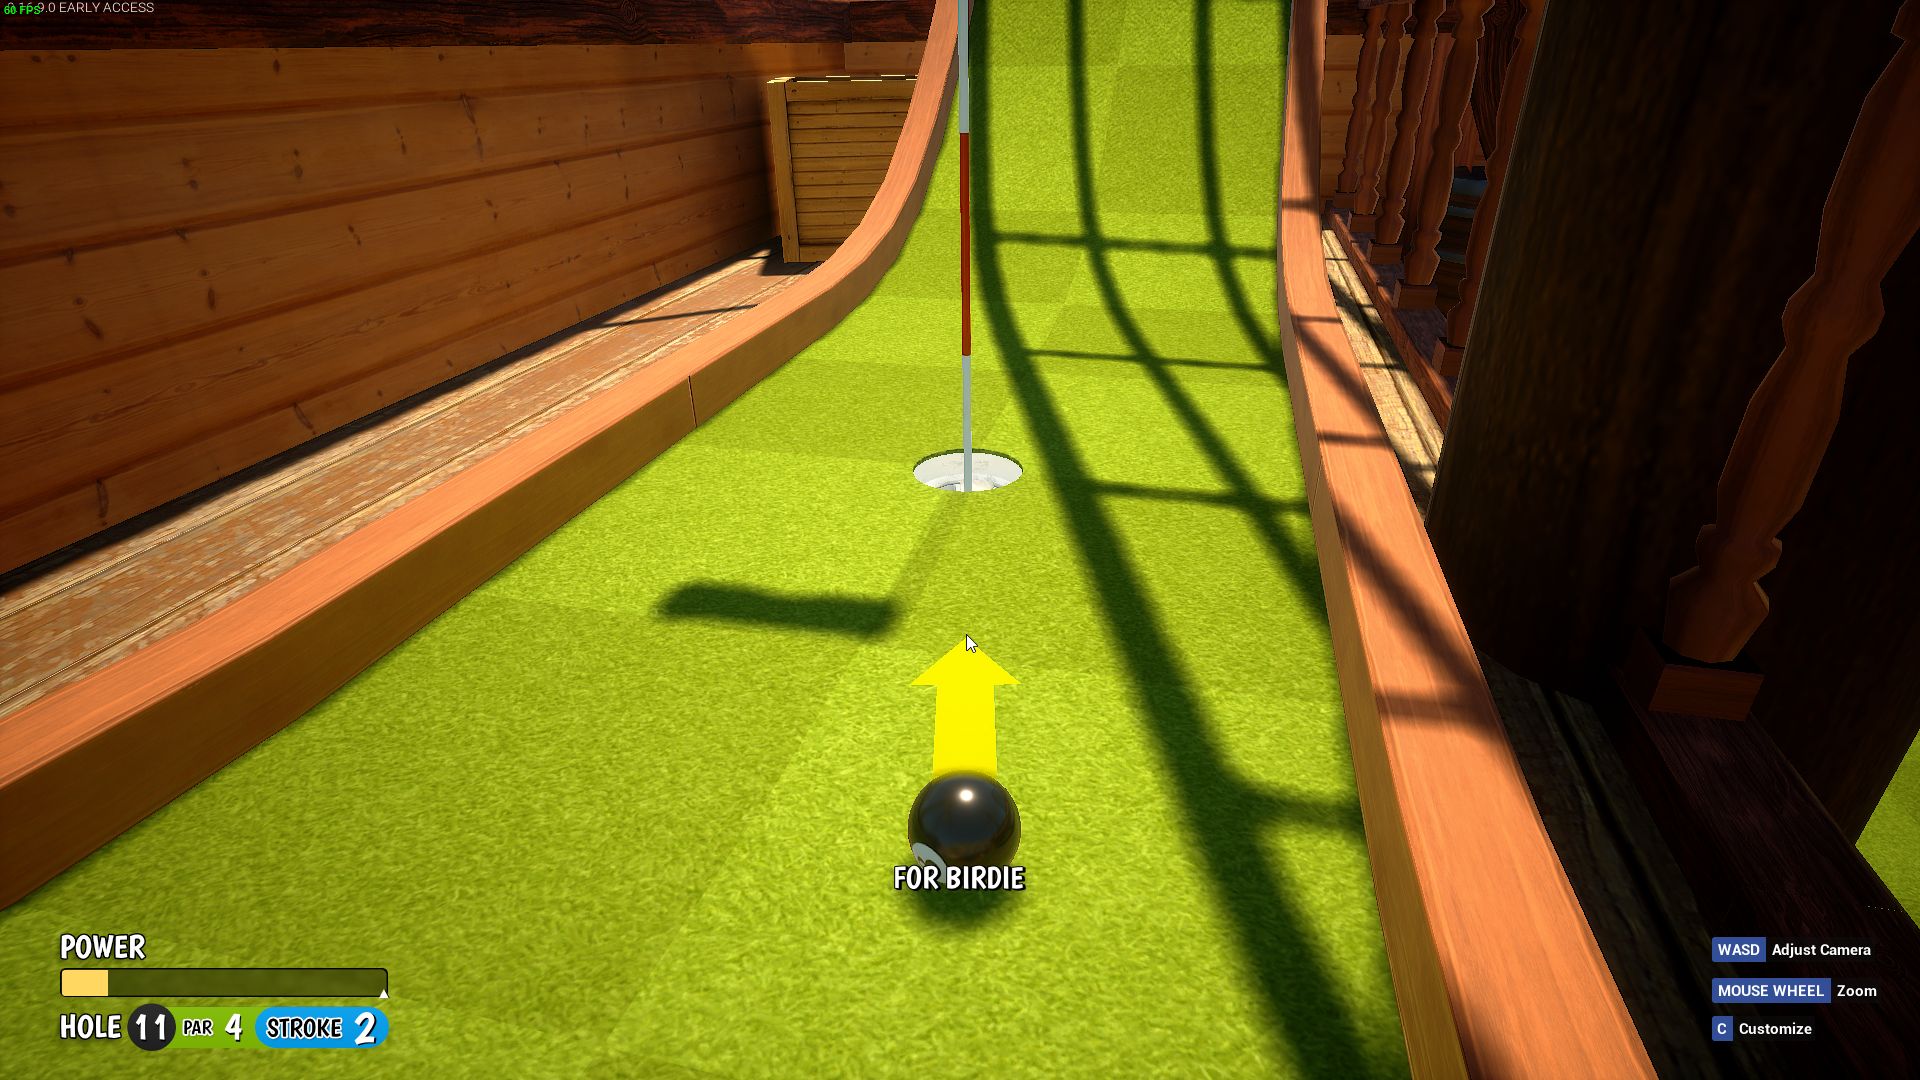
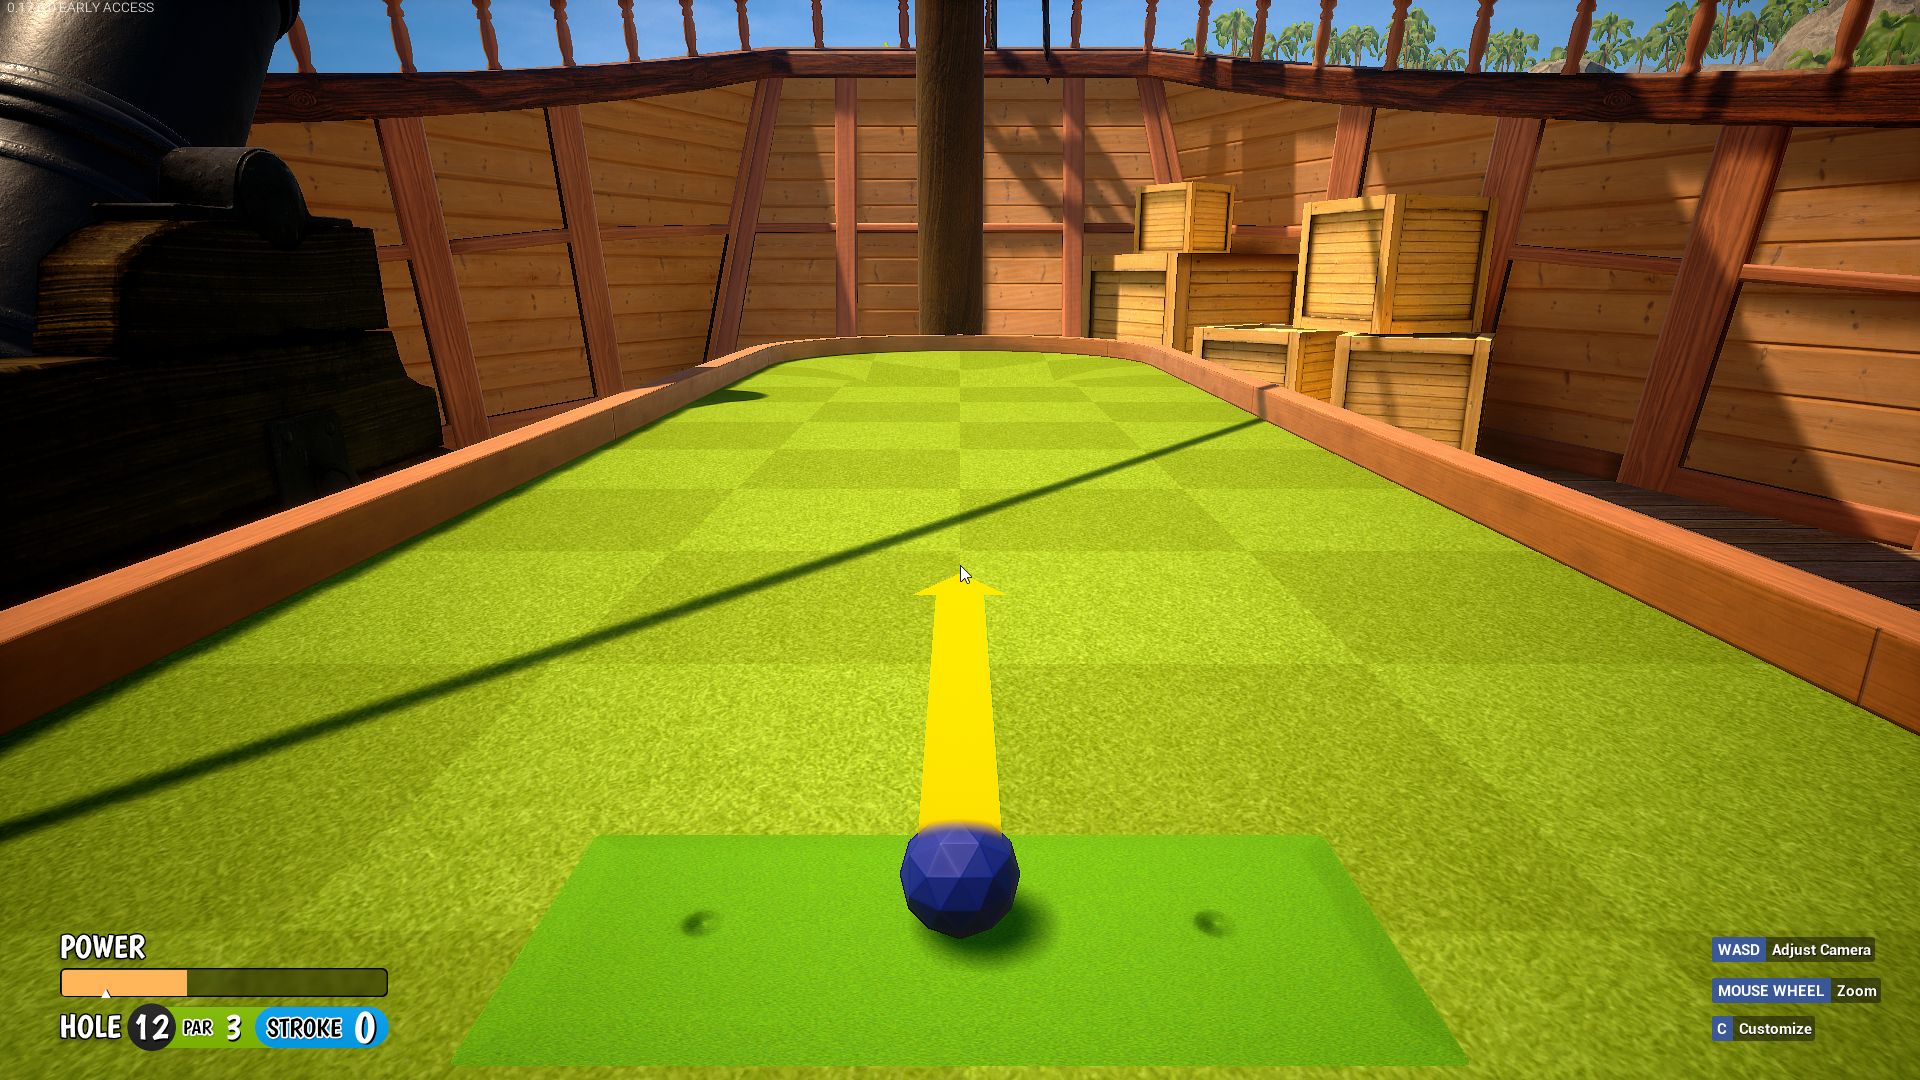
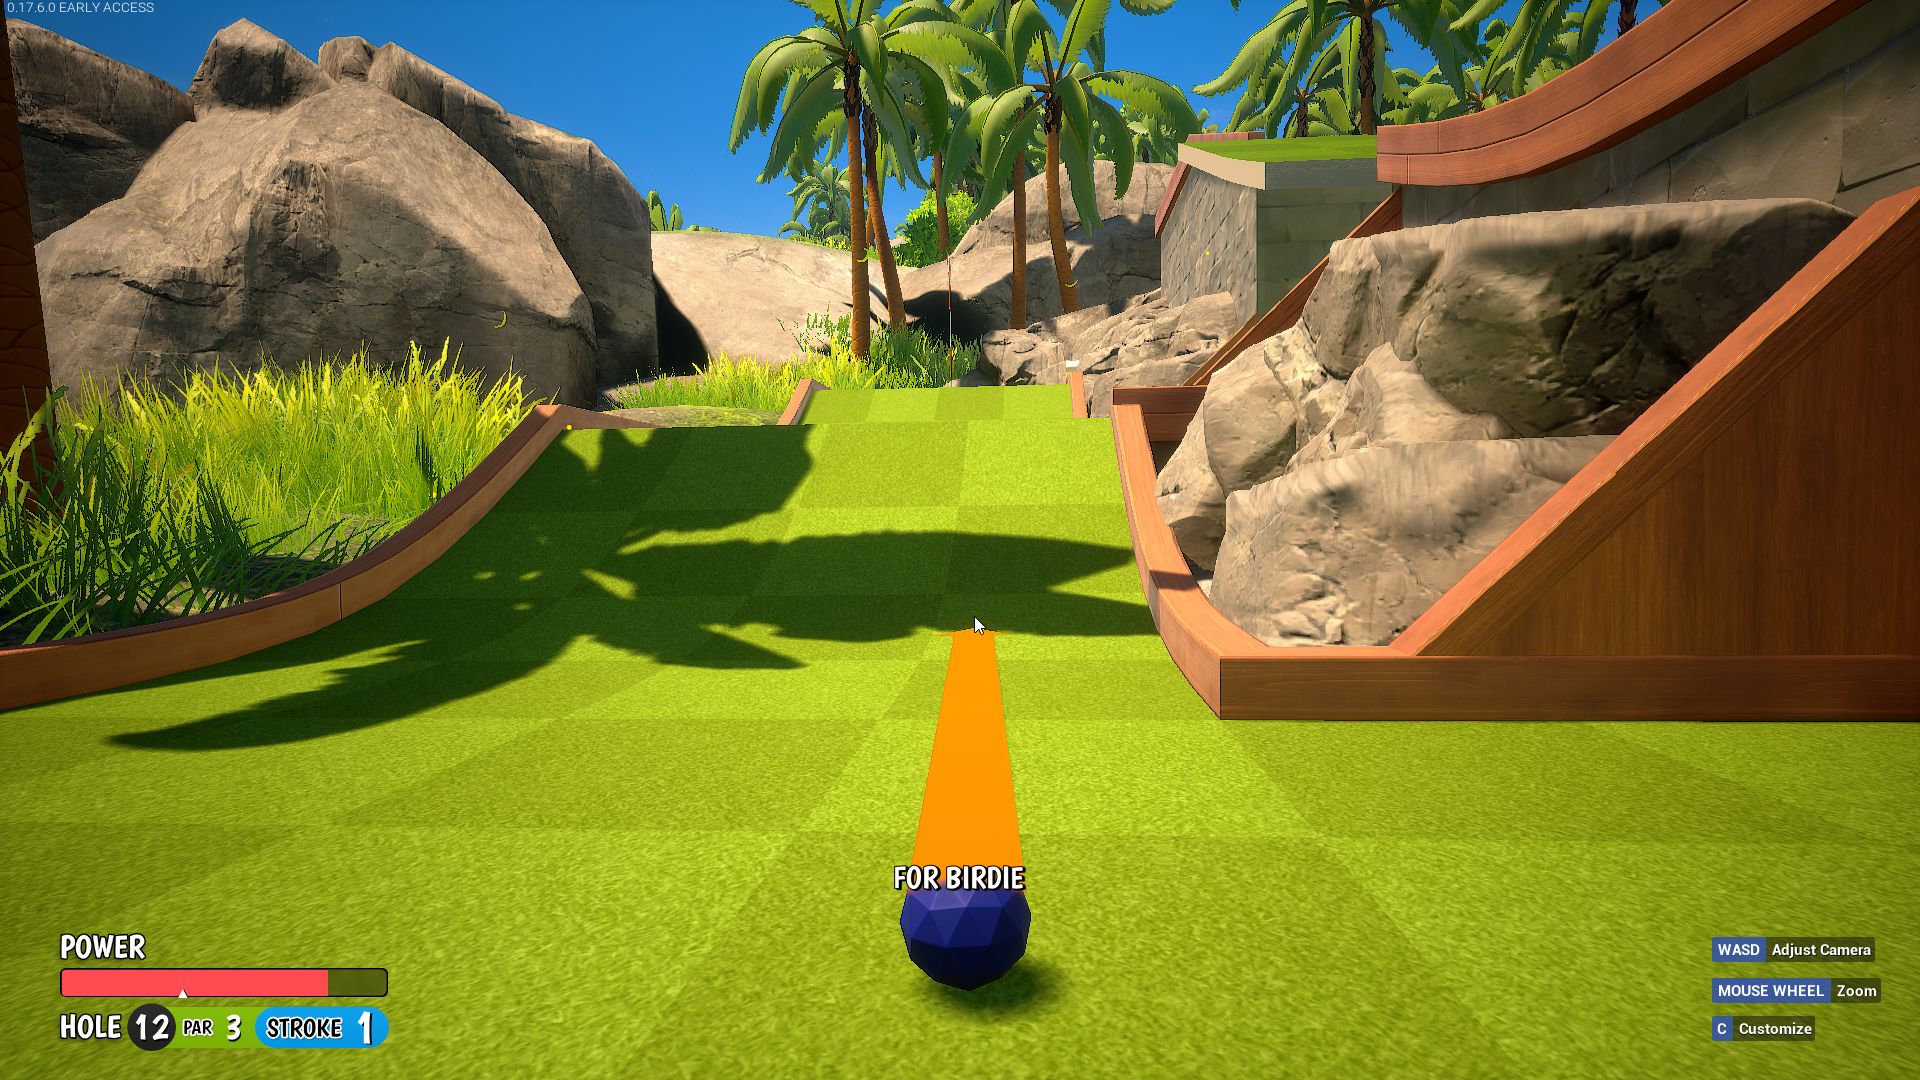
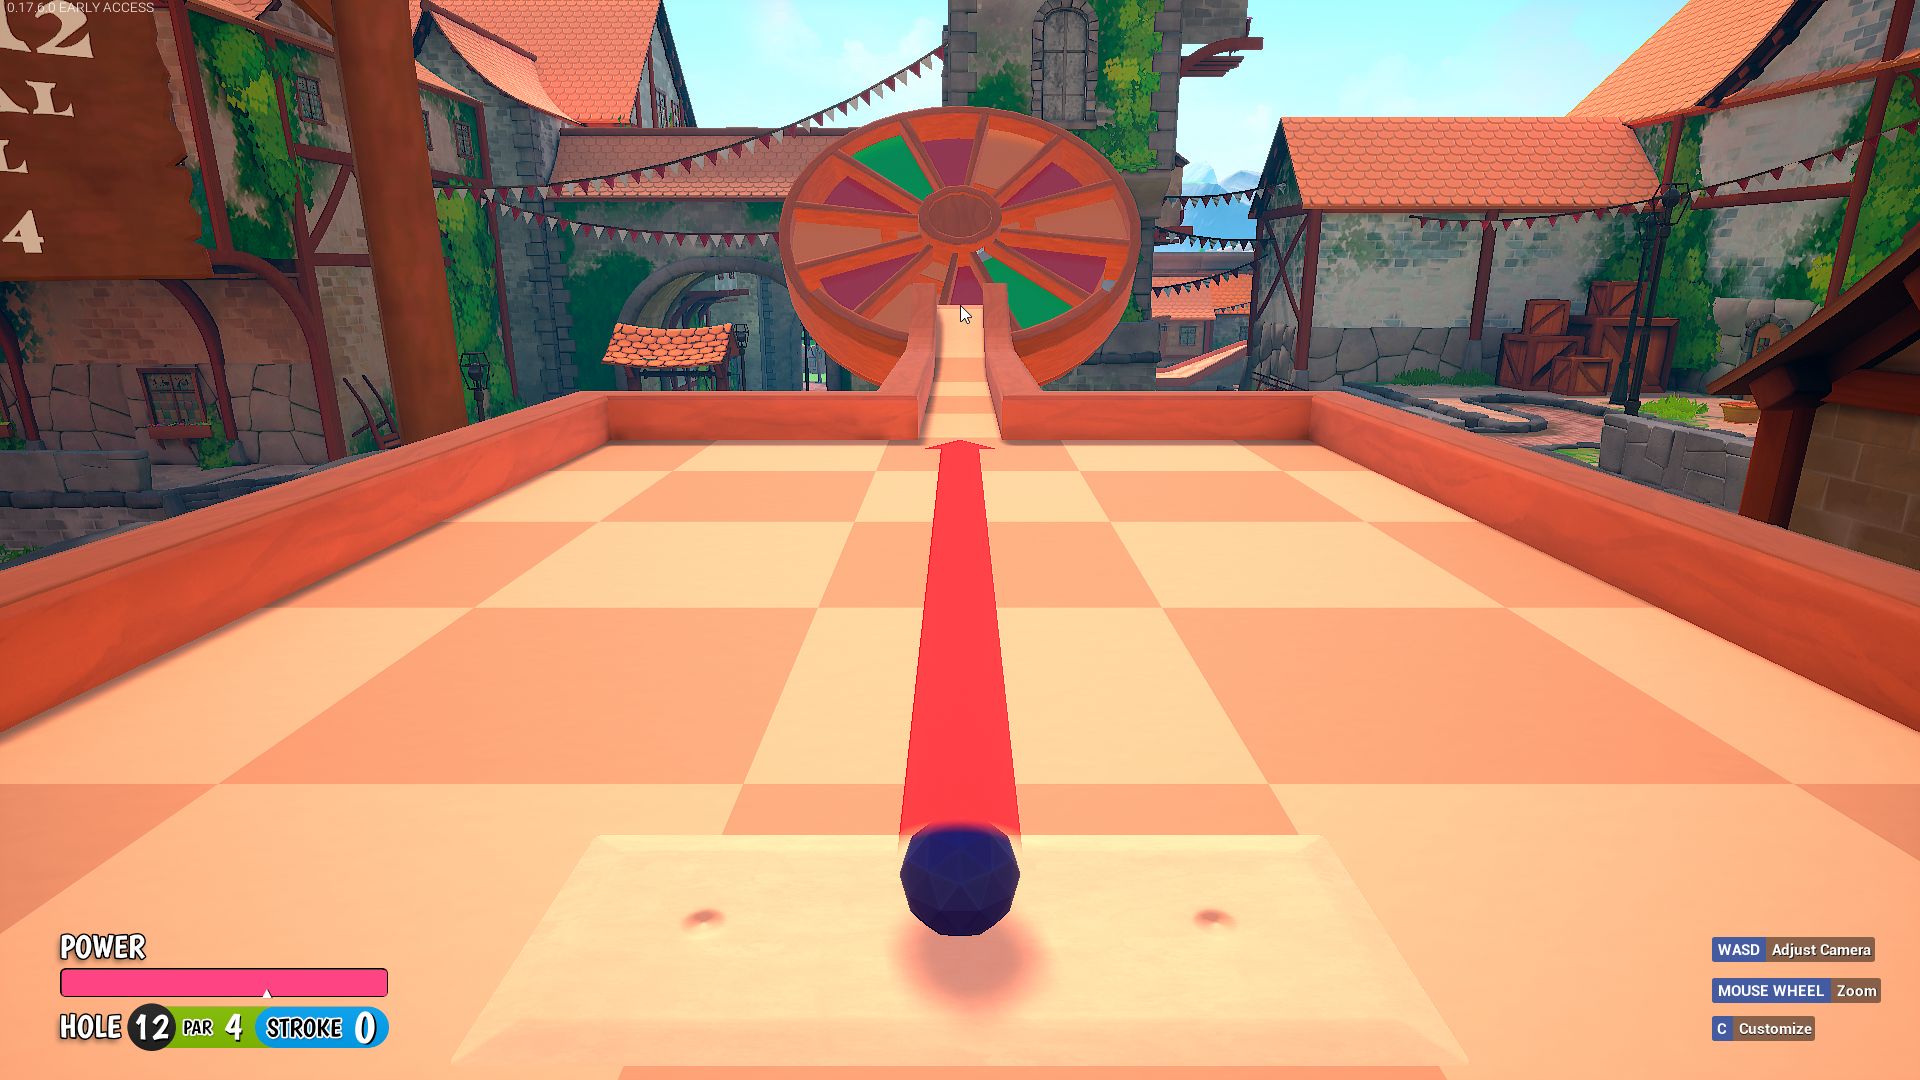
Hole 12 – HIO (no ach)
1. Time in your head:
The second the opening cut scene for hole 12 finishes count to 3 and shoot
Power start of P in “Par”
 2. Counting in your head isn’t always reliable so this is the safer method if you take your time.
You’ll need to set your FOV to 120 for this shot in order to see the moving platforms.
Position your camera looking down on a slight angle so you can still aim but also see the moving platforms as shown in screenshot.
Shoot at timing shown in screenshot while closest platform is moving right.
Power start of P in “Par”
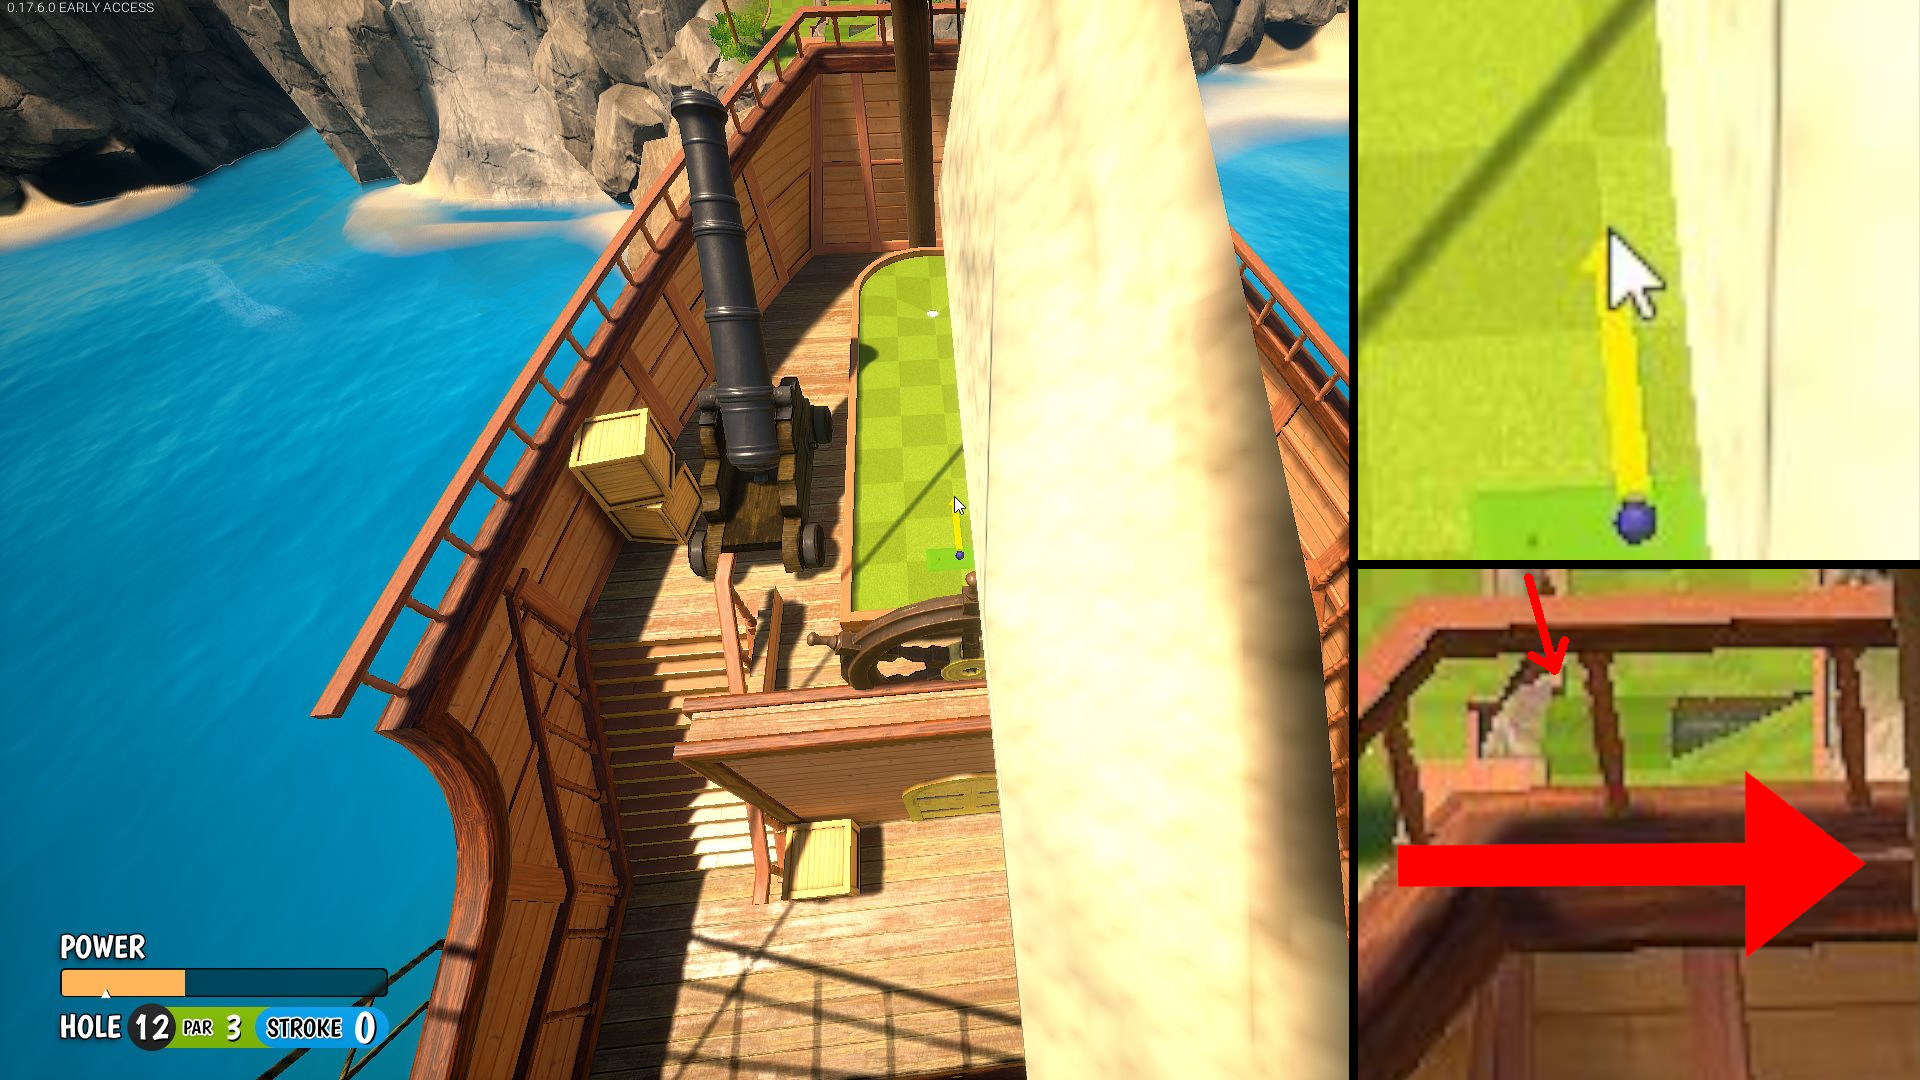
If you happen to miss, the power from the bottom is K in “Stroke”
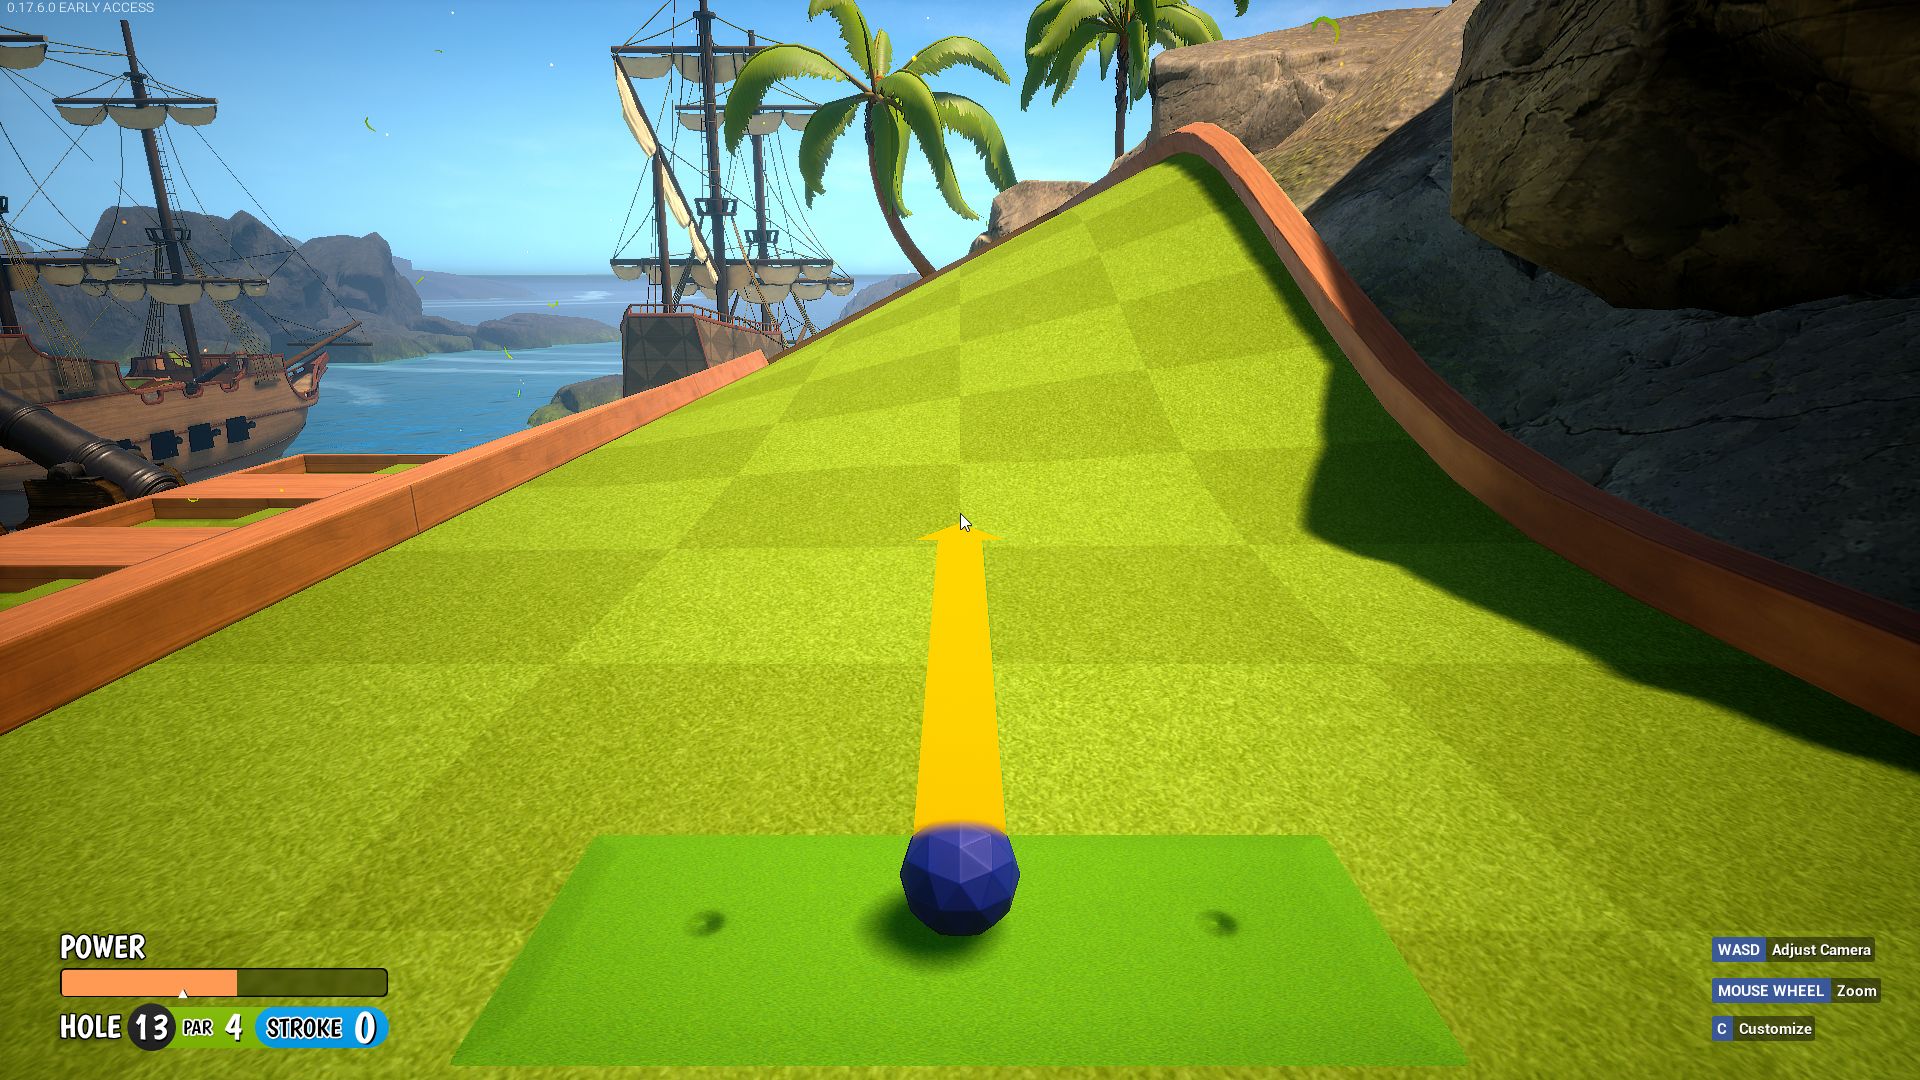
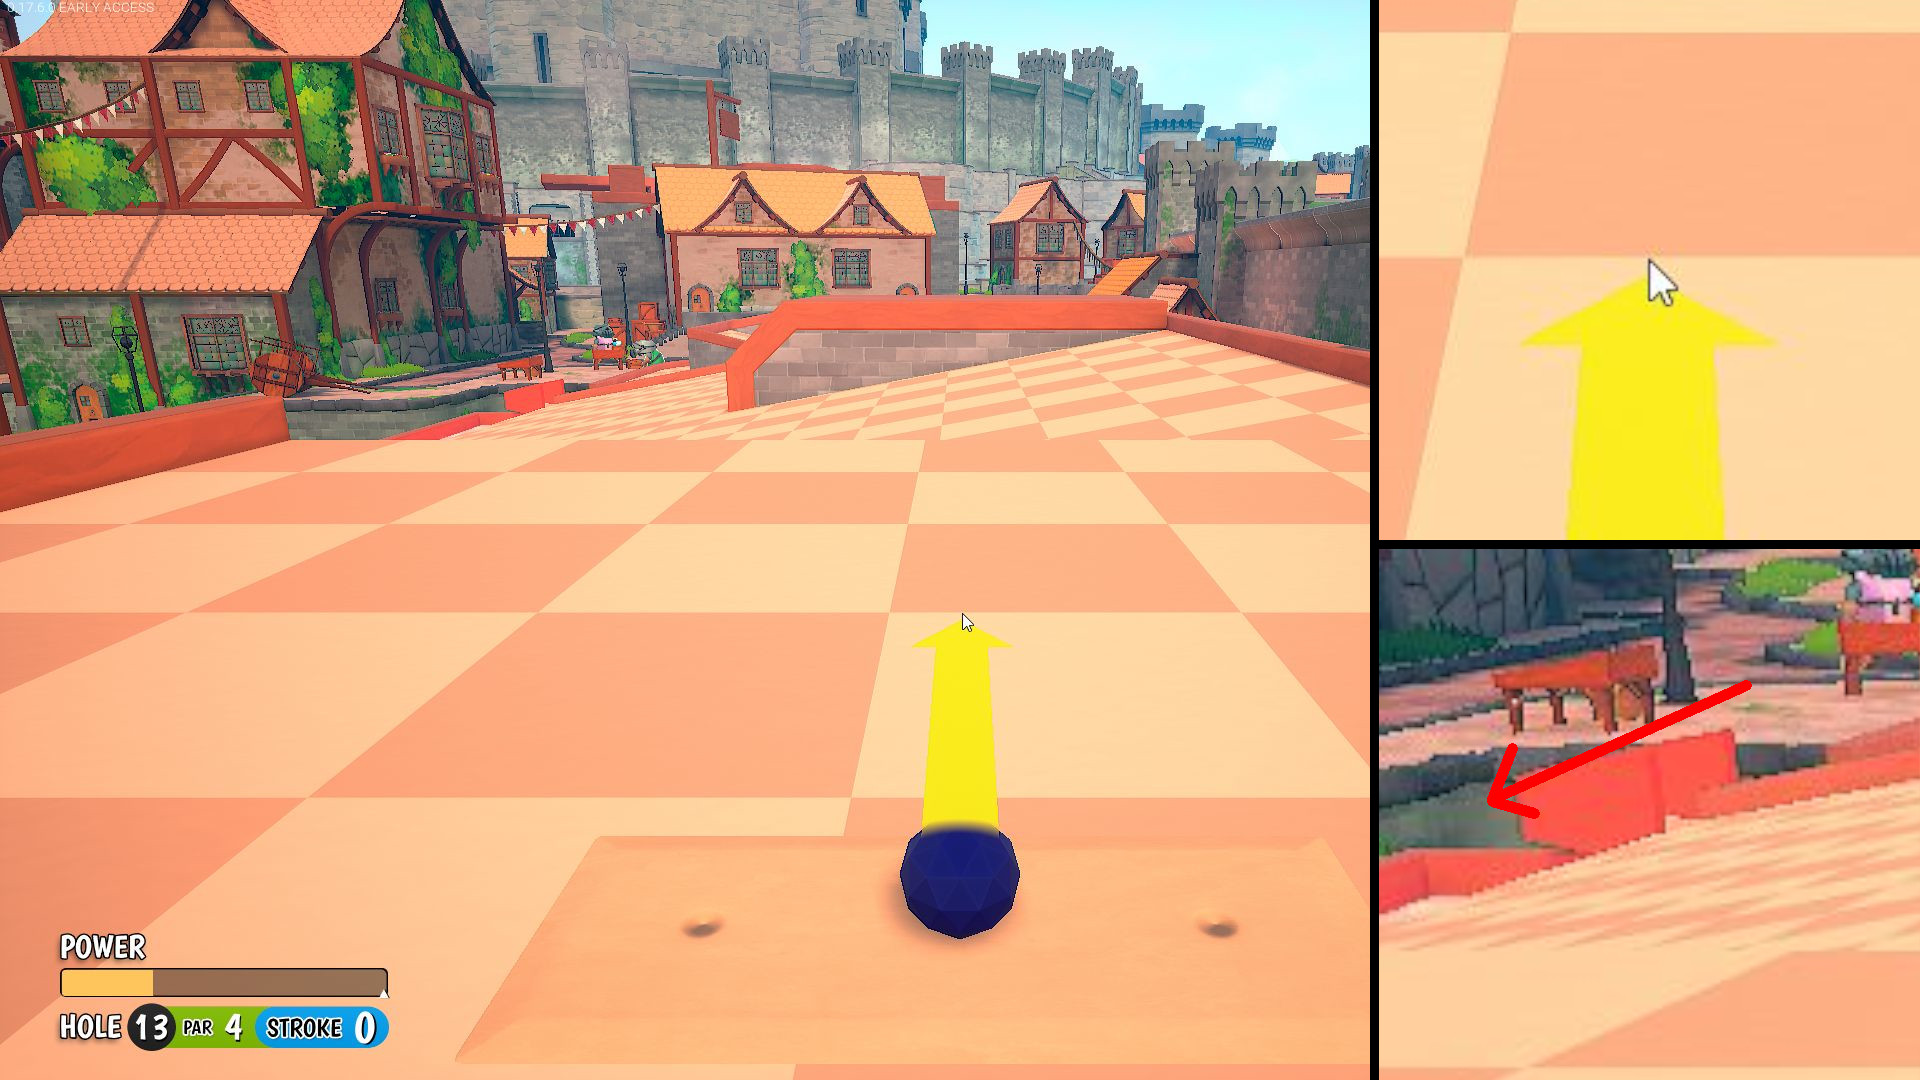
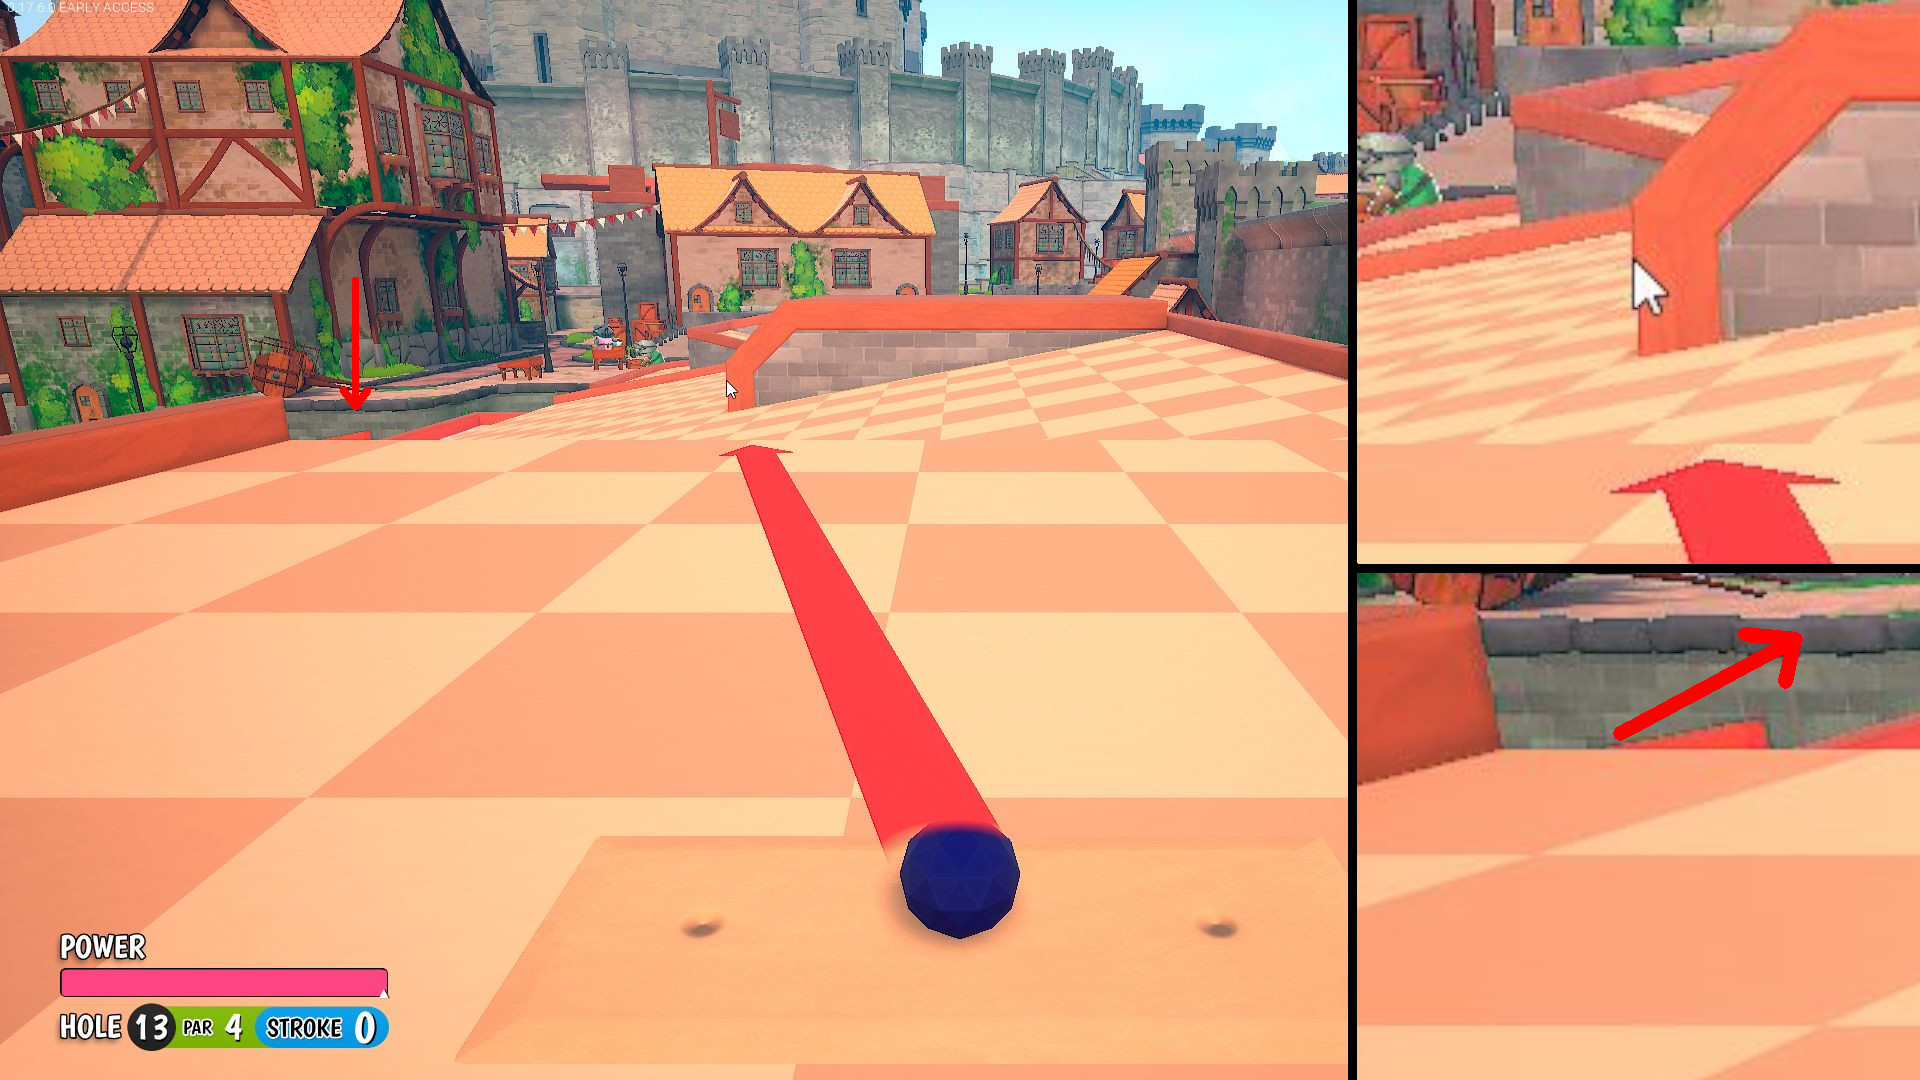
Hole 13 – HIO
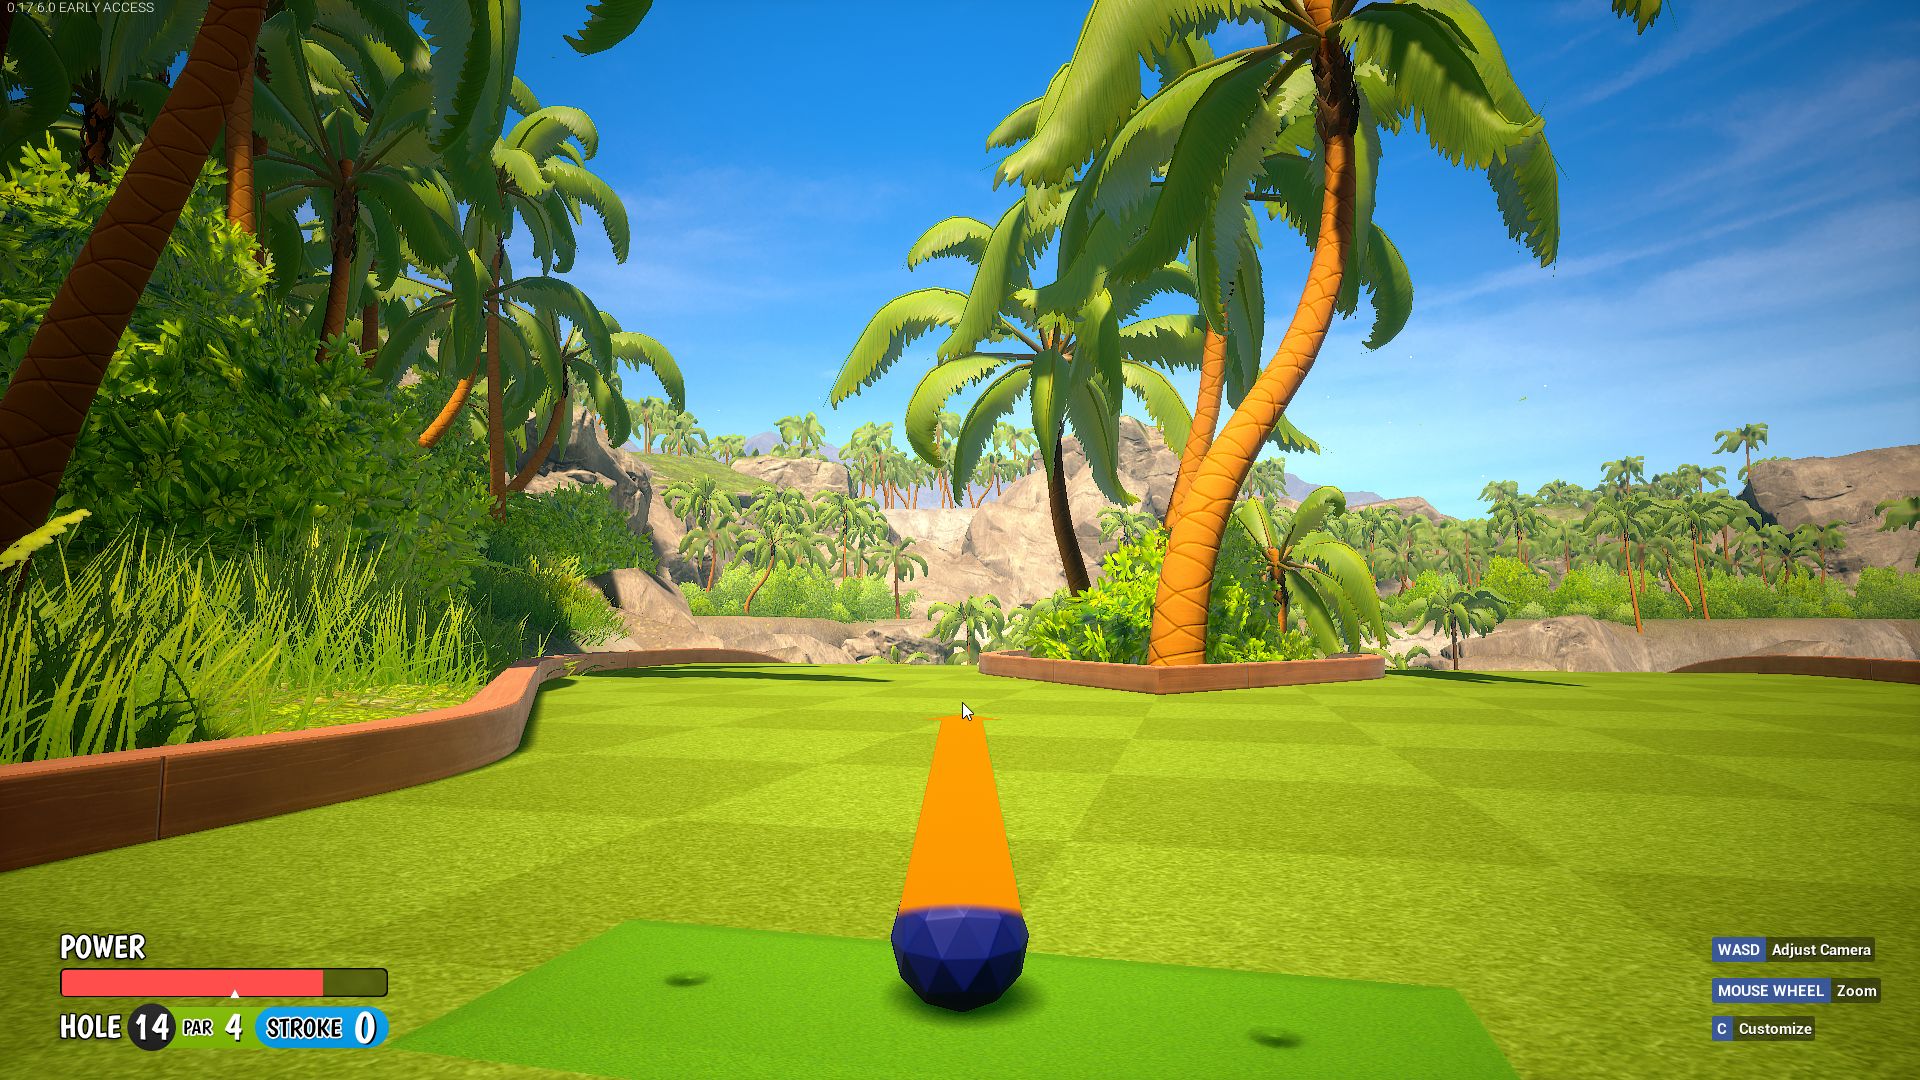
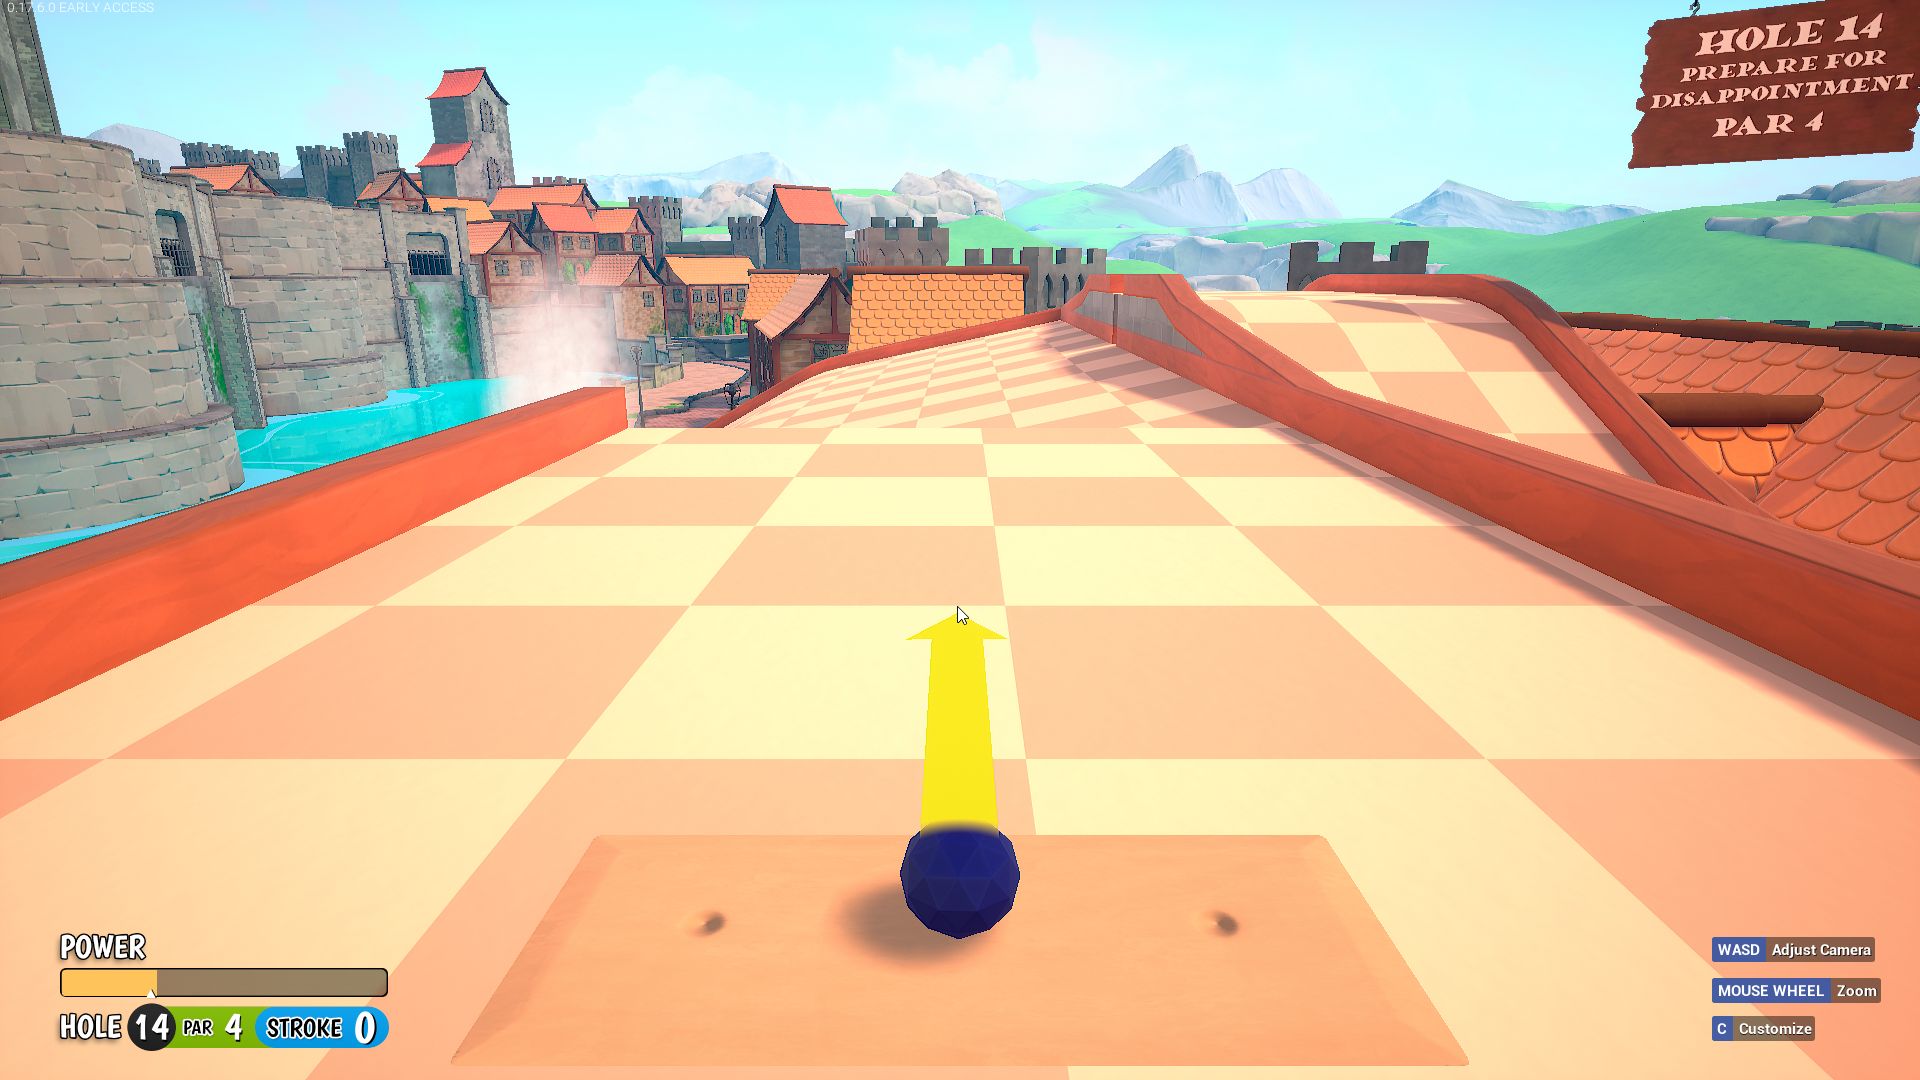
Hole 14 – HIO
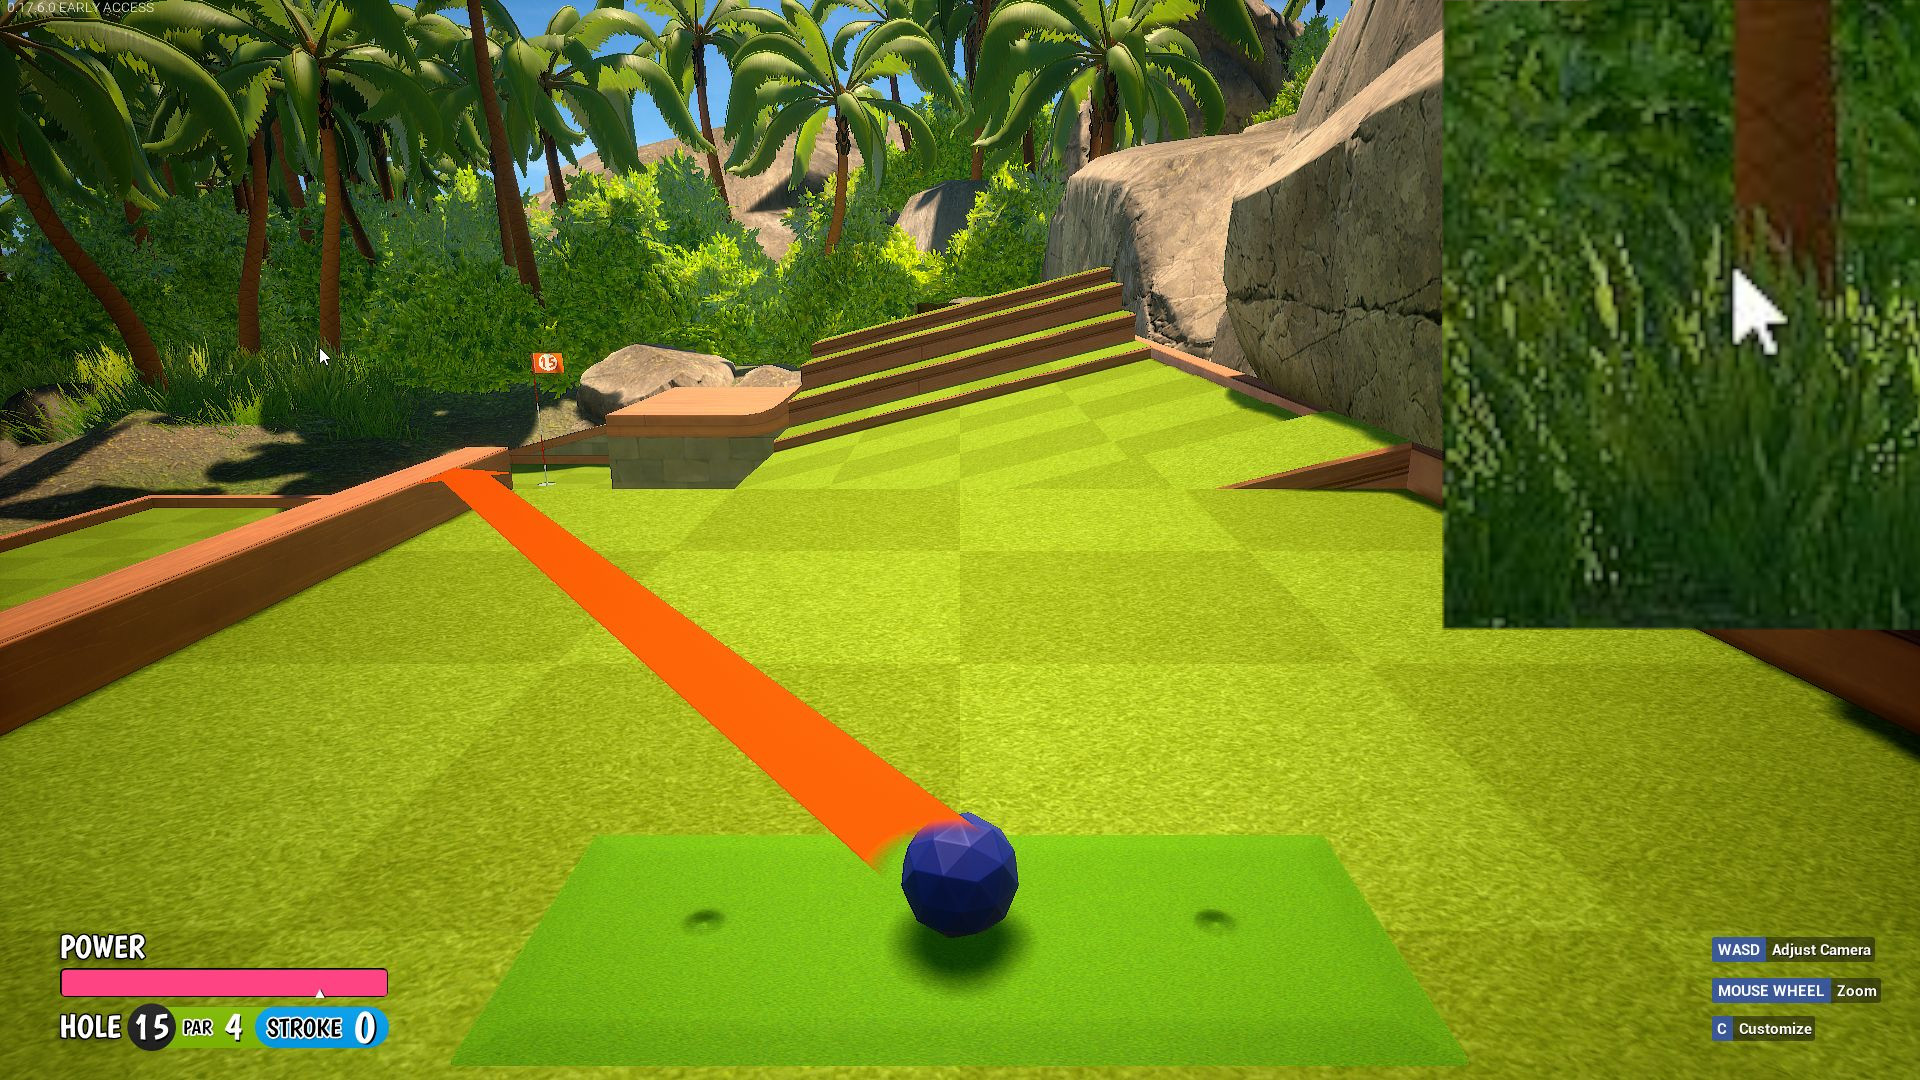
Hole 15 – HIO
Timing as shown in screenshot JUST as the closest block starts to move up, If you’re not host accounting for ping is difficult here. Feel free to use the screenshot to find your own visual que.
Hole 16
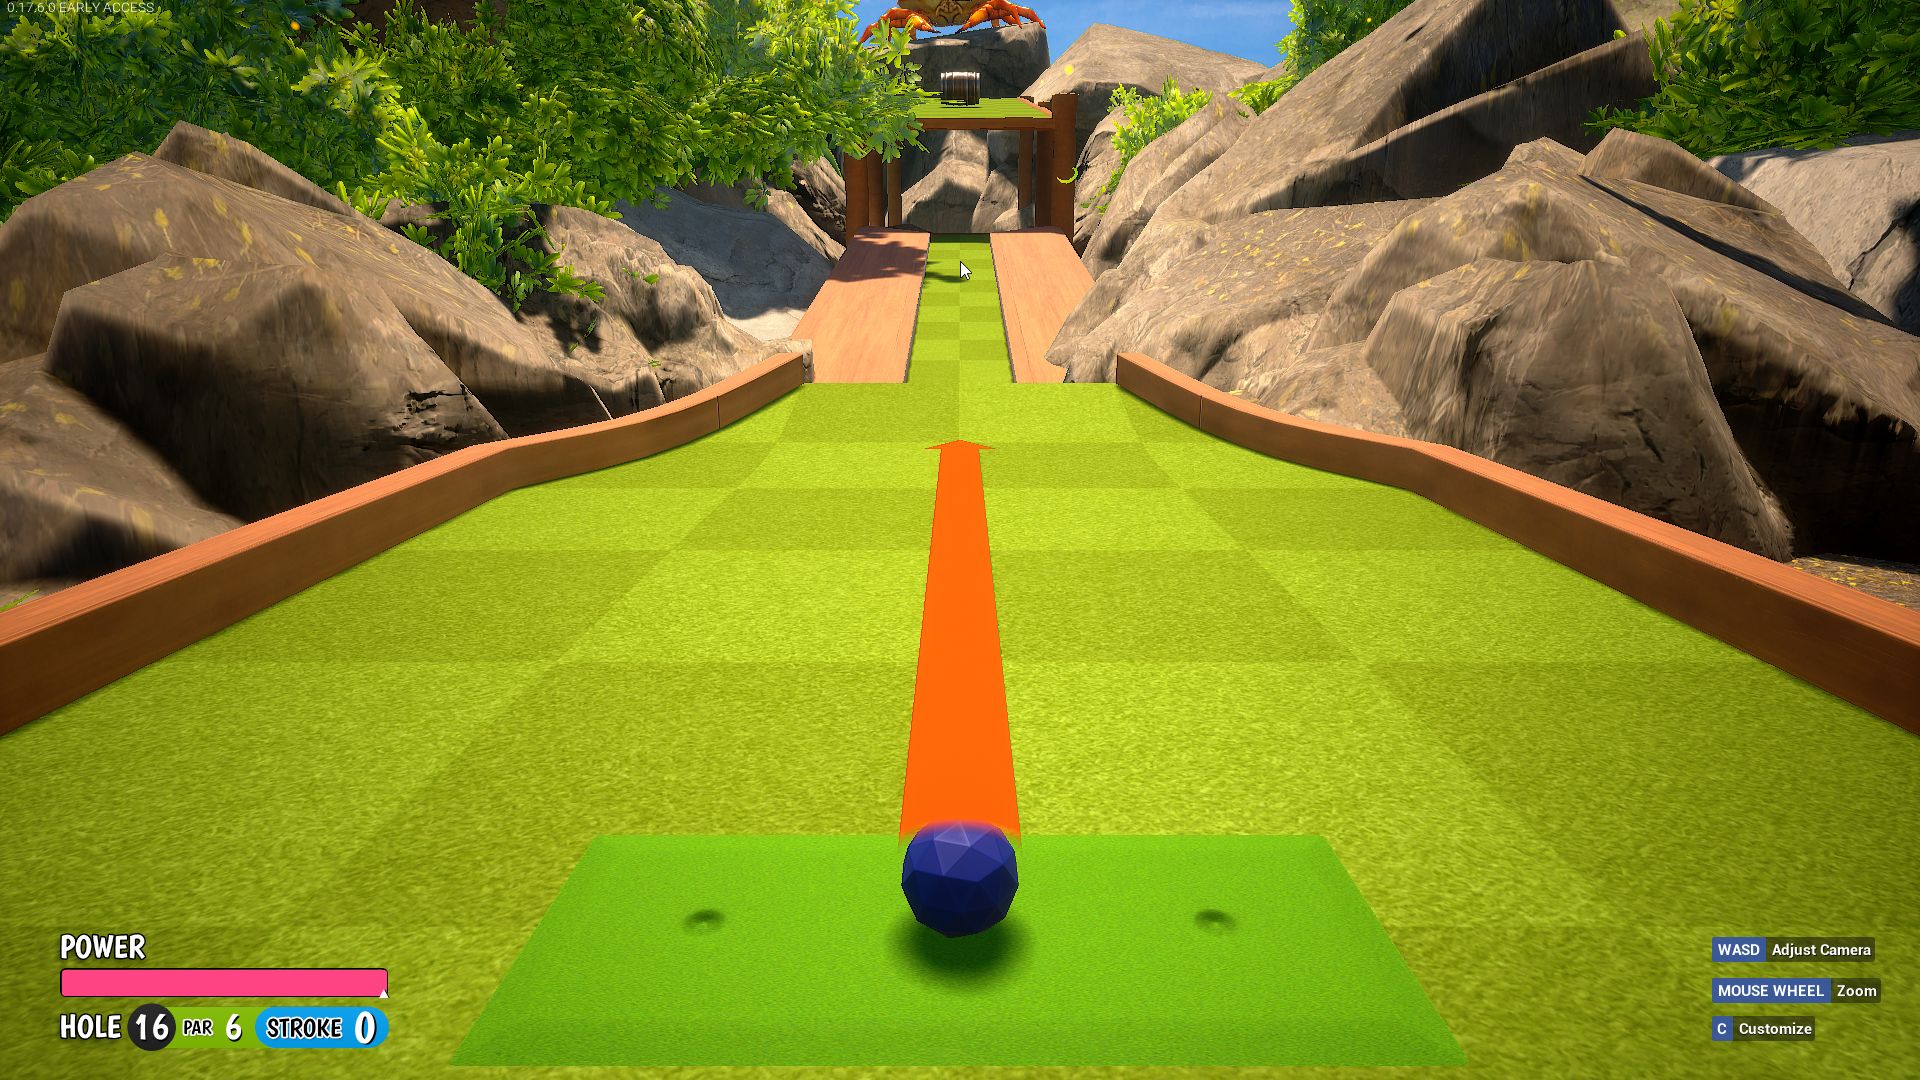
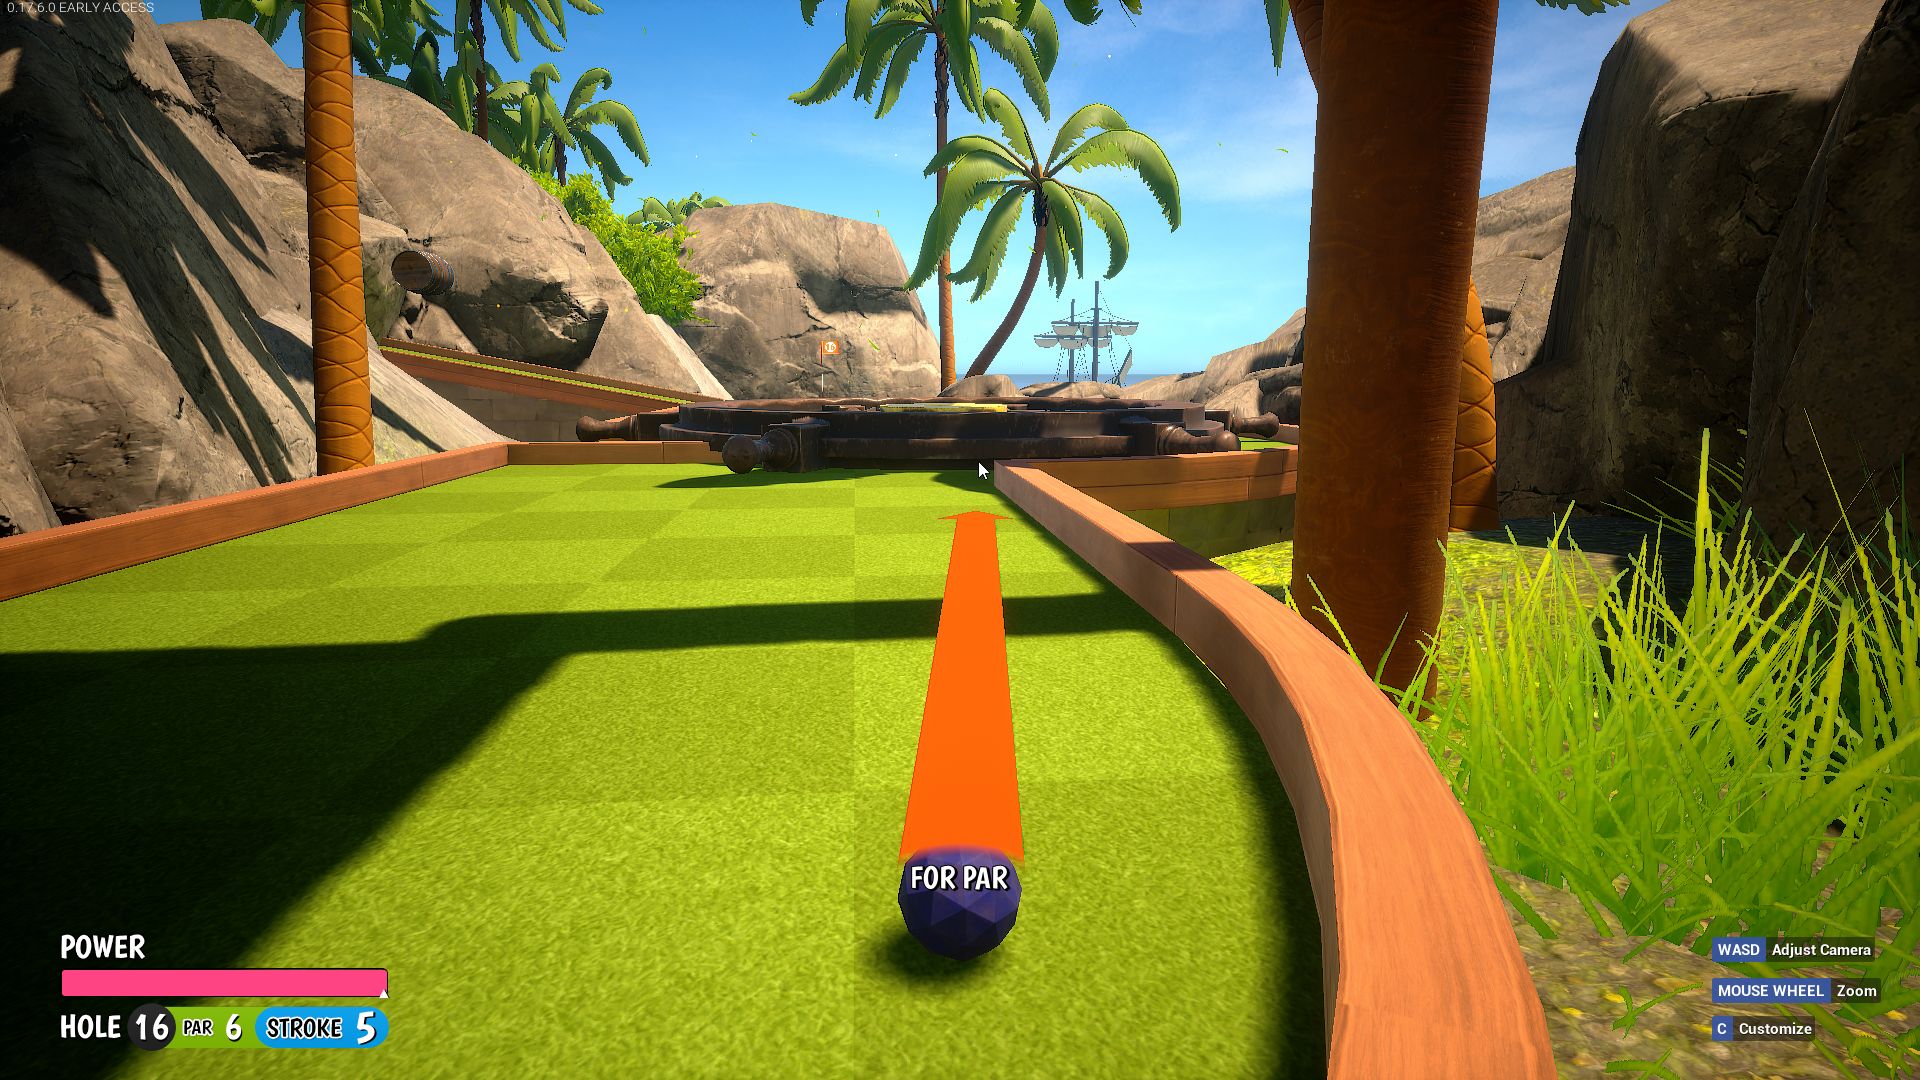 Aim shown in screenshot, power end of 6 in “Par 6”
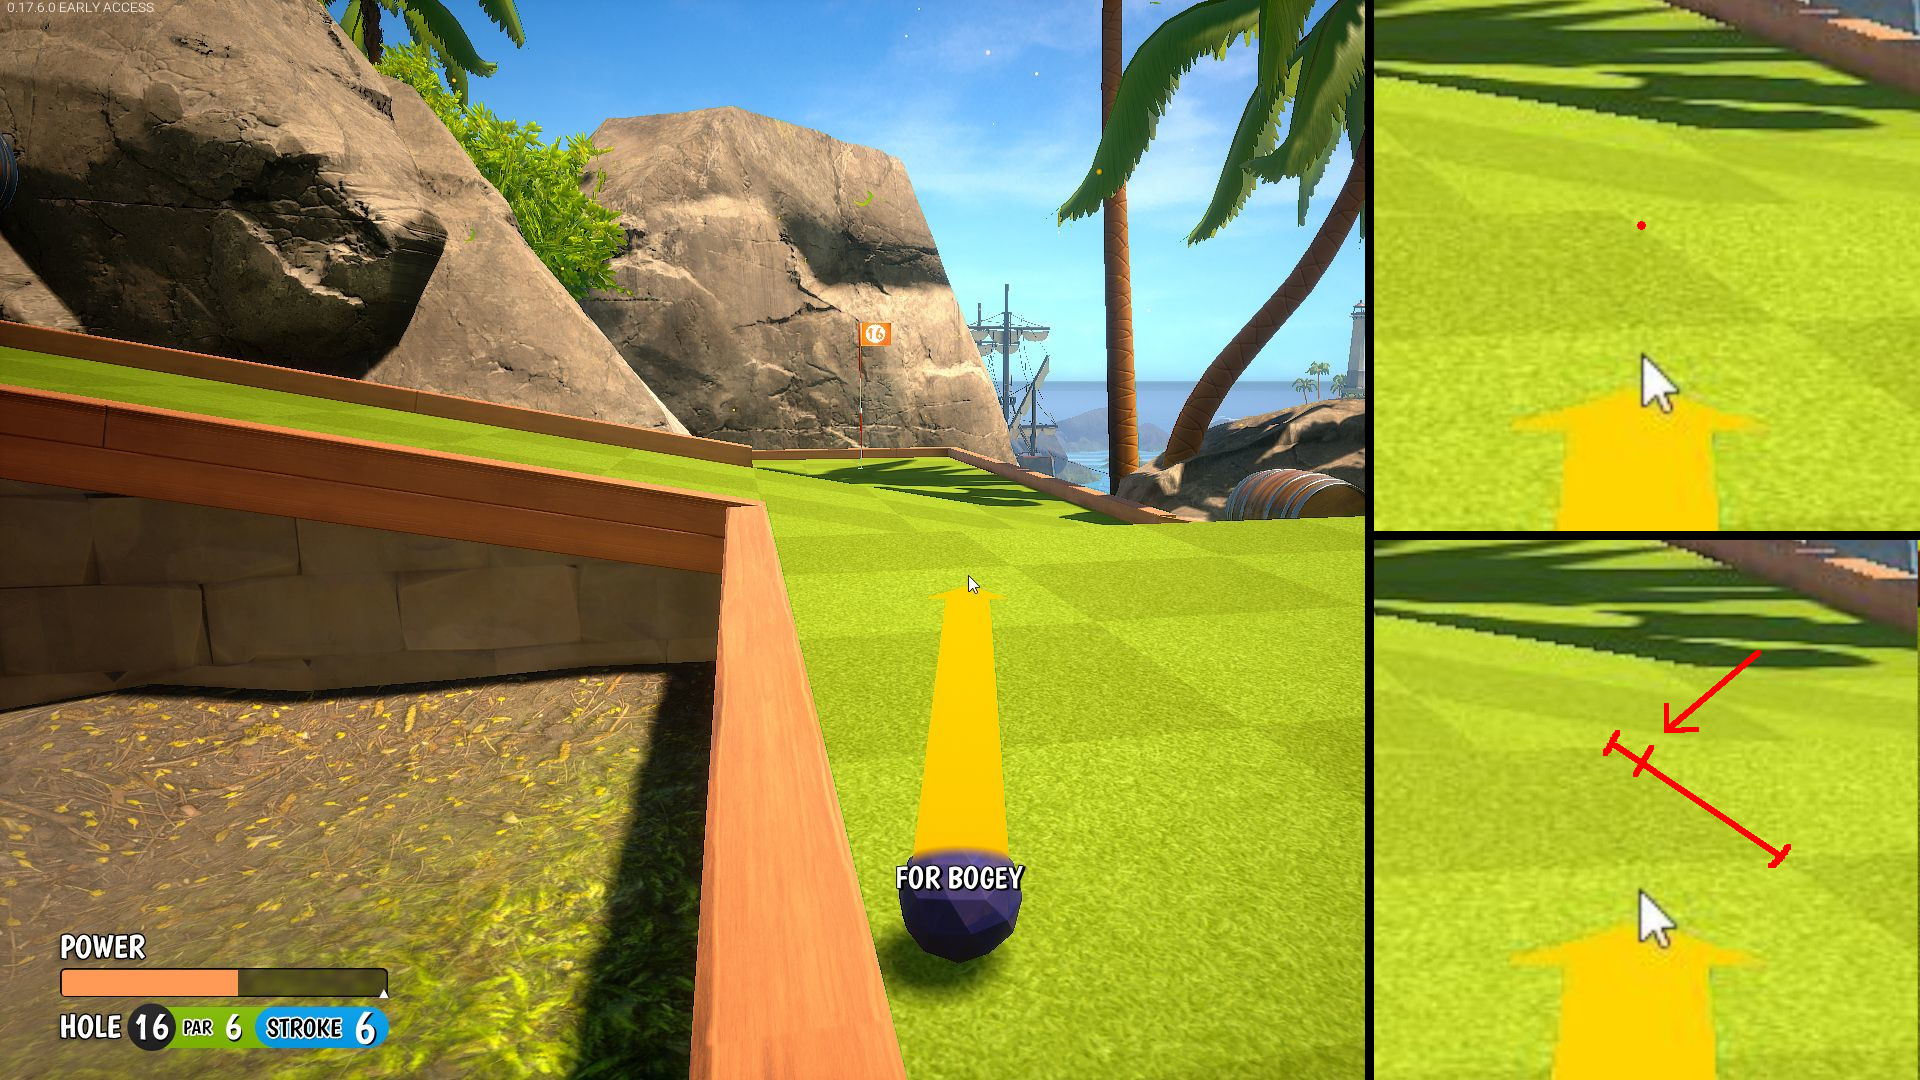
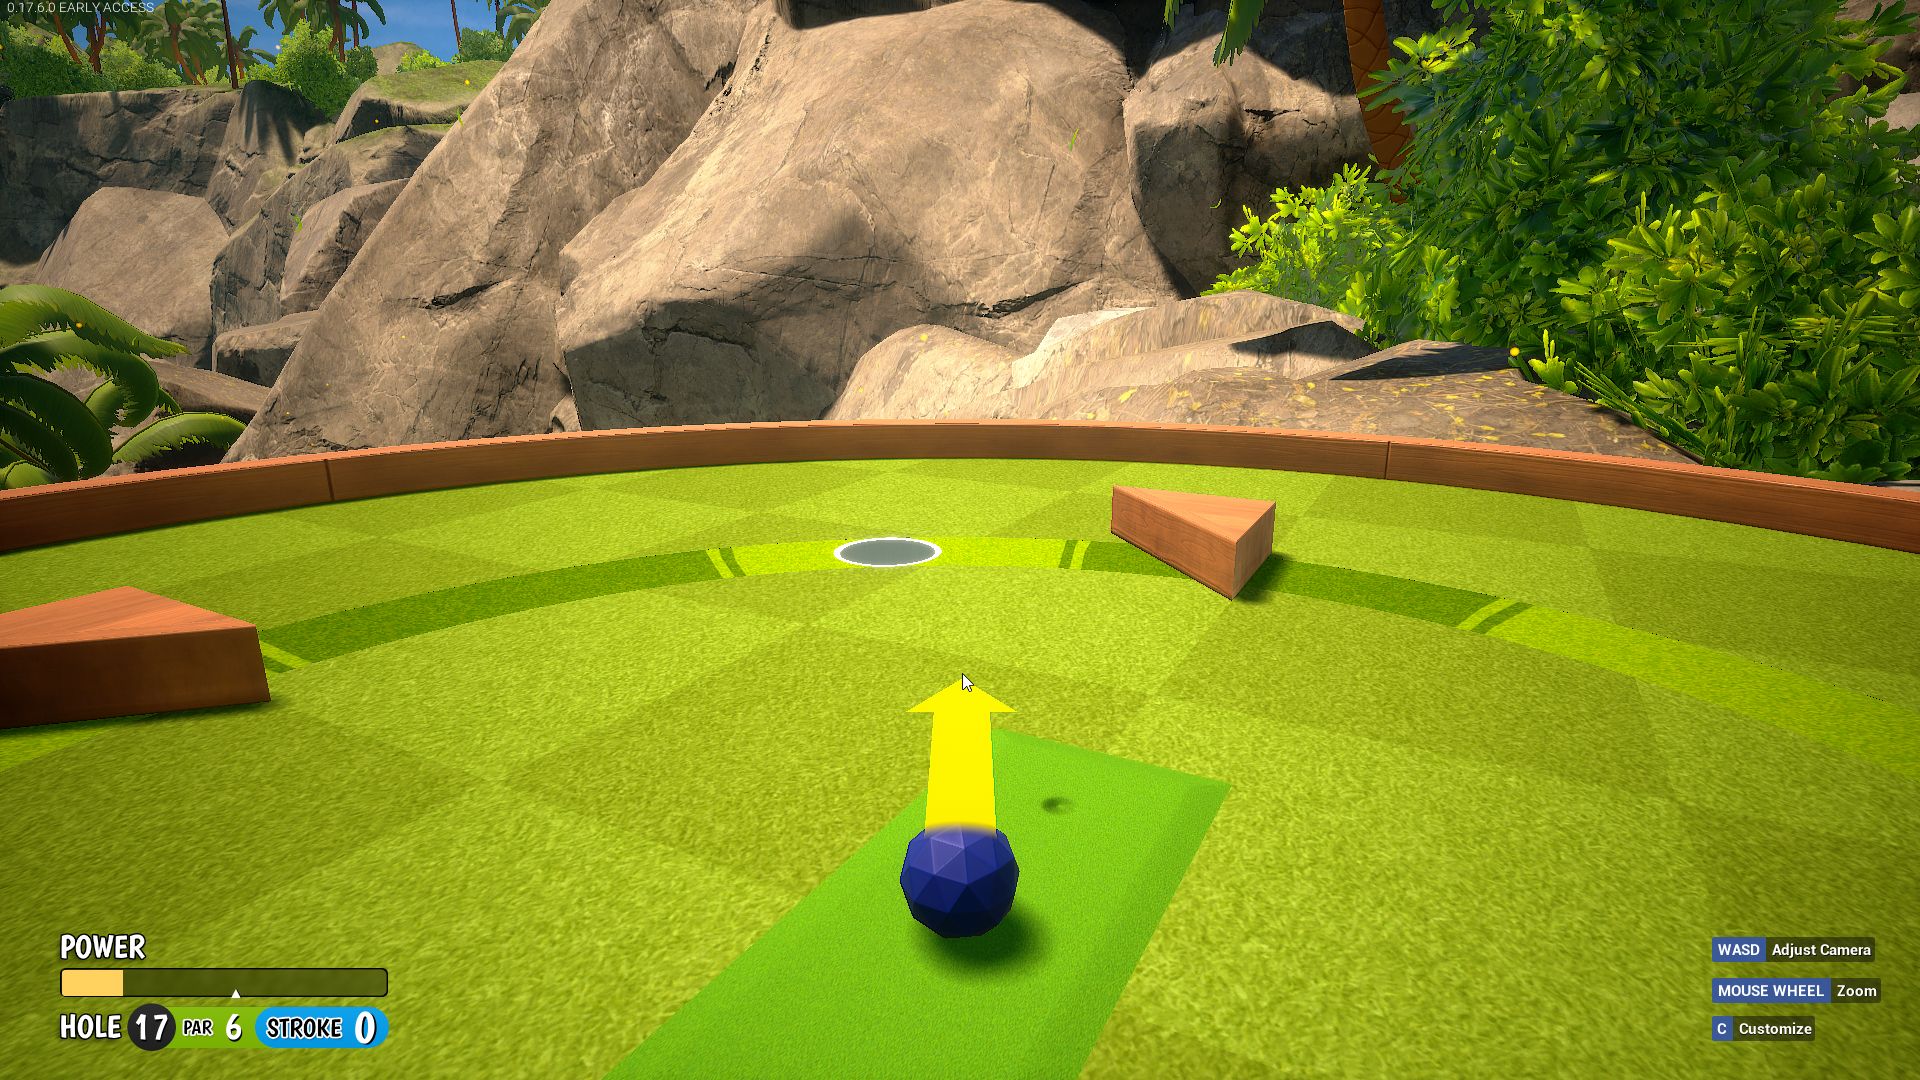
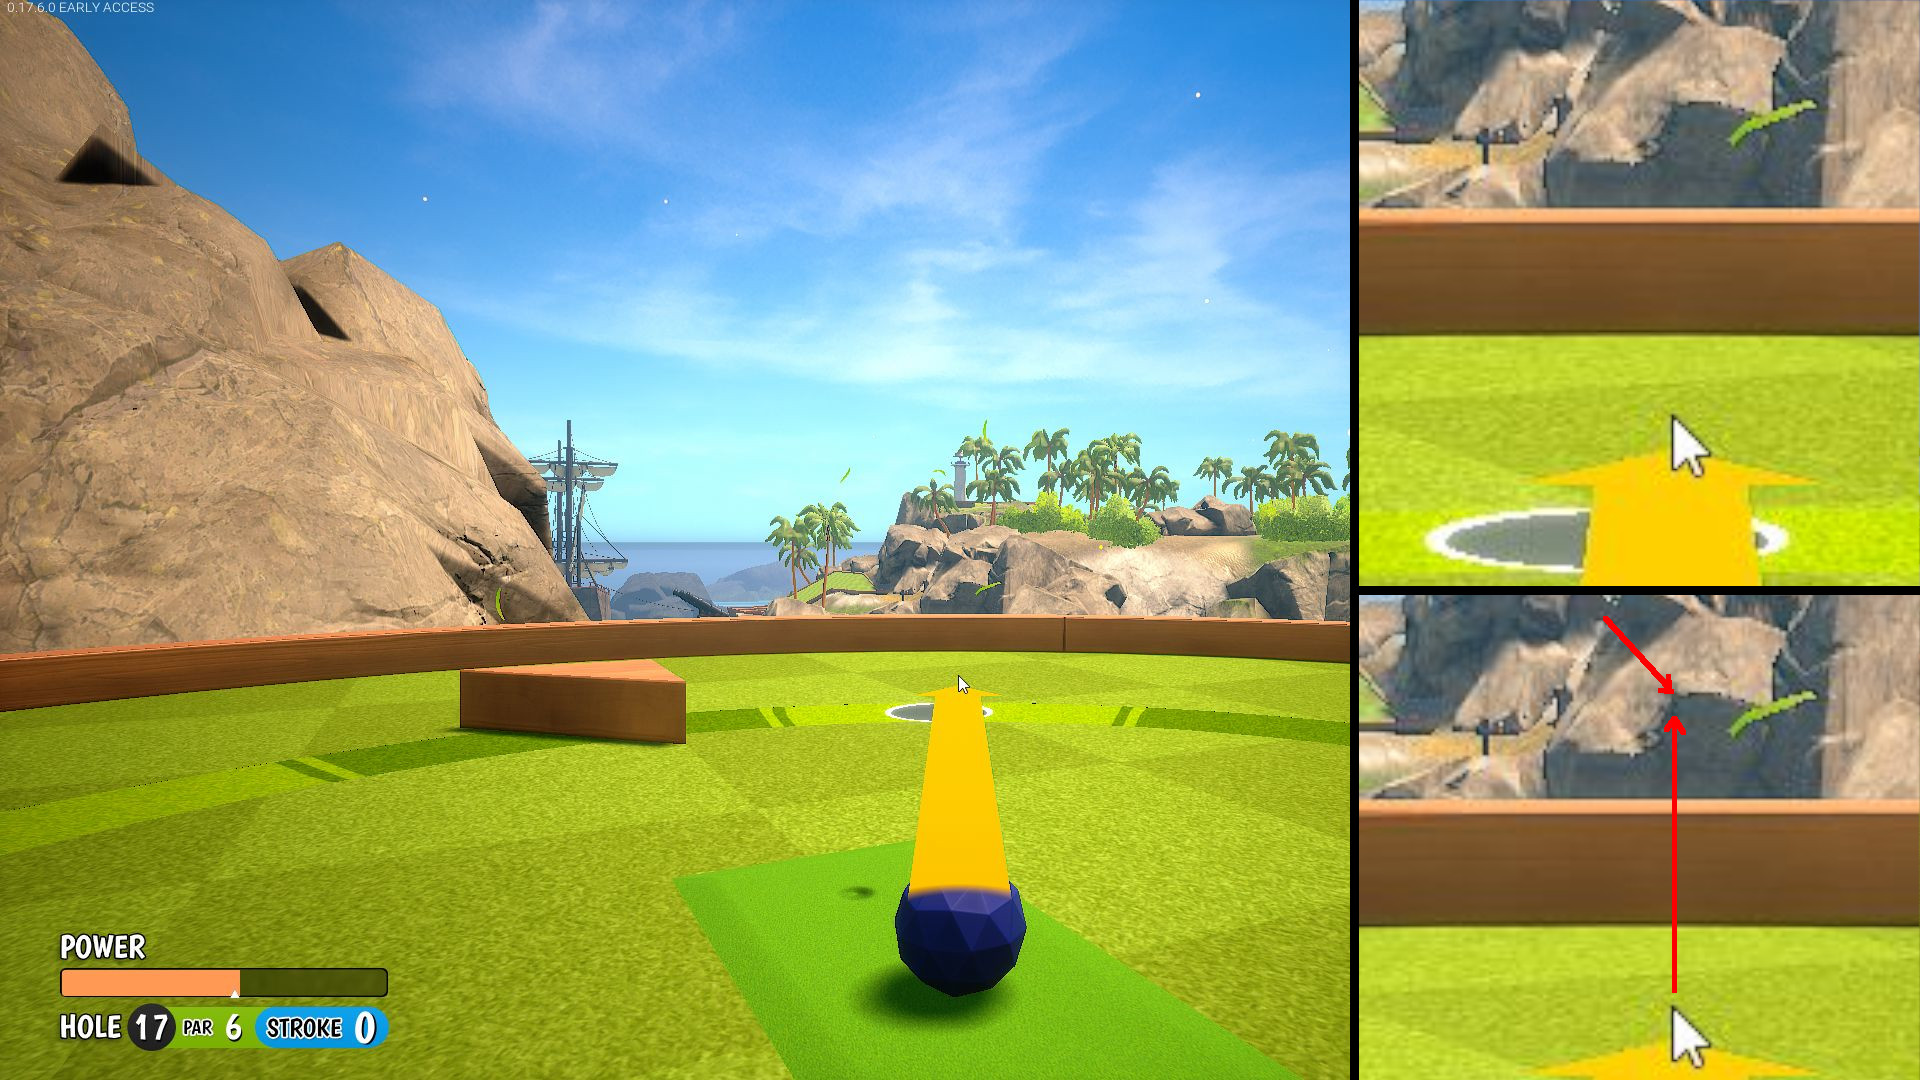
Hole 17
Both methods can result in 2 strokes.
1. Intended method (no skip)
Aim/Timing as shown in screenshot
Power end of E in “Hole”
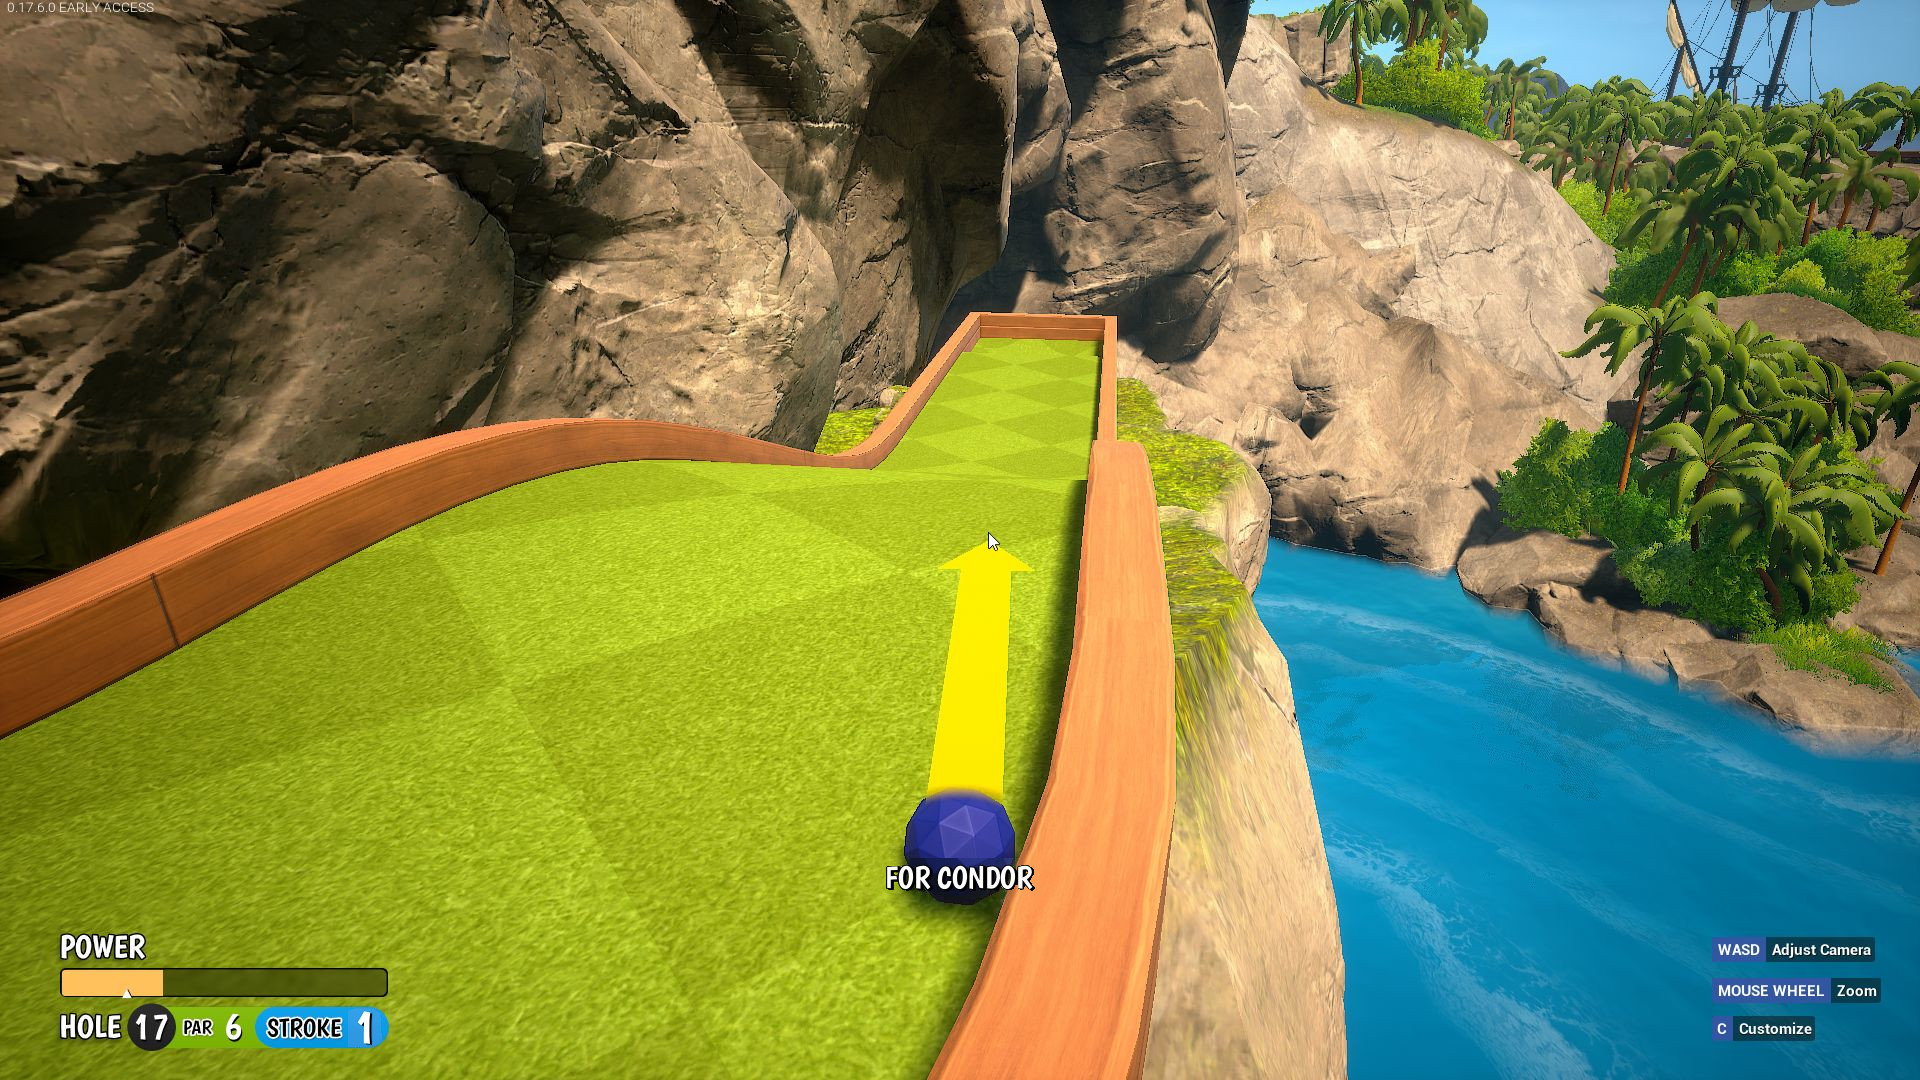
2. Skip method, There are several combinations of power & aim I’ve found that work for this skip, this one seemed to be the most consistent, but even then… sometimes the ball does not jump over the wall and you just miss.
Aim/Timing shown in screenshot
Power end of 6 in “Par 6”
If you’re lucky enough you get to skip this shot!
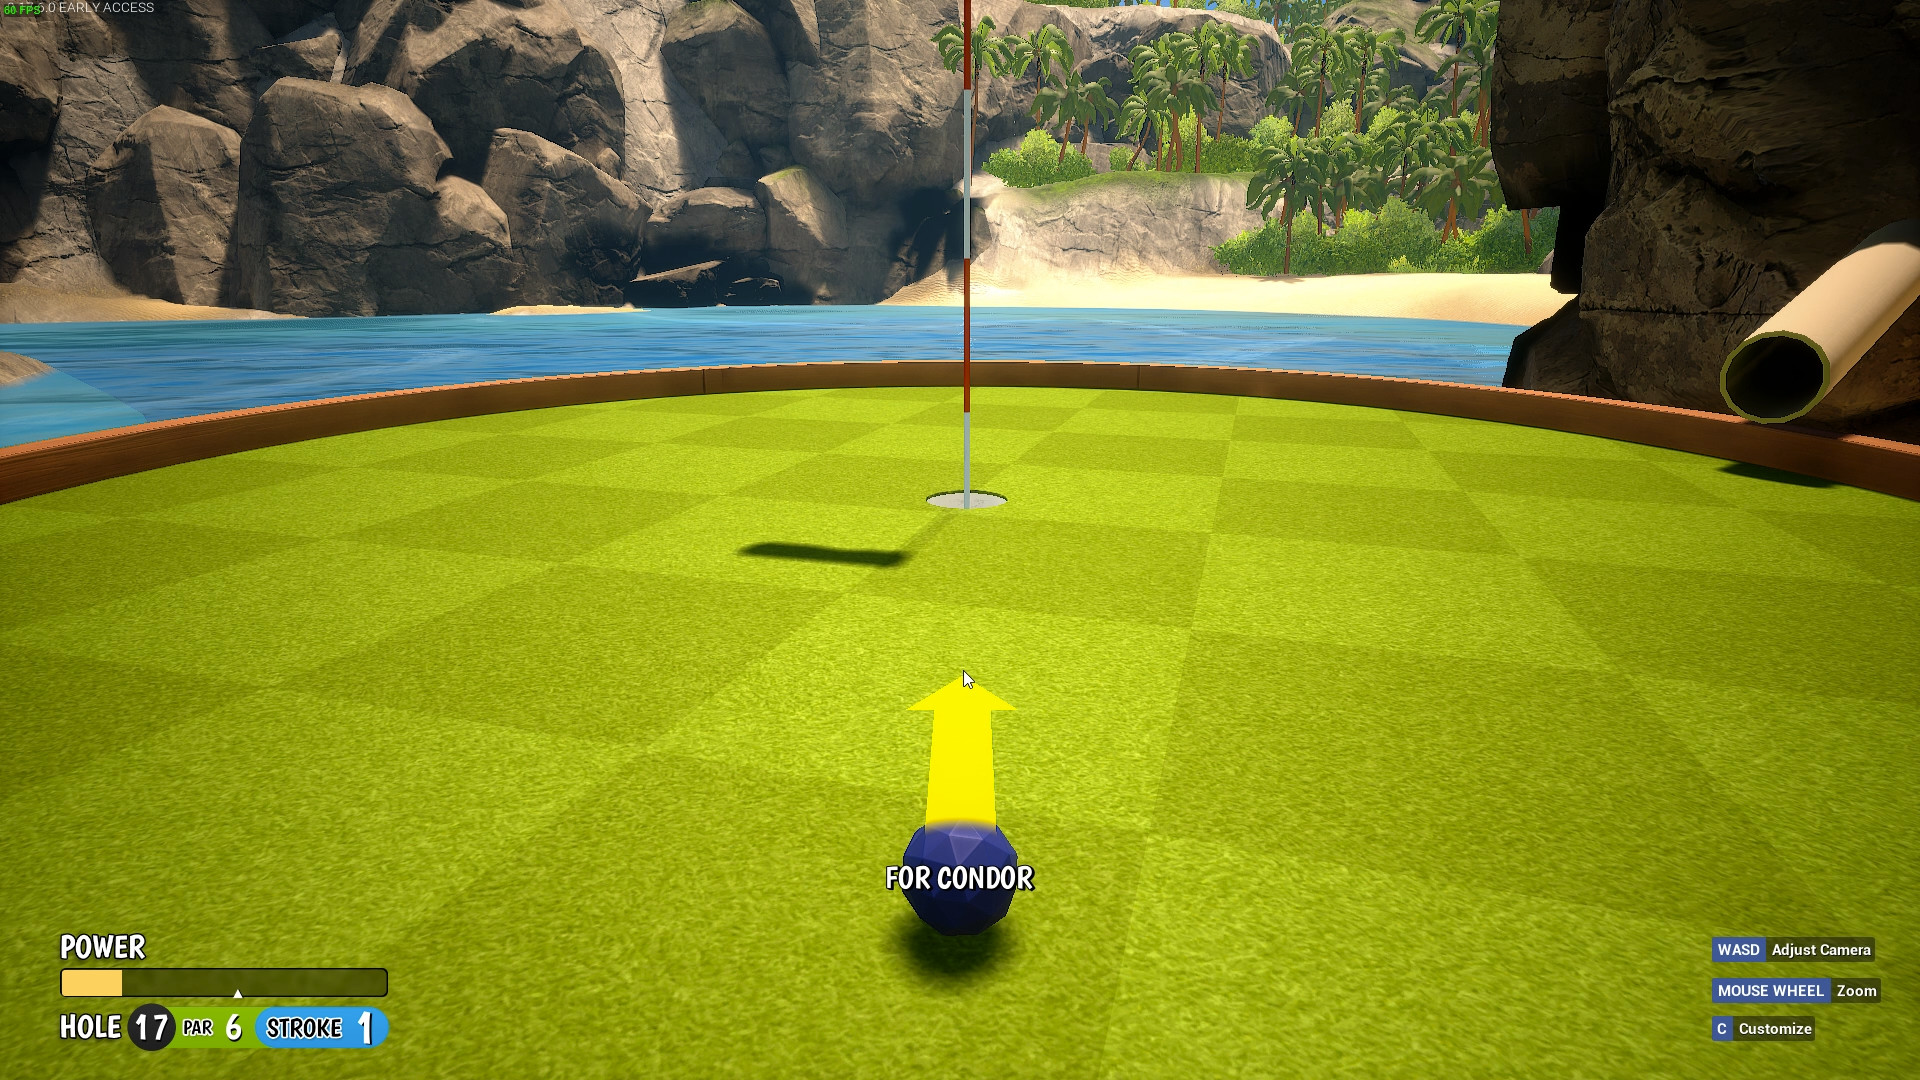
2nd shot, shoot into the funnel.
 last shot, tap in Power end of E in “Hole”
Hole 18 – HIO
Place cursor as shown in screenshot, very easy visual placement.
Power start of 1 in “18”
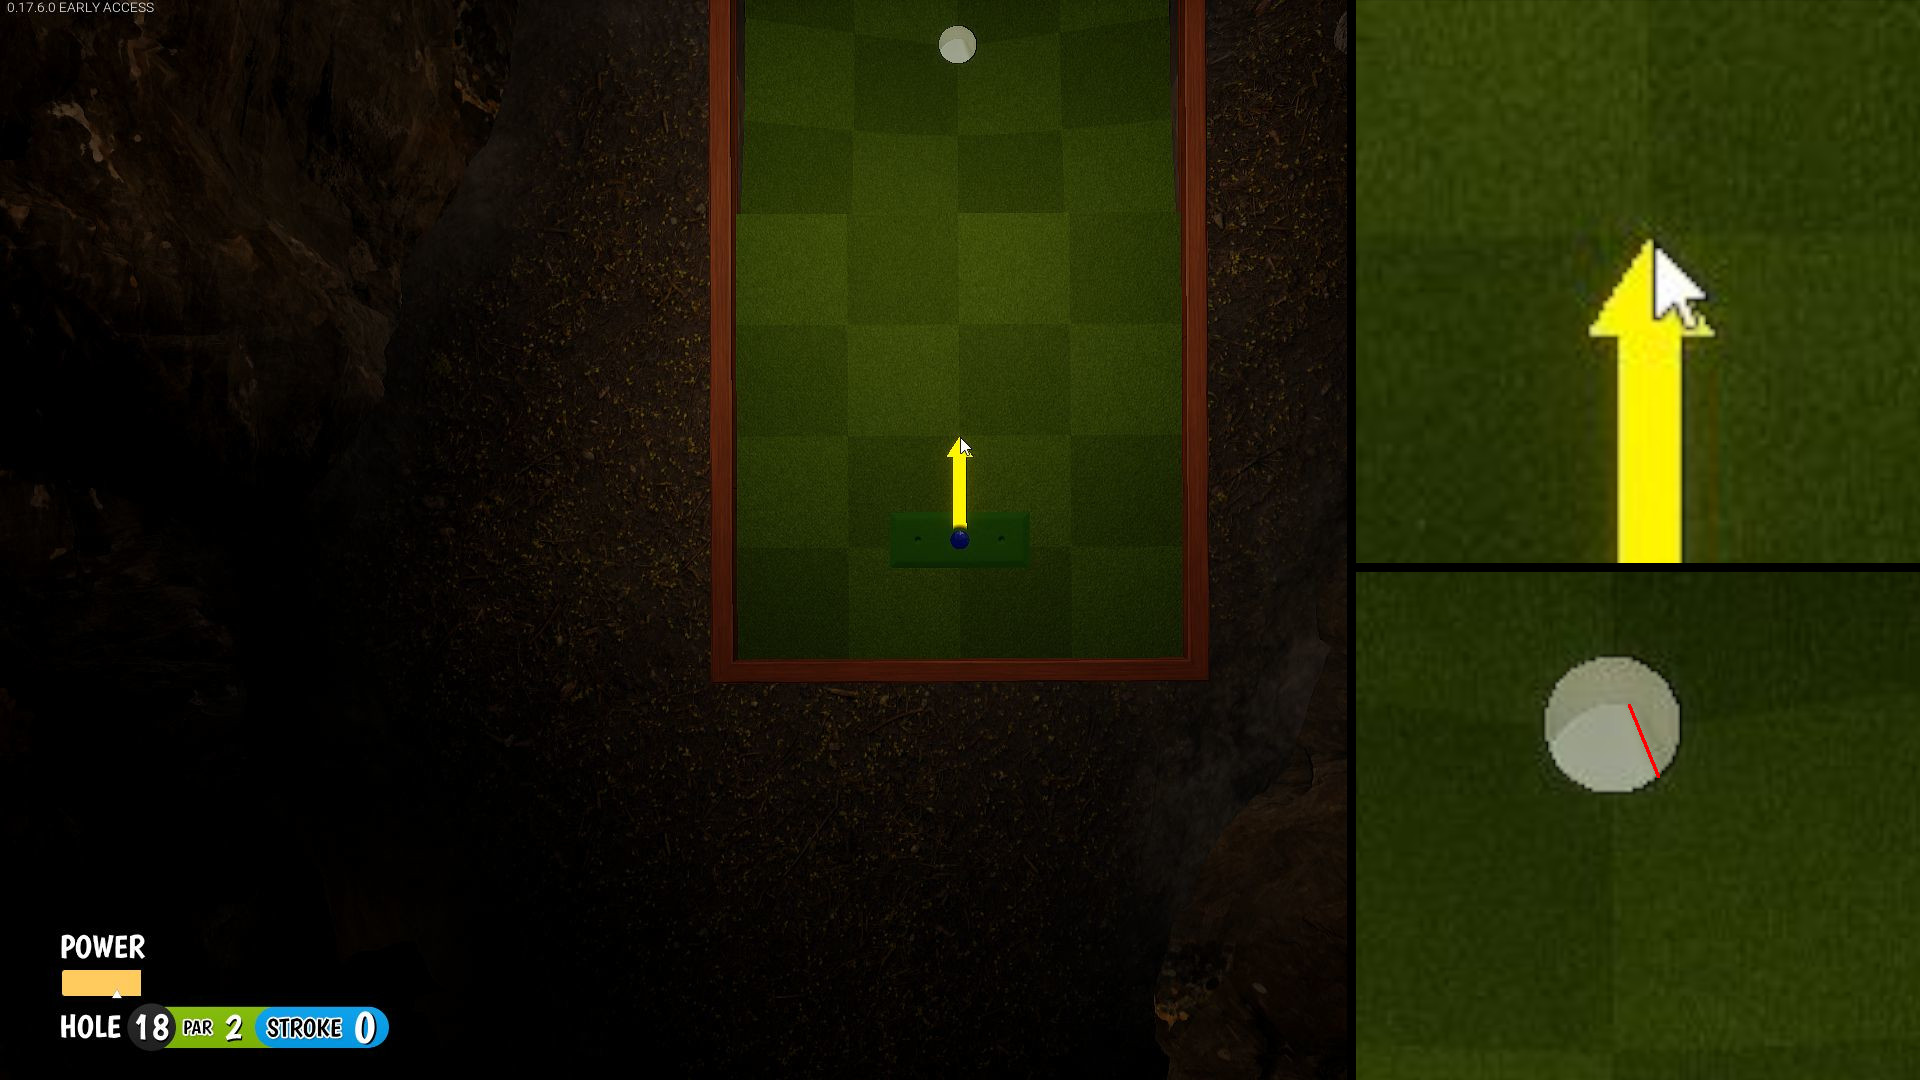 There is a chance that on the way down your ball changes paths.. so Prayge.
Kingdom
Hole 1
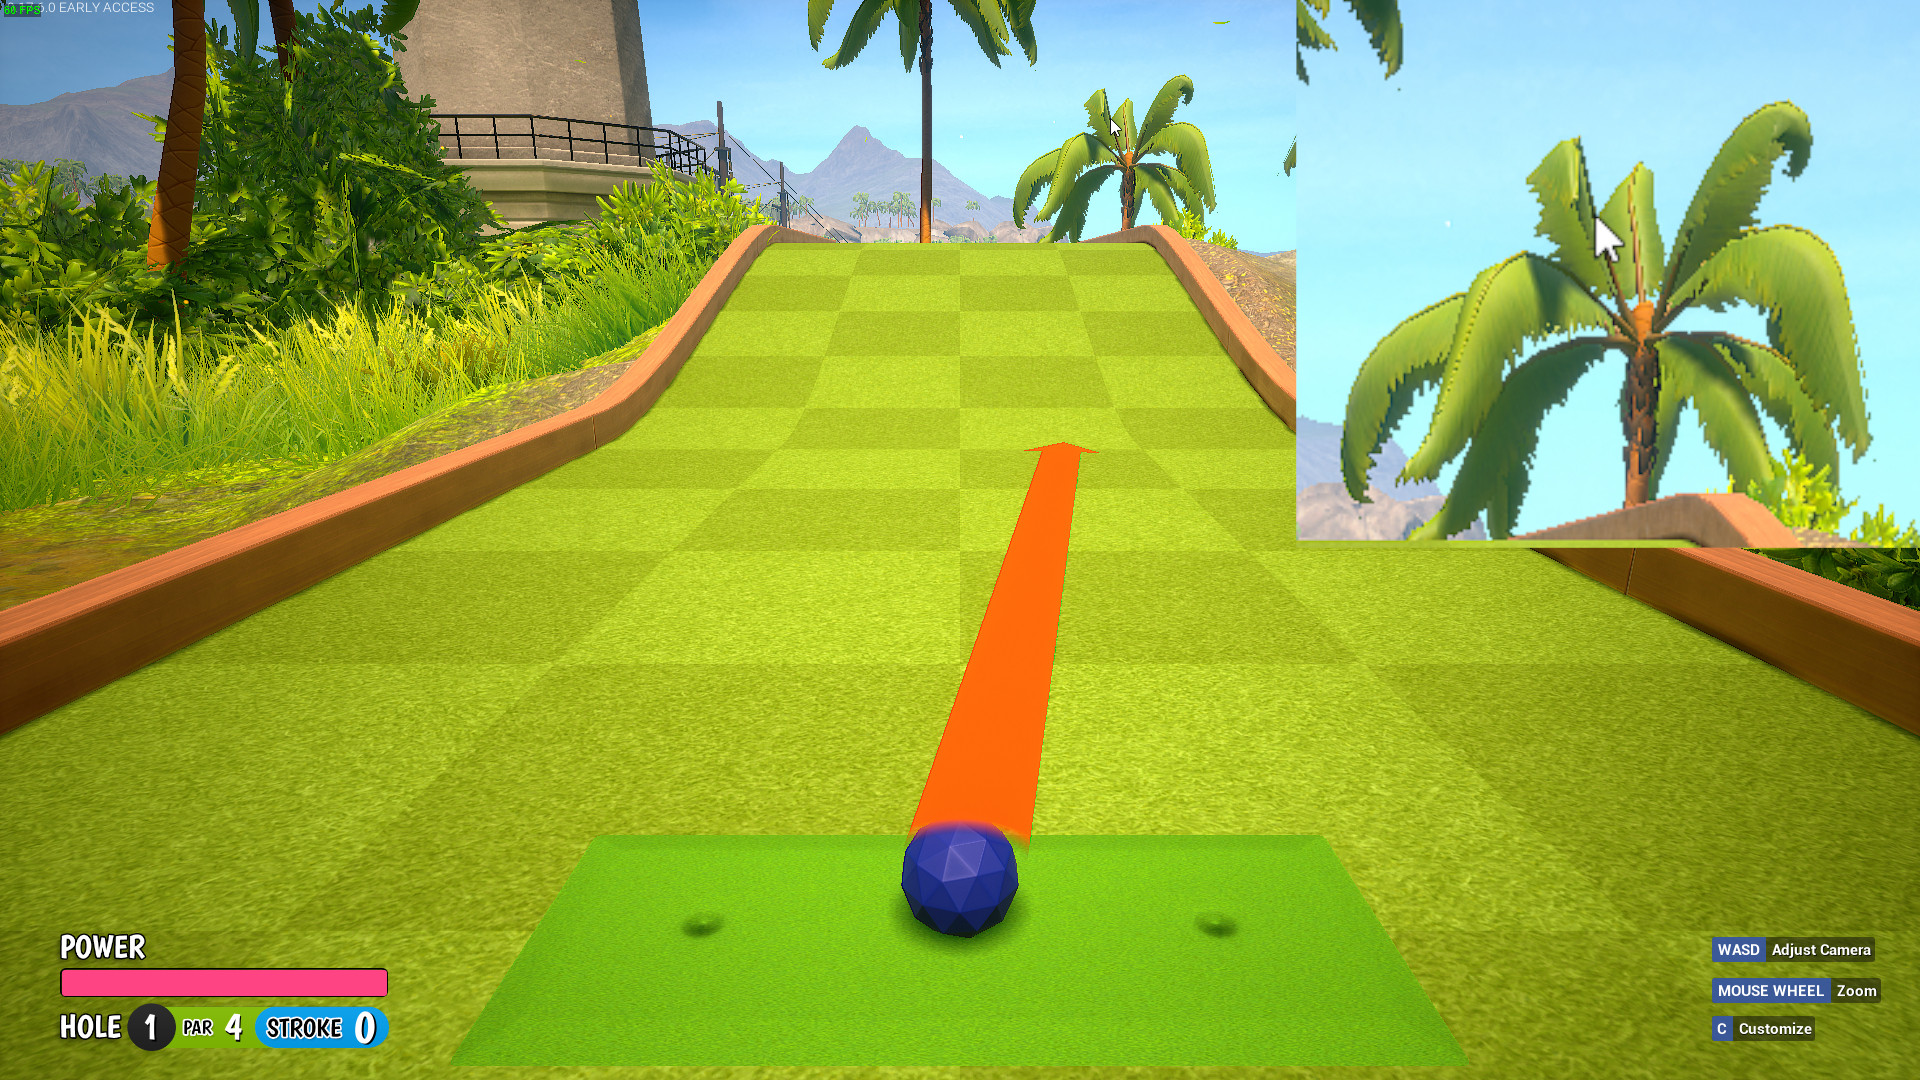
 I intentionally chose the lowest possible power here so if you’re slightly to the side it will go in and not bounce out.
Aim at the hole, power start of P in “Par”
Hole 2 – HIO
Hole 3 – HIO
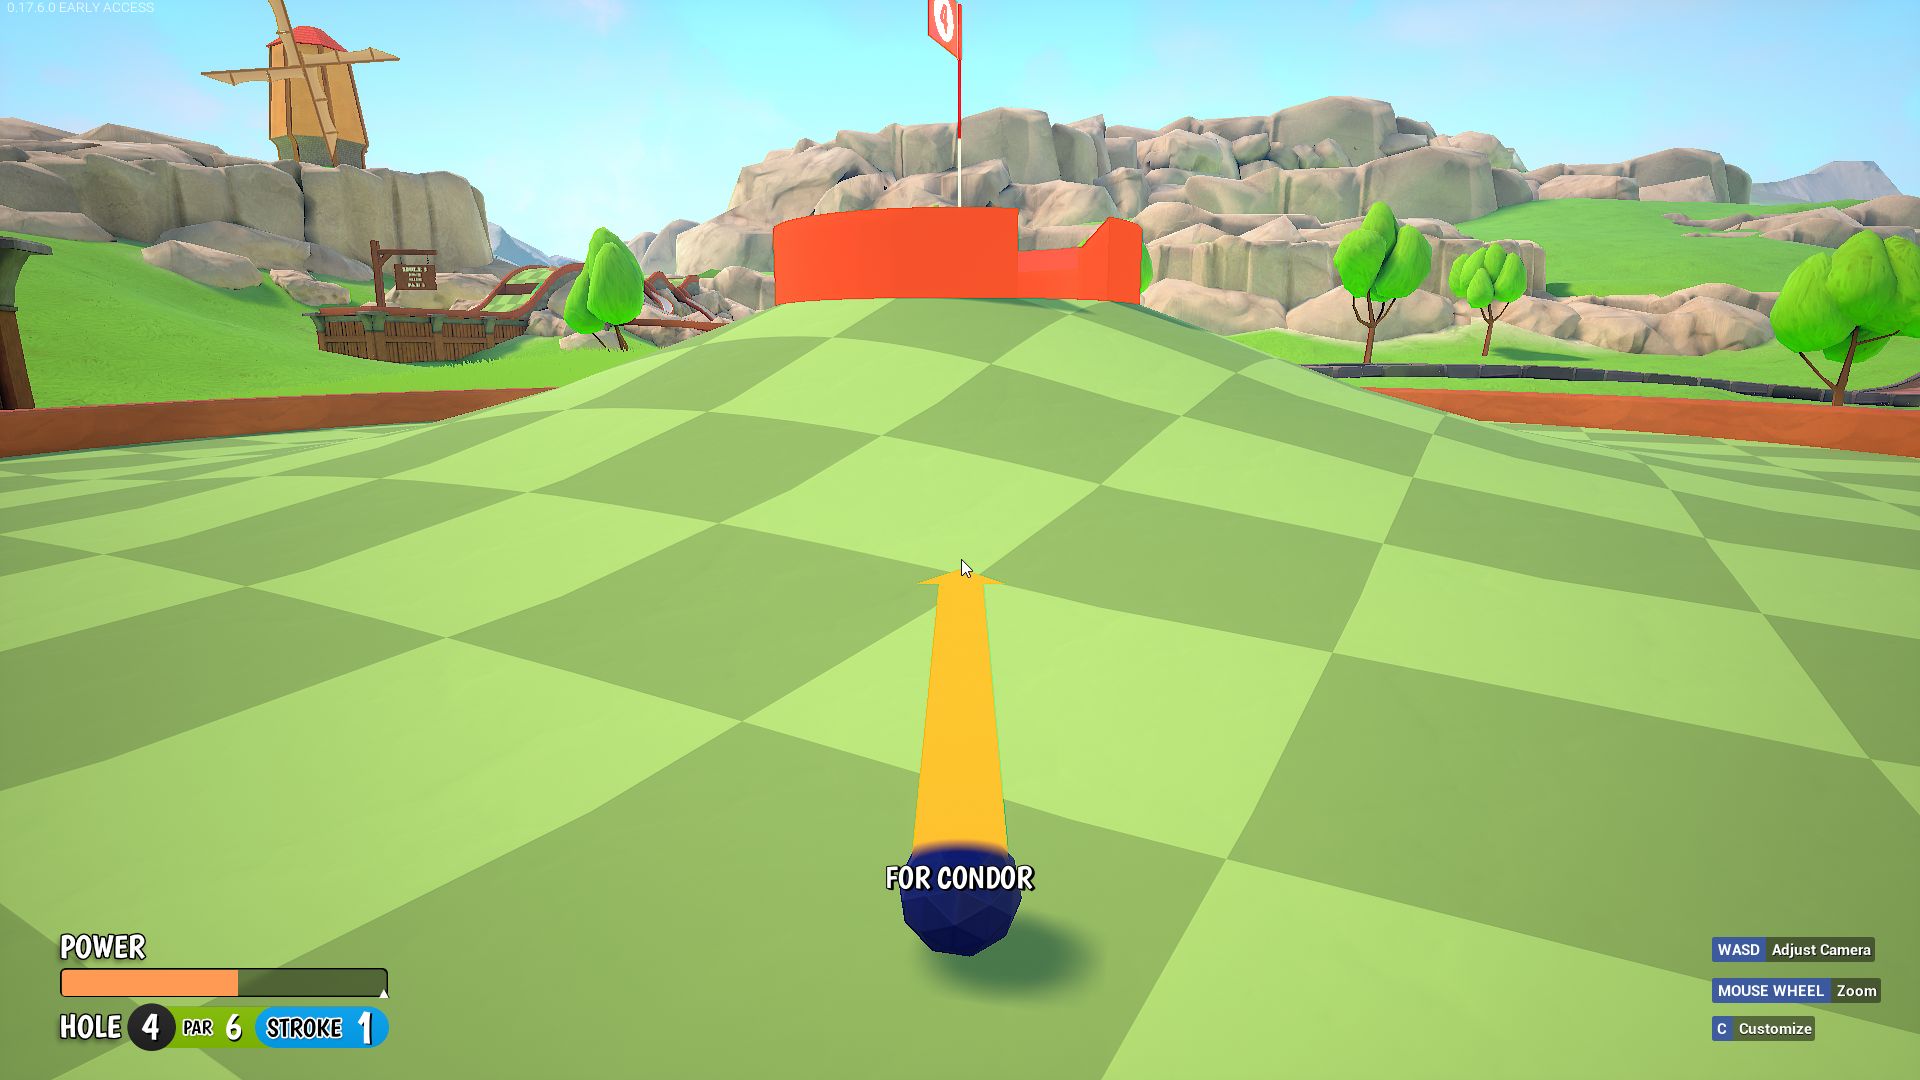
Hole 4 – HIO (no ach)
OR you can try to get it exact to the pixel aim & timing for HIO – This HIO is VERY difficult and is even harder when not host.
Zoom in, place cursor as shown in screenshot & timing as shown in screenshot when shadow is moving left.
To HIO the cursor must be 3 pixels right and 1 pixel down (from being inside the corner of the square) and the timing must be exact.
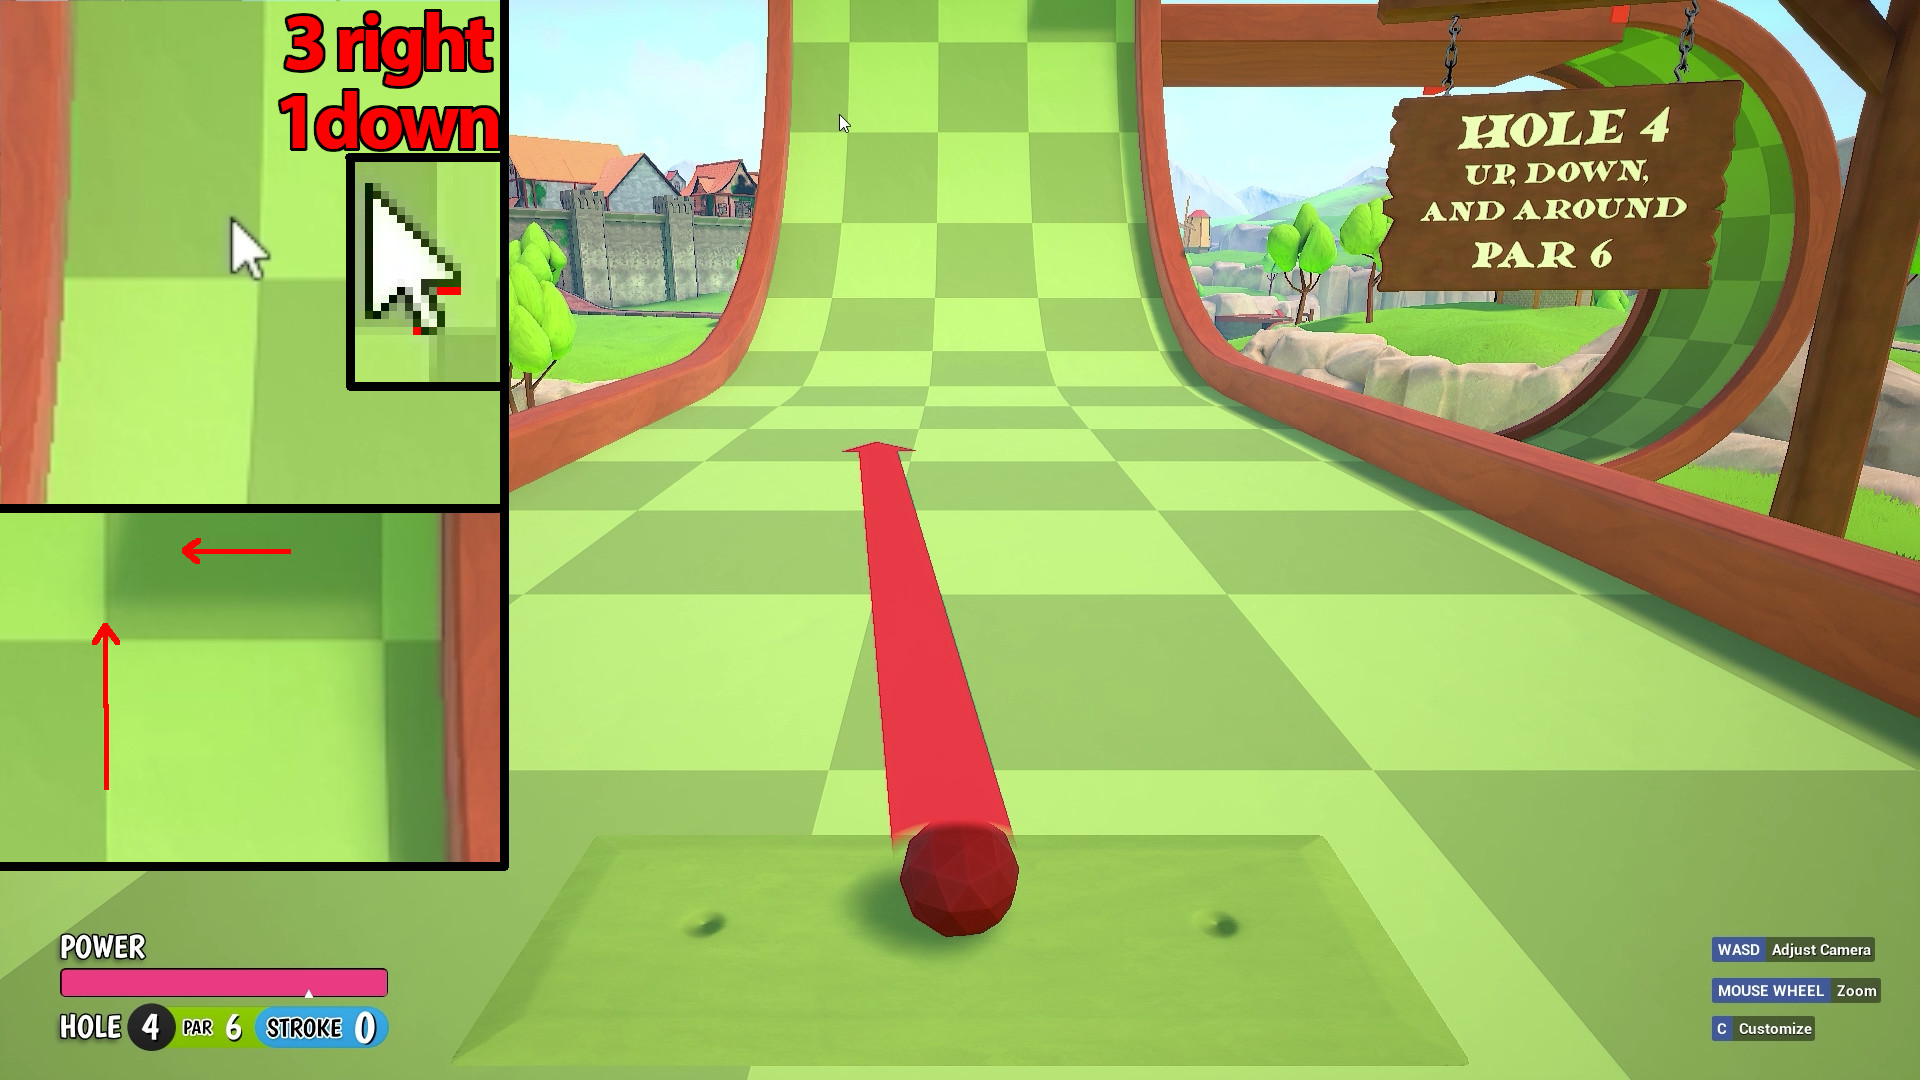 Power 6 in “Par 6” timing as shown.
Hole 5
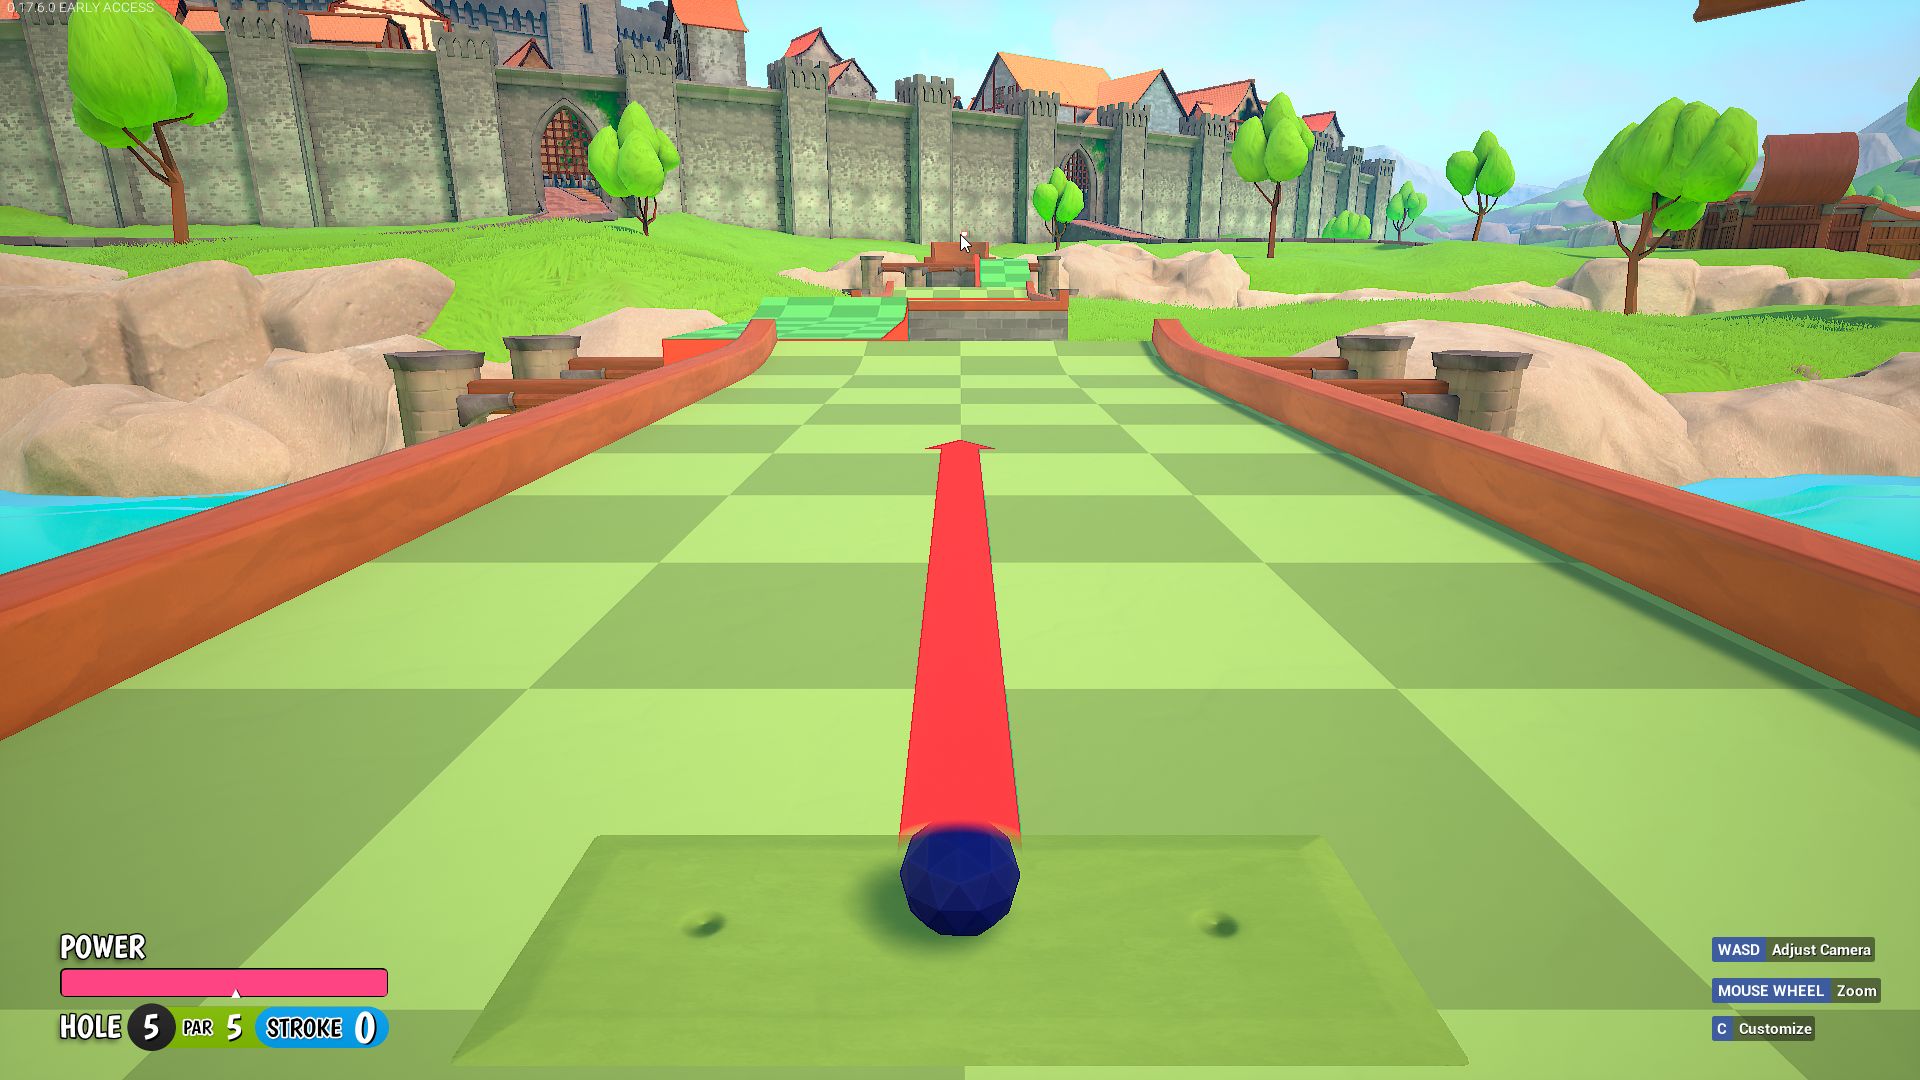 Shoot straight, full power as wall goes down and platform moves right.
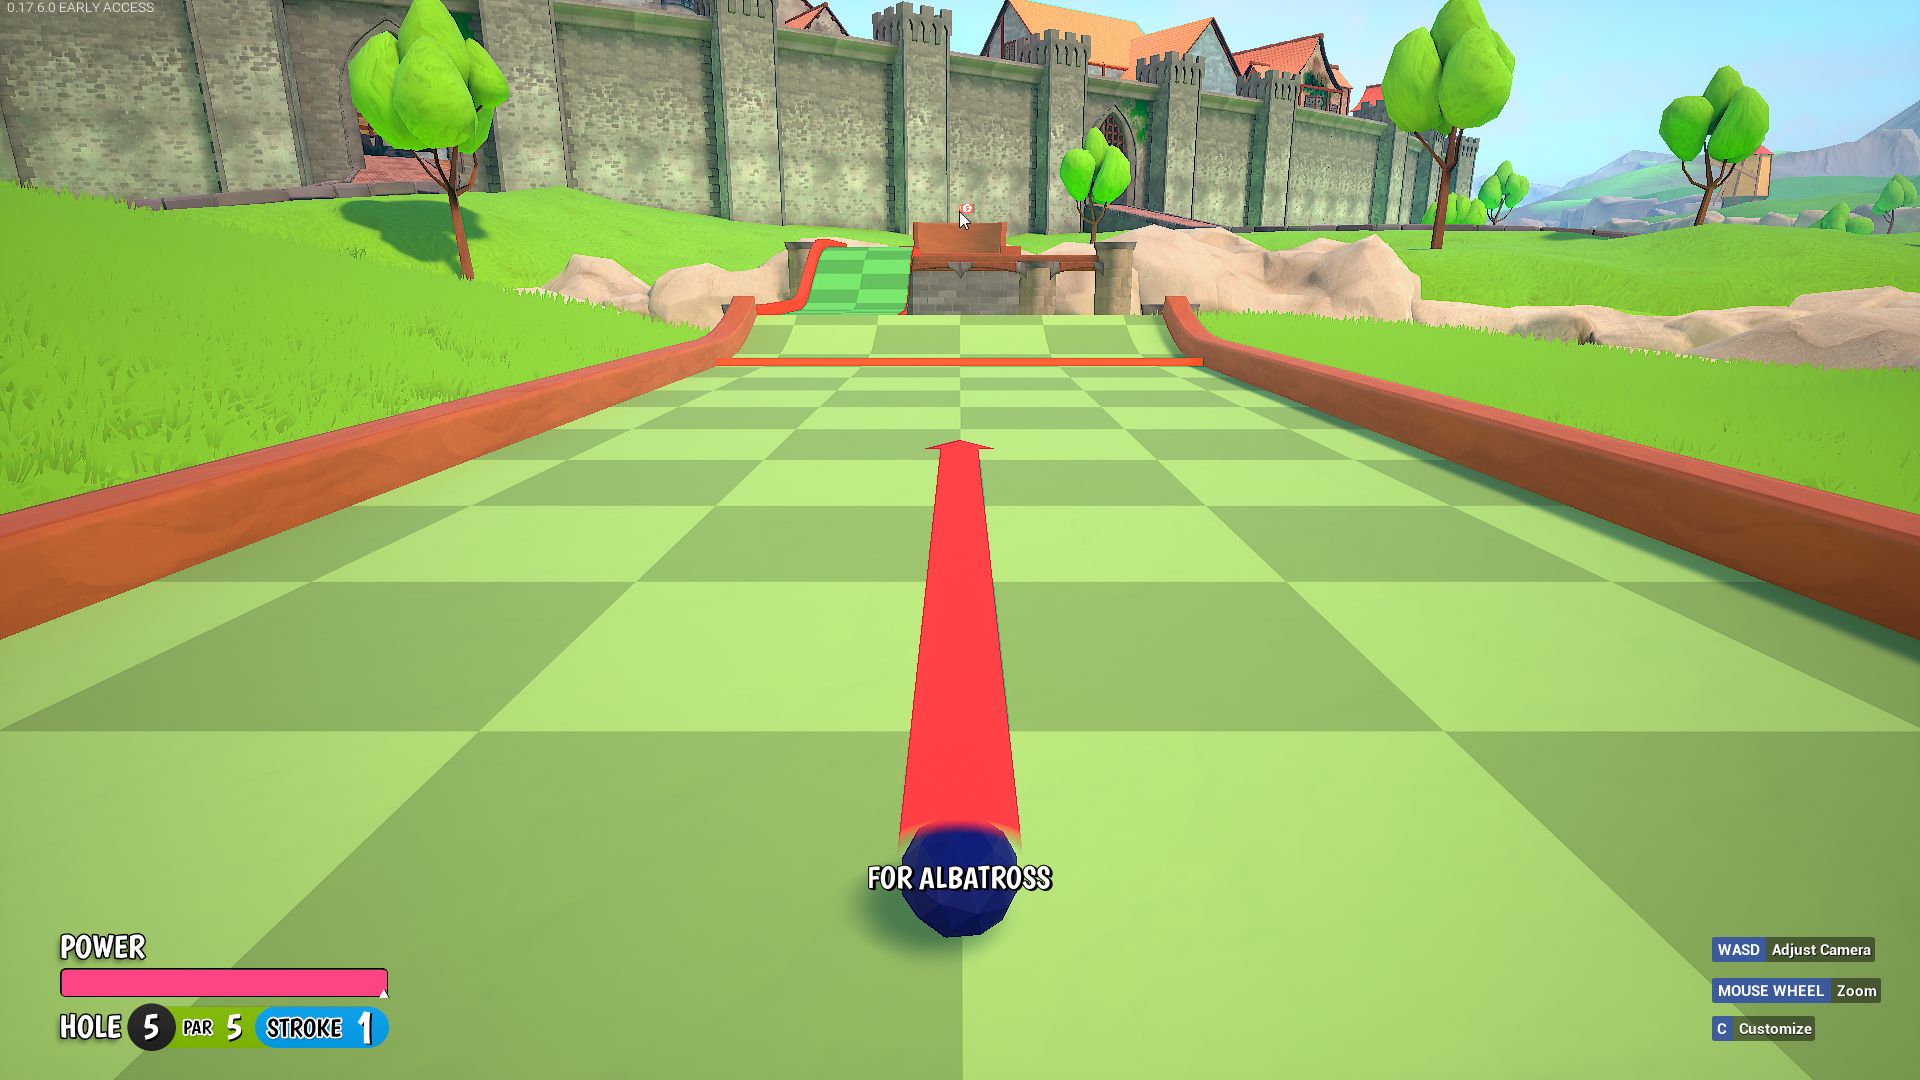
Hole 6 – HIO
1. Regular
Zoom all the way out, do not move camera, place cursor on flag pole,
Power between E & 0 closer to E.
 2. Dunk it for the style points.
Zoom all the way out, do not move camera, place cursor on flag pole,
Power 1/4 of the 0.
Hole 7 – HIO
Place cursor as shown & shoot as shown when blocks are moving apart.
Hole 8 – HIO
Hole 9 – HIO
Power O in “Stroke”
Hole 10
 Shoot straight in line with the ground texture, Don’t forget to time the bridge..
Power end of 6 in “Par 6”
 Aim at the edge of the shadow shown in screenshot, Don’t forget to time the bridge..
Power between T&R.
Hole 11 – HIO
Hole 12 – HIO
Hole 13 – HIO
1. Slower, Safer.
Zoom all the way in, place cursor as shown (or power between 1&3 straight)
Shoot when block moving toward you as it passes wall (also shown in screenshot)
 2. Faster, Riskier.
Zoom all the way in, do not move camera, place cursor where shown in screenshot,
Shoot AS SOON as you see the moving block emerge in the bottom left moving away from you.
Hole 14 – HIO
Hole 15
https://youtu.be/ptGUvkHDJGo
And that wraps up our share on Tower Unite Pro MiniGolf: All HIO, Map, Level, & Hole Guide. If you have any additional insights or tips to contribute, don’t hesitate to drop a comment below. For a more in-depth read, you can refer to the original article here by Codyumm, who deserves all the credit. Happy gaming!