Looking to conquer all the achievements in Retro Mystery Club Vol. 1: The Ise-Shima Case? Look no further! This guide will provide you with quick and easy steps to obtaining every achievement in the game. Get ready to level up your gaming skills and become the ultimate retro mystery master.
Introduction
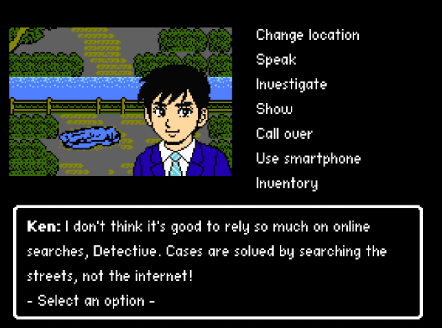
Wise words from Ken.
This guide will detail how to obtain each of the 12 achievements in the game. I have not included a full walkthrough for the story itself, as sometimes there may potentially be multiple ways to progress the conversation to the desired outcome, and certain dialogue may be optional. If you’re familiar with games like Famicom Detective Club, this game plays pretty much identically–you have a menu on the right containing various commands, such as changing location, speaking to the person on the screen or asking them questions, showing them evidence and so on. There is also the option to Use smartphone which contains various functions, including the ability to save via the Case notebook command.
You can progress the story easily enough by going through and using each relevant option in the menu logically, though sometimes you may need to pick the same command repeatedly on the same topic to progress the conversation and learn more information. Your helpful detective colleague Ken will also often offer suggestions on what to do. In any event, if you’re stuck you can always resort to brute forcing it by continually going through all the options again and again. Hopefully that won’t be necessary!
The story spans 9 days, so this guide is split up into the days that have achievements available during them. There is one achievement not fixed to a particular day, and is instead from playing a game on your smartphone.
If you spot any errors in this guide, please let me know and I will update it.
Ninja Kai Master
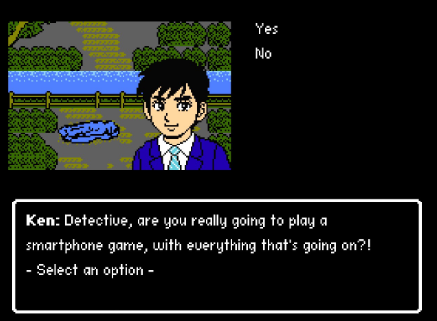
This achievement can be obtained on multiple days by choosing Use smartphone > Game. However, your access to this game is somewhat sporadic, as sometimes Ken will prevent you from playing it.
The game itself is quite simple: you use spacebar to jump and either the arrow keys or WASD for movement, and the objective is to jump on clouds to try and get as high as possible. It’s game over if you fall off the bottom of the screen (which is gradually scrolling), or if you collide with an enemy. For the achievement, you will need to reach a score of at least 1500m. I spent an embarrassing number of attempts trying to get this, so if you’re anything like me you may be faced with this screen a lot:
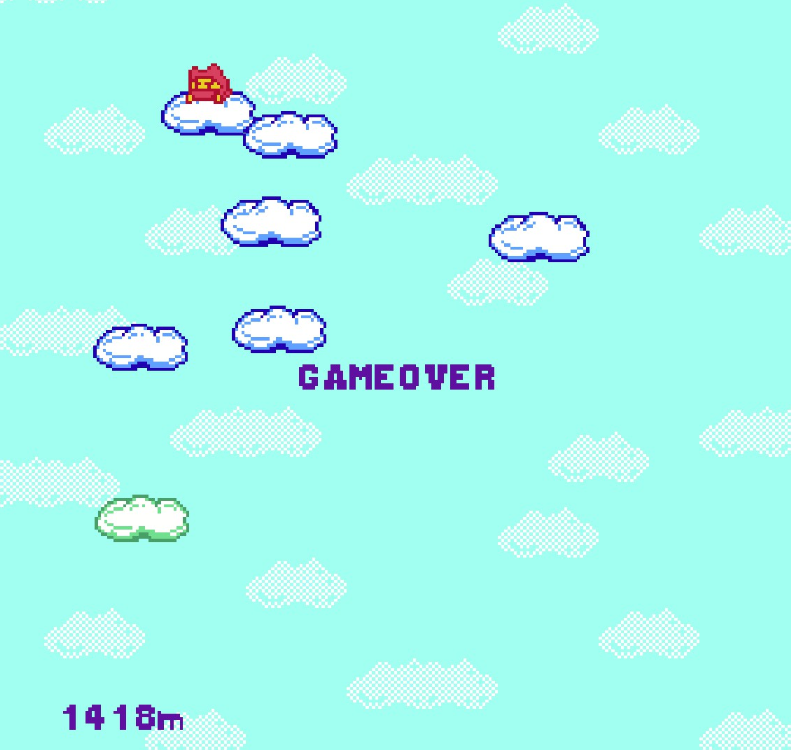
There are 4 types of cloud:
- Blue Clouds: These are the standard, “safe” type of cloud you can jump on.
- Blue Clouds with an Enemy: A blue cloud, but with a “friend” sat on top. You can land on these, but it’s a bit fiddly as you have to stick to the edges because if you come into contact with the enemy sat on the cloud it’s game over. Don’t be over-eager to jump onto blue clouds before they’ve properly come into view at the top of the screen, as you could be in for a nasty surprise!
- Green Clouds: These clouds will immediately begin to plummet the moment you land on them. It’s probably best to avoid them where possible, but they can make for good stepping stones to reach the next blue cloud.
- Orange Clouds: These clouds will slowly phase in and out of existence–just be careful with your timing when jumping on these, to avoid landing on them right before they disappear.
Aside from the enemies that can be found sitting on clouds, there is also one type of flying enemy that you need to avoid.
Some clouds will stay still, whereas others will move horizontally, sometimes on a slightly upwards or downwards trajectory. Clouds will have varying movement speeds. Sometimes the cloud that is initially highest on the screen isn’t necessarily the best option to go for, as another cloud may end up higher depending on its trajectory. If you’re stood on a cloud and another cloud phases through the same spot, the game seems to often transfer you to the cloud that is moving upwards.
Once you’ve got a score higher than 1500m, you’ll earn the achievement Ninja Kai Master.
Day 1
You can get the first achievement almost immediately on Day 1 by continuously asking Ken for his alibi.
How could you doubt him?
Call over > The person who found the body
5 x Speak > Alibi
At this point, Ken will continue to repeat the same line “Why does everyone think I did it? Based on what?” and the achievement should trigger.
This achievement should trigger automatically once you complete Day 1.
Day 3
You should trigger this achievement automatically whilst taking to Reiji Hamazuki in the parking lot outside Michiru spa on Day 3, after showing him the photo of the victim and then asking some follow-up questions.
For some reason this achievement randomly popped up for me during the conversation with Nishizawa in Ozaki near the end of Day 3.
However, I think it is supposed to trigger a little afterwards once you’re in Pefru bar, at the very end of the day. Investigate the bar counter, and you’ll learn that the girl behind the bar is called Akiko. Call over Akiko and you should be able to hear a long story from her, which I assume is the intended trigger for the achievement.
Day 4
When you enter Le Bijou during Day 4, immediately Investigate > Receptionist. Ken will finally read their nameplate, earning you this achievement.
Day 5
Also, if you haven’t already obtained the Ninja Kai Master achievement, the start of Day 5 is a good opportunity to play the game on your smartphone.
For this achievement, at the start of Day 5, do not choose Use smartphone > Contacts. Instead, progress the story as normal, and eventually you’ll end up at Michiru spa. Do the following:
Ask > Hamazuki
Change location > Men’s baths
Ask
Change location > Outdoor baths
Eventually, you’ll be in the spa with Kana.
Now:
3 x Leave the bath
On the third time, she will say “Detective? Just a few more minutes. If you hang in there, you might win.” Let the screen progress so that text is still showing on the screen, but with the – Select an option – showing too along with the menu. Now, wait 2 minutes and you’ll see an event, and the achievement will unlock.
Reload your save from the start of Day 5. For these two achievements, you will need to immediately do:
Use smartphone > Contacts
Ken should send a text to Tamami.
Carry on playing through the day as before, and the scene at Michiru Spa should play out the same way as before, except this time you’ll end up in the spa with Tamami. At this point, the achievement If You’ll Excuse Me… should trigger.
Now:
3 x Leave the bath
6 x Wait for Kana
At this point, the text will say “Tamami seems to be dizzy and is about to drop her towel.” Again, allow the screen to progress so that the text is still showing on the screen, but with the – Select an option – showing too along with the menu. Wait for 2 minutes, and eventually you’ll see another event, and the In Hot Water achievement should trigger.
Day 7
Once you arrive at the Italian restaurant on Day 7, just make sure to use your smartphone’s search engine to look it up and you’ll trigger this achievement.
Day 9
During Day 9, you will end up at an abandoned factory. There are multiple dead ends in the factory which have doors you can open, however most are empty. You can get this achievement by doing the following:
Change location > Inside the factory
5 x Move forward
Face right
3 x Move forward
Face left
Move forward
Open > Door
Investigate > Inside
In case you’re lost, here’s a map of the area: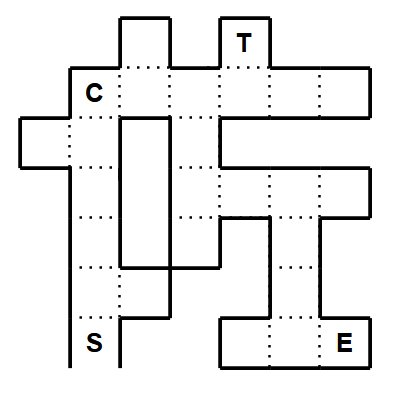
S = Start location once you’ve changed location to inside the factory
C = Cat
T = Treasure
E = End (where you need to go for the story)
This achievement should automatically trigger once you complete the story.
And that wraps up our share on Retro Mistery Club Vol.1 The Ise-Shima Case: Retro Mystery Club Vol. 1: Achievement Guide. If you have any additional insights or tips to contribute, don’t hesitate to drop a comment below. For a more in-depth read, you can refer to the original article here by Gláe Bolg, who deserves all the credit. Happy gaming!
