In this guide, we will be exploring the process of creating custom maps for Half-Life using a tool called Trenchbroom. We will cover how to set up Trenchbroom with Half-Life and go over some of the basic functions of Trenchbroom. So, if you’re ready to take your Half-Life gaming experience to the next level, let’s get started!
Setting up Trenchbroom
Trenchbroom can be installed from here: https://trenchbroom.github.io/
After installing Trenchbroom, open it up and select “New Map…”
A new window will pop up, in that window select “Open Preferences”: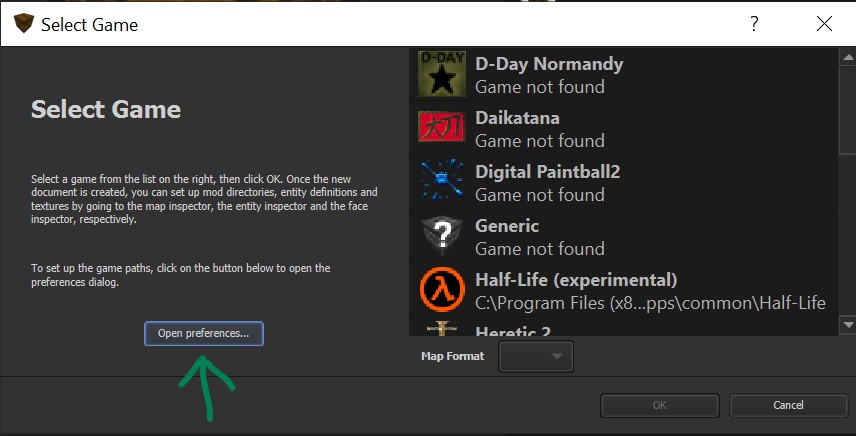
Next, select “Half-Life”, then set the game path to the Half-Life installation directory. If Half-Life is installed on Steam on Windows, this path is “C:\Program Files (x86)\Steam\steamapps\common\Half-Life”.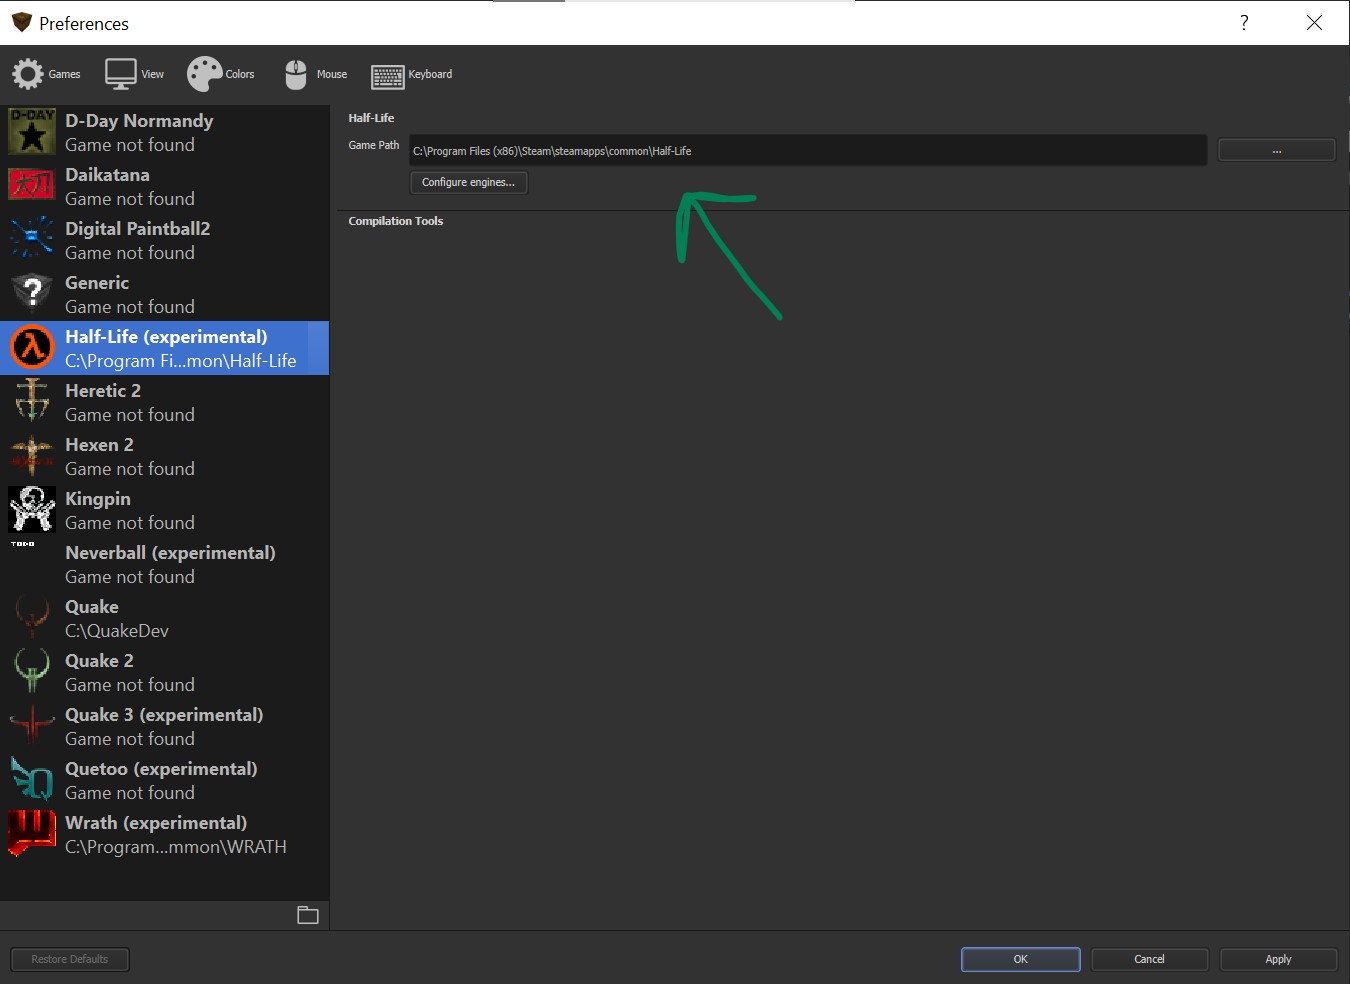 Finally, select “apply”, then “done”!
Setting Up FGD Files
(NOTE: You will need to scroll down a bit to the “compile tools” section and select “Vluzacn’s ZHLT v34)
Vluzacn’s ZHLT also comes with an FGD file that comes with extra entities that are not included by default in Trenchbroom. To add these, complete the following steps:
1. Open the folder that you installed Trenchbroom at, then navigate to “games -> Halflife”
2. Create a new file in a text editor of your choice, and call it halflife_zhlt.fgd
3. In that file, add the following:
@include “HalfLife.fgd”
4. Close your new halflife_zhlt.fgd file and navigate to GameConfig.cfg. In line 18 change the following from:
“definitions”: “HalfLife.fgd” ,
“defaultcolor”: “0.6 0.6 0.6 1.0”,
“setDefaultProperties”: true
},
to:
“definitions”: “halflife_zhlt.fgd” ,
“defaultcolor”: “0.6 0.6 0.6 1.0”,
“setDefaultProperties”: true
},
(NOTE: Make sure “halflife_zhlt.fgd” is surrounded by square brackets. I could not add square brackets in this guide because of Steam’s weird formatting)
5. Drag the installed zhlt.fgd into the Halflife folder, where the HalfLife.fgd is at.
Doing this will load the default entities that come with Trenchbroom plus the entites added in by ZHLT. This is what the Halflife folder should now look like: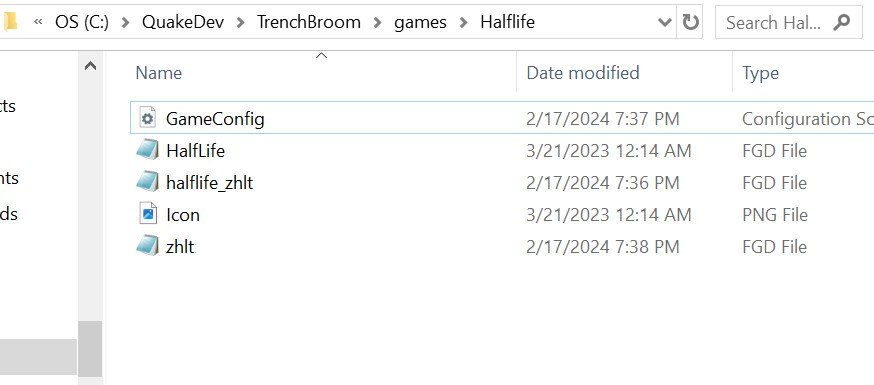
Now you will have access to all the needed entities to make good Half-Life levels!
Trenchbroom Basics
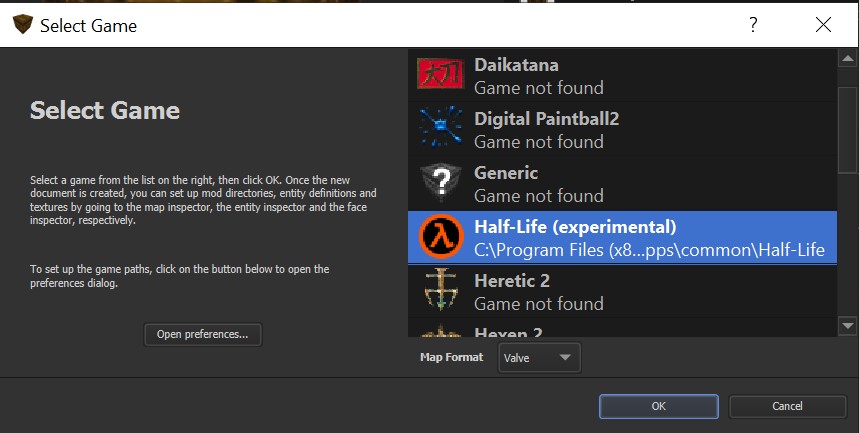 Make sure that the path to the game file is shown for Half-Life, if “Game not Found” is displayed beneath it, go to the “Setting up Trenchbroom” part of this guide and follow the steps there.
After hitting “ok” you should see this window: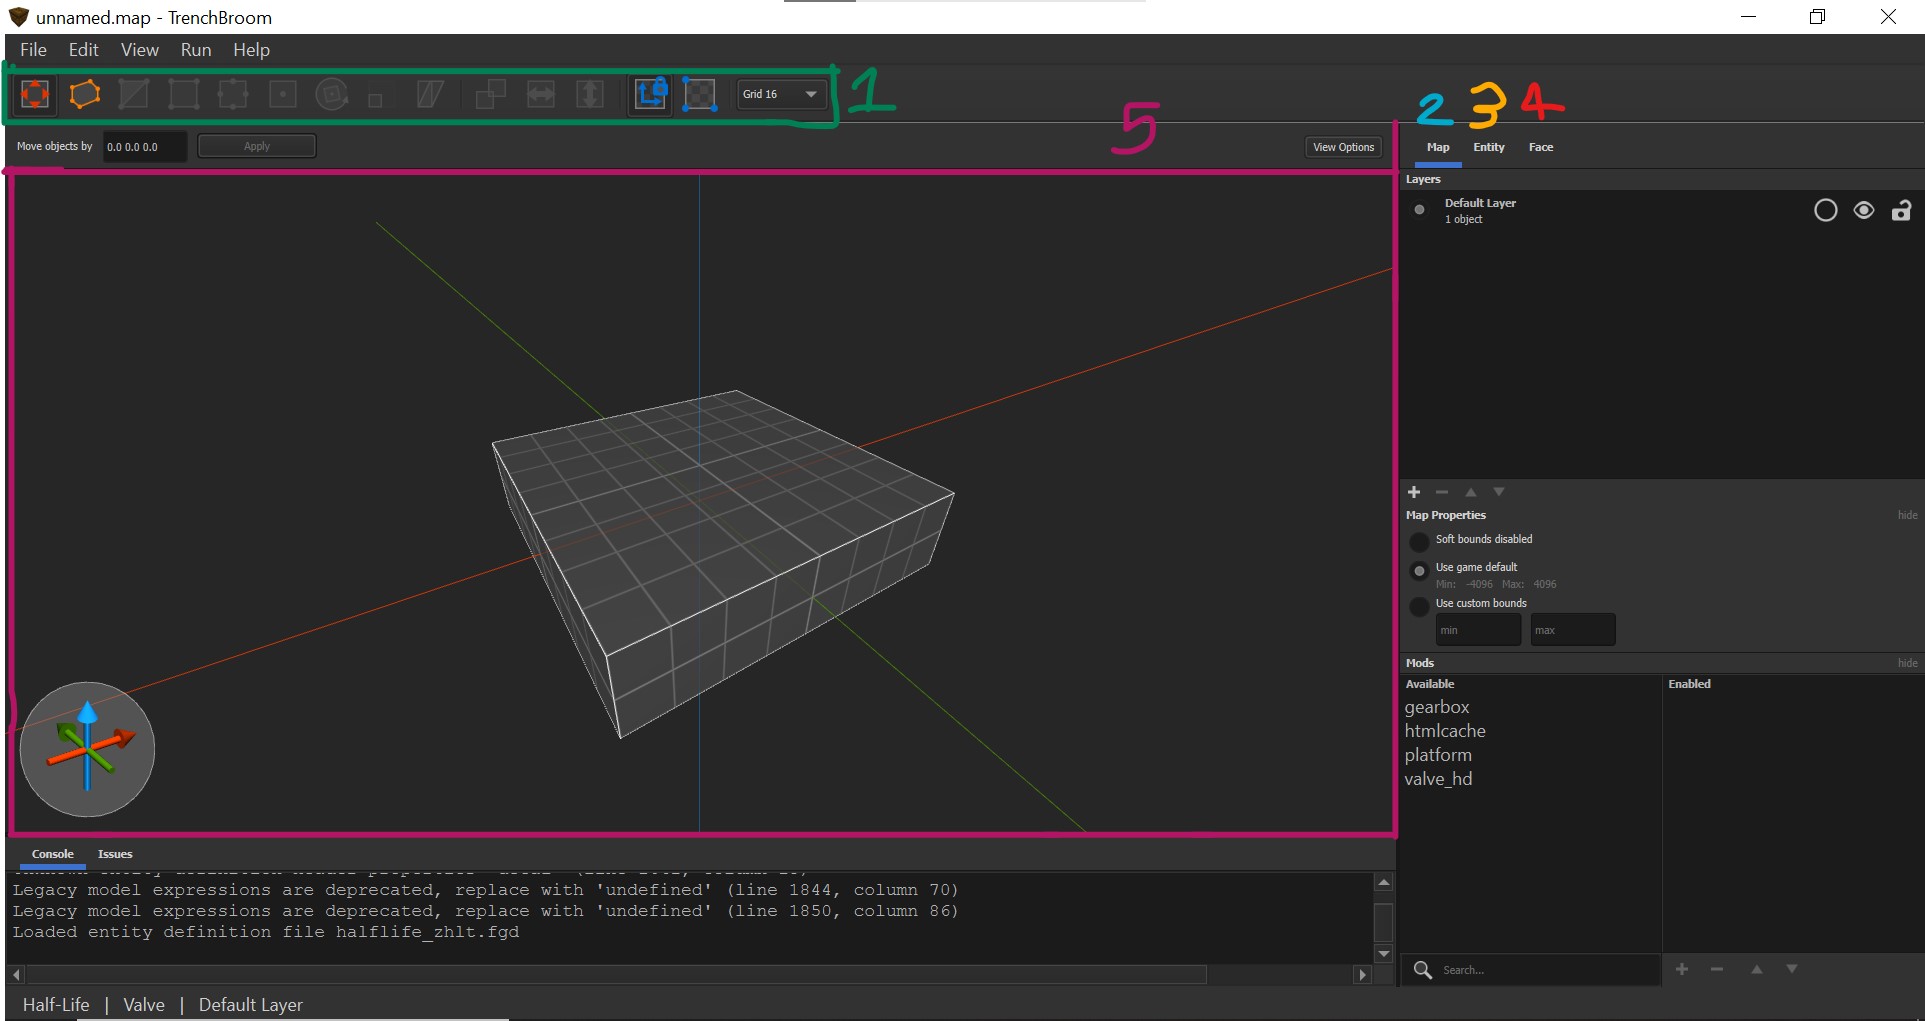 Here is a quick rundown of the different menus in Trenchbroom:
1. Brush Editor Panel – These are tools to manipulate brushes in the level and create new ones.
2. Map Window – This window, when selected, is how you edit map properties, such as layers, similar to something like Photoshop, or change what music is playing.
3. Entity Window – This window, when selected, is where entities, such as monsters, weapons, and lights can be put into the level and is also where individual entity properties can be changed.
4. Face Window – This window, when selected, is where textures can be applied to brush faces.
5. Editor Window – This window is where the map is actually manipulated.
To begin, let’s import a set of textures by following these steps:
1. Navigate to the “Face” window.
2. Select the small “+” at the bottom of the “Texture Collections” panel.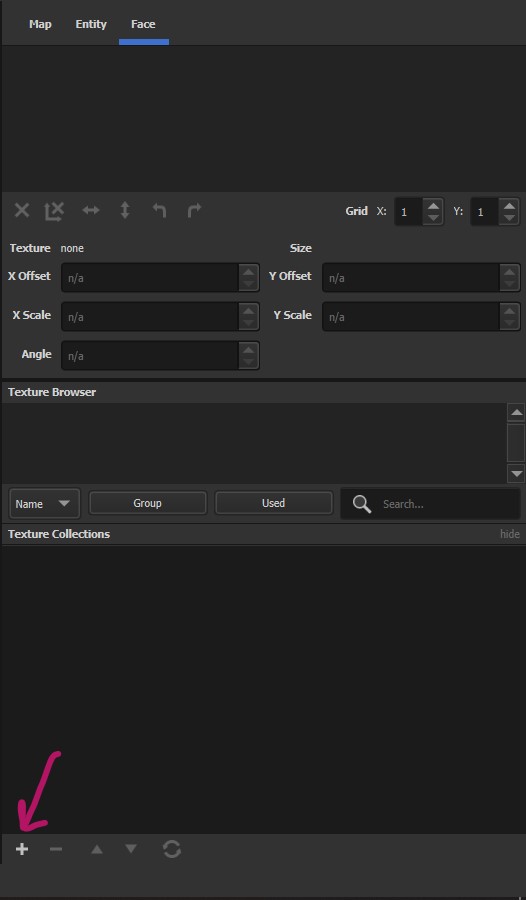 3. This should open up your file explorer into the Half Life game folder, where there are several .wad files. You can load as many or as few of these wad files as you like, but for now we’ll load the “halflife.wad” file.
4. You should now see several textures pop up in the “Texture Browser” panel of the Face window.
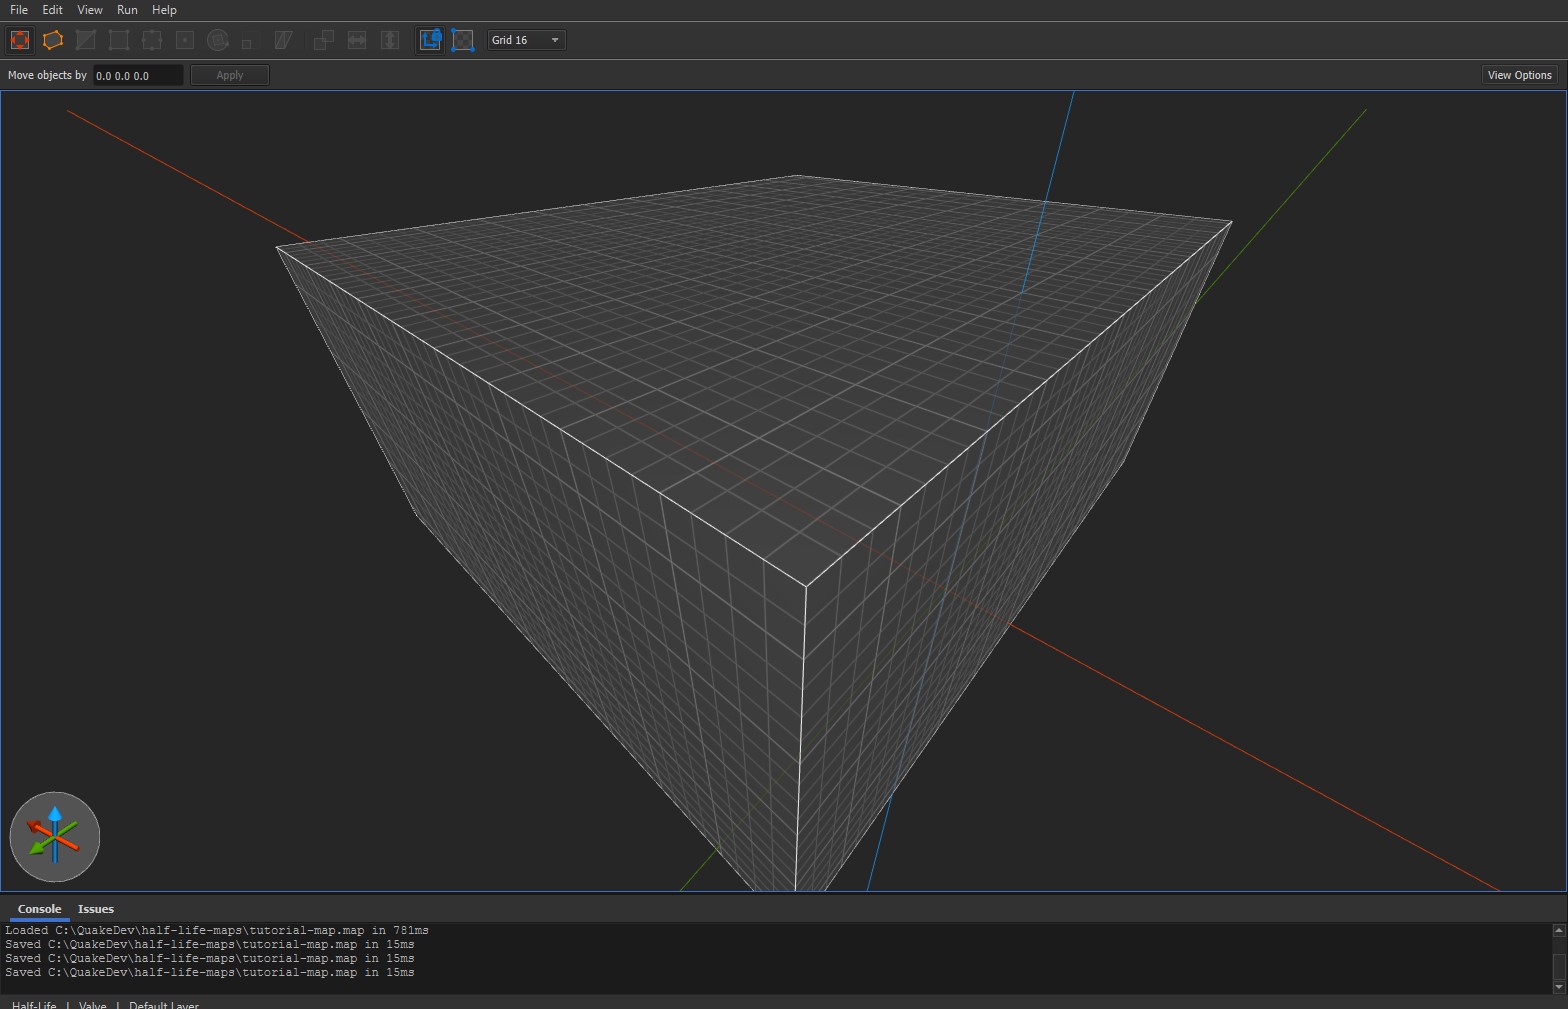
Next, we should construct a room for the player to walk around in. The map should have a rectangle already made in there. Select that rectangle with the right-mouse button. While the rectangle is selected, press shift, then select the top face on that rectangle. If you hold the right mouse button while holding shift, you can drag that face up to make the rectangle taller: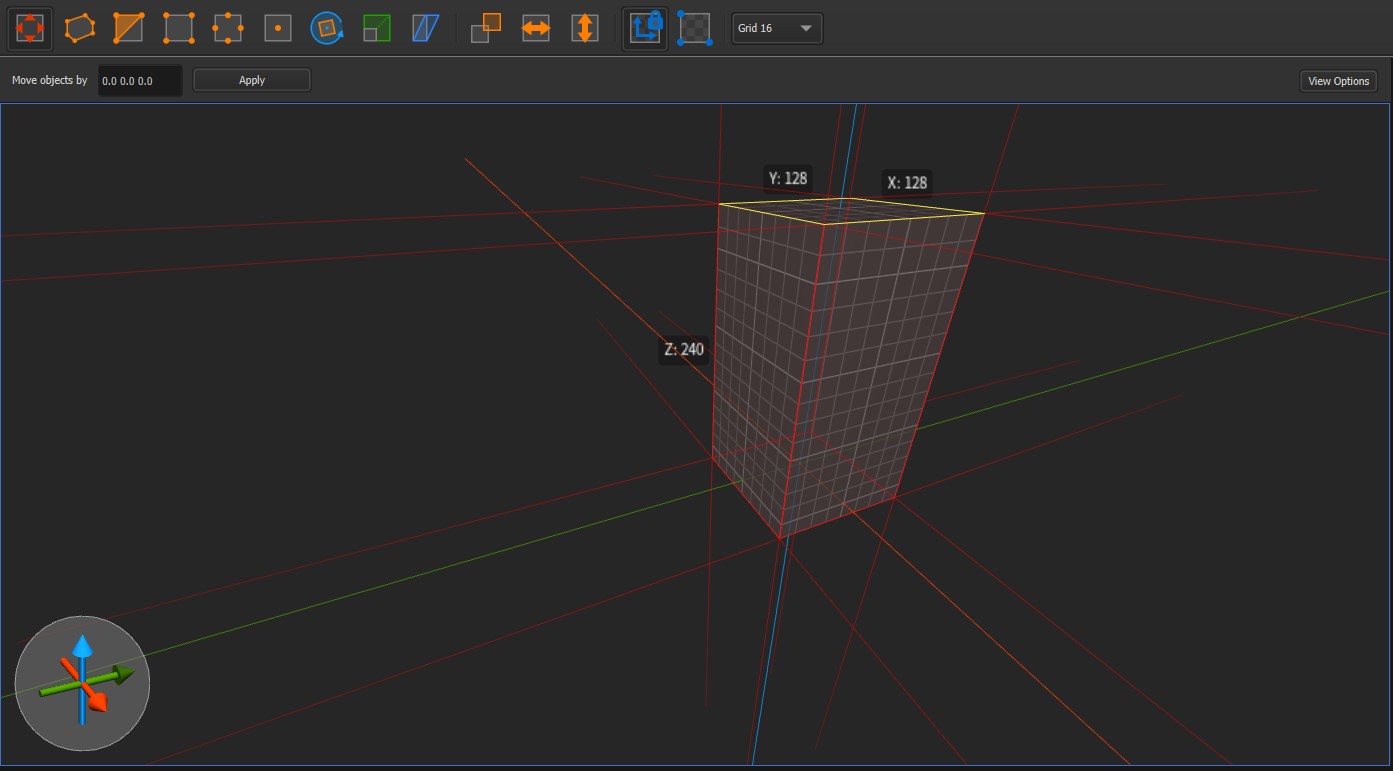 This rectangle is referred to as a Brush in Trenchbroom, and creating maps is largely made up of manipulating these brushes. Try making the brush roughly room sized by using the technique explained above:
 Next, we will need to hollow out the rectangle to become an actual room for the player to walk around in. To do this, select the rectangle, then select “Edit -> CSG -> Hollow”:
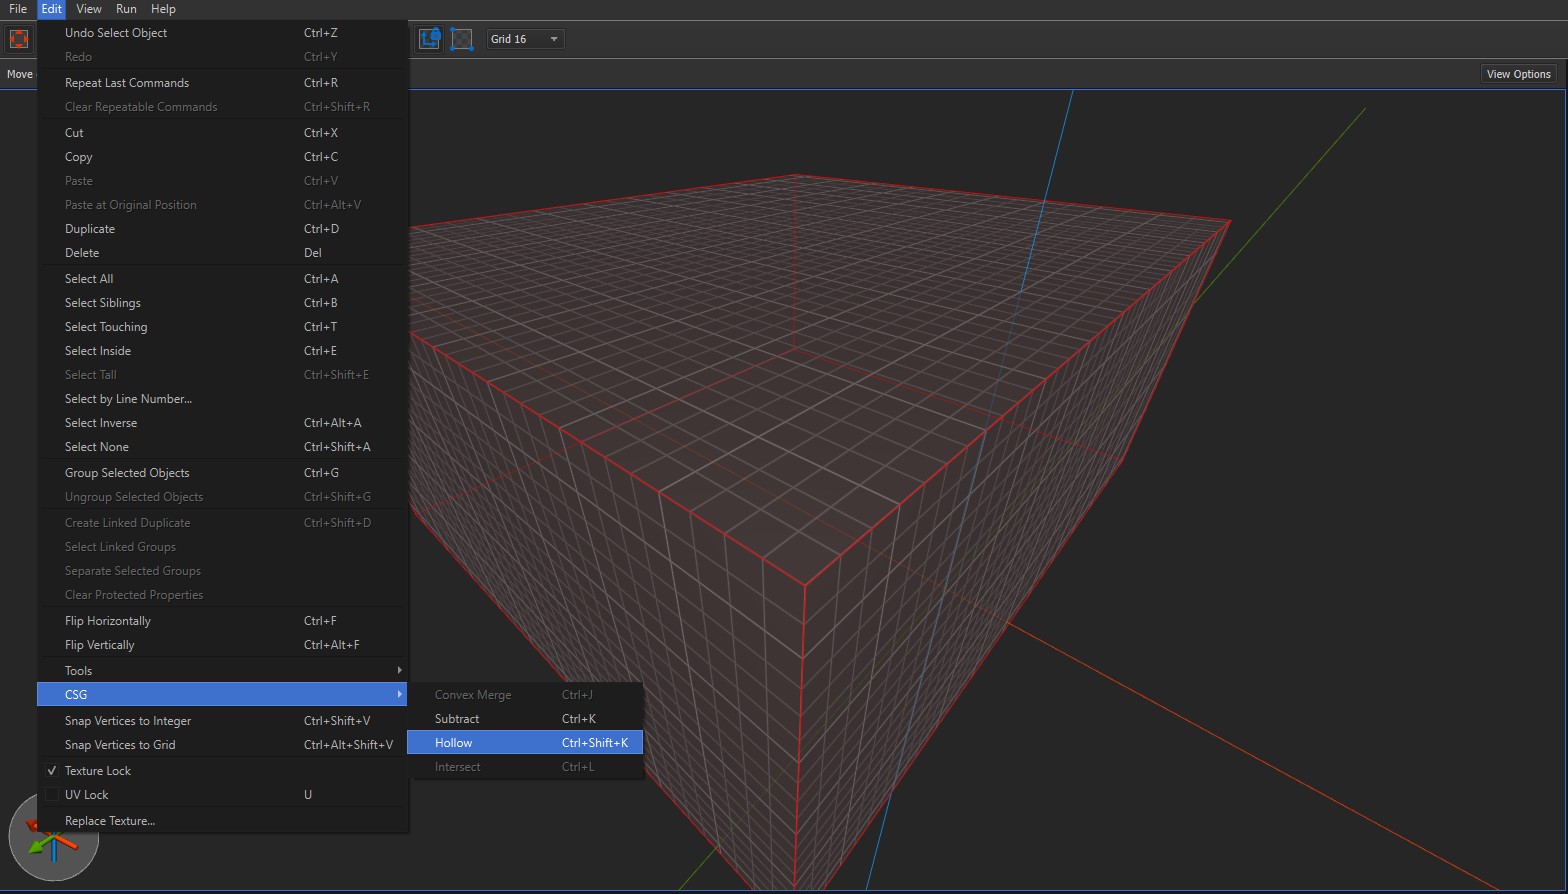 This should split this rectangle into six smaller ones that form a room. To look inside the room, simply hold down right mouse and use WASD to navigate:
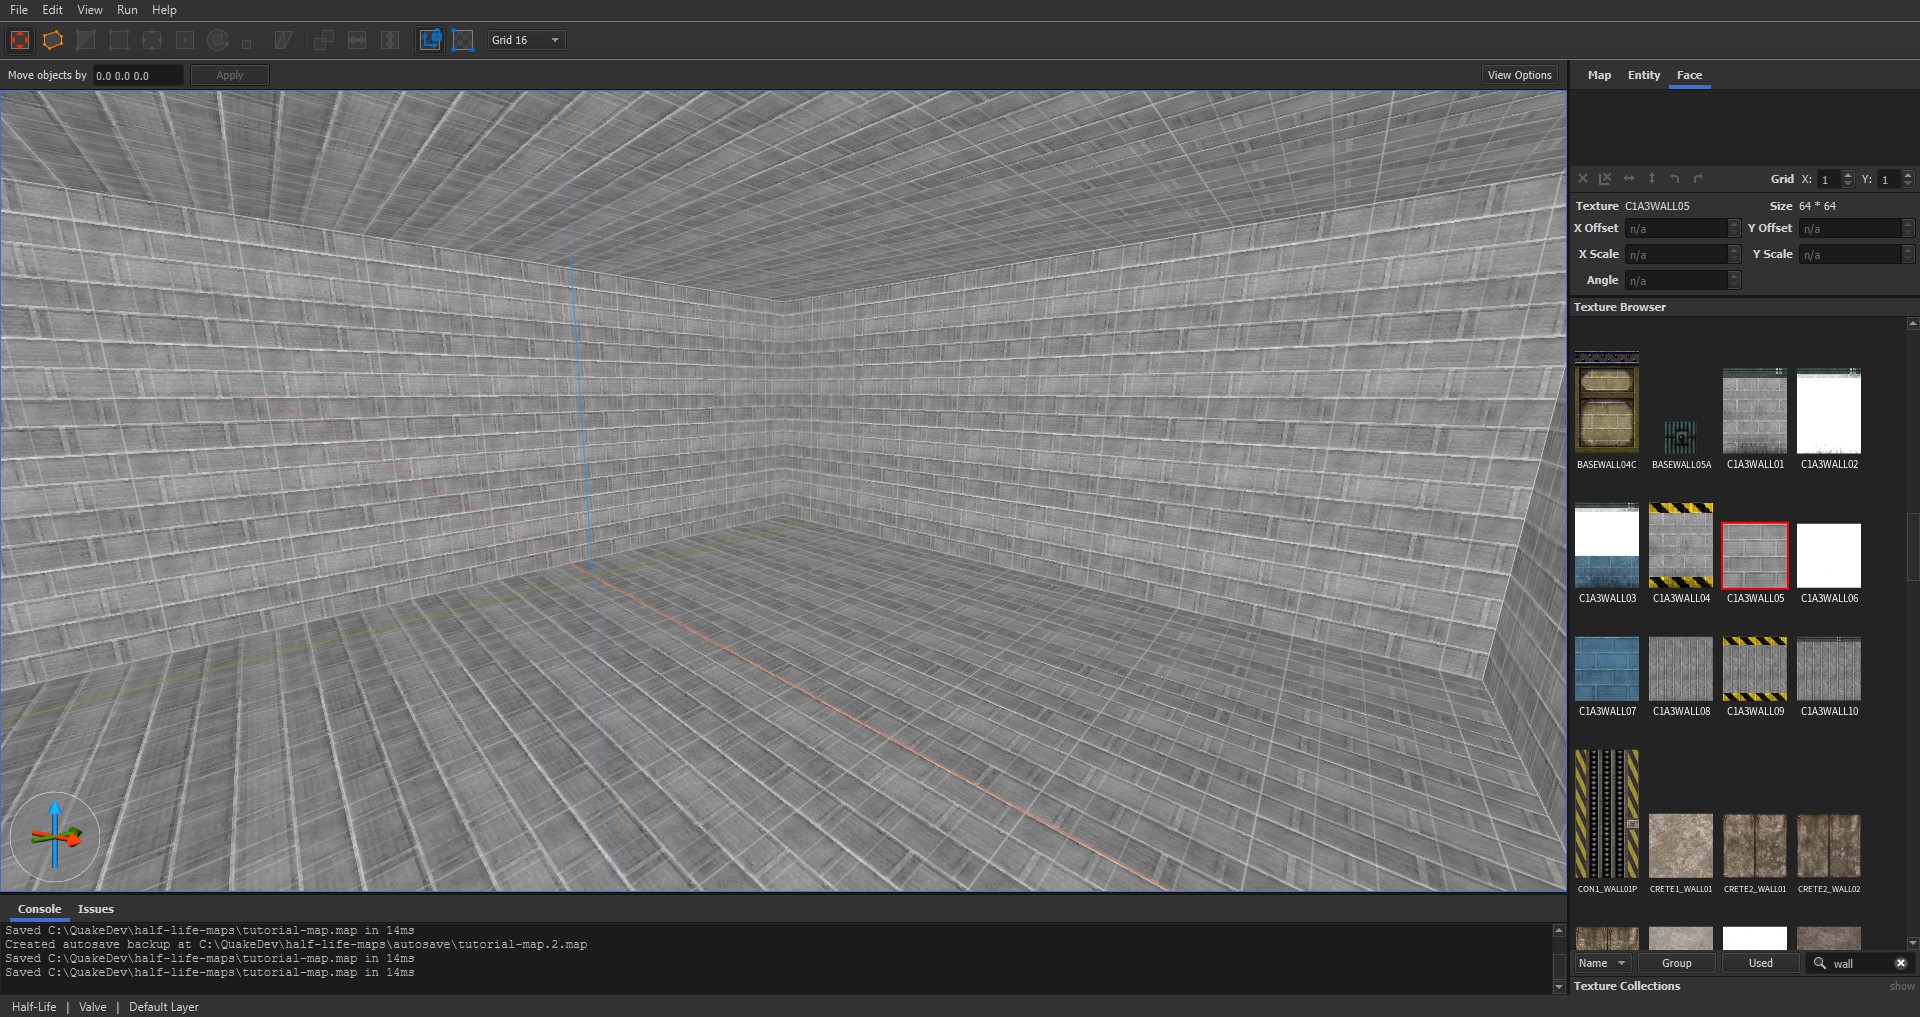
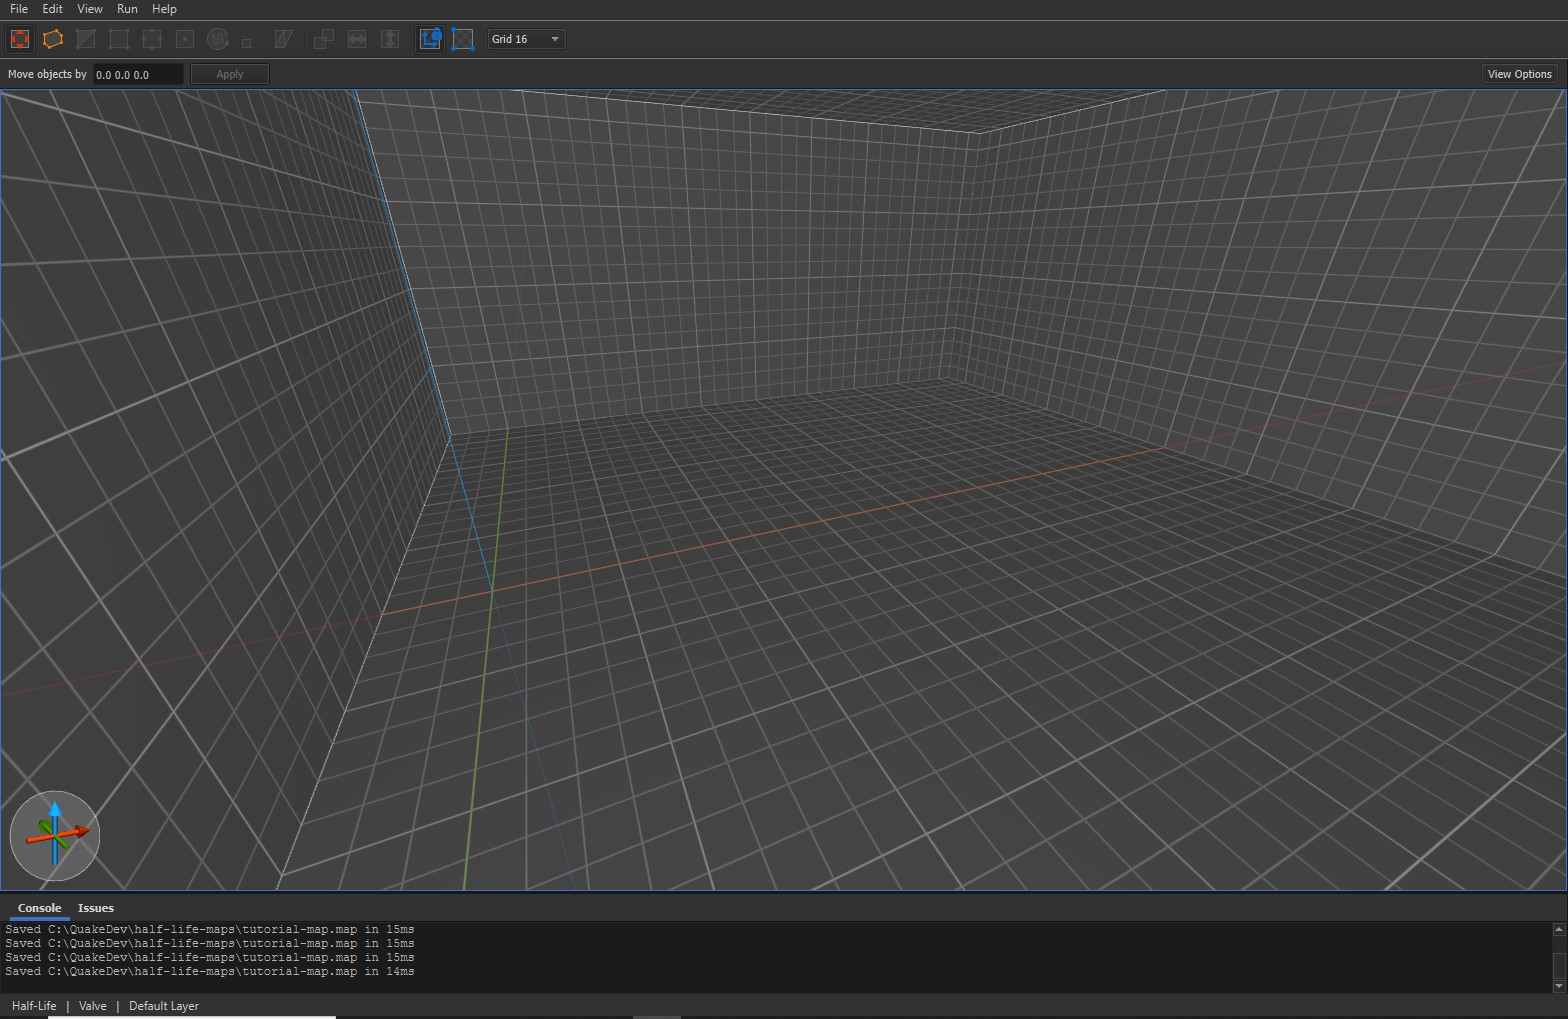 Now, when making Half-Life maps, every brush must have a texture, otherwise the map will not run, so let’s texture our room! To do this, select one of the walls, then navigate to the “Face” tab on the right:
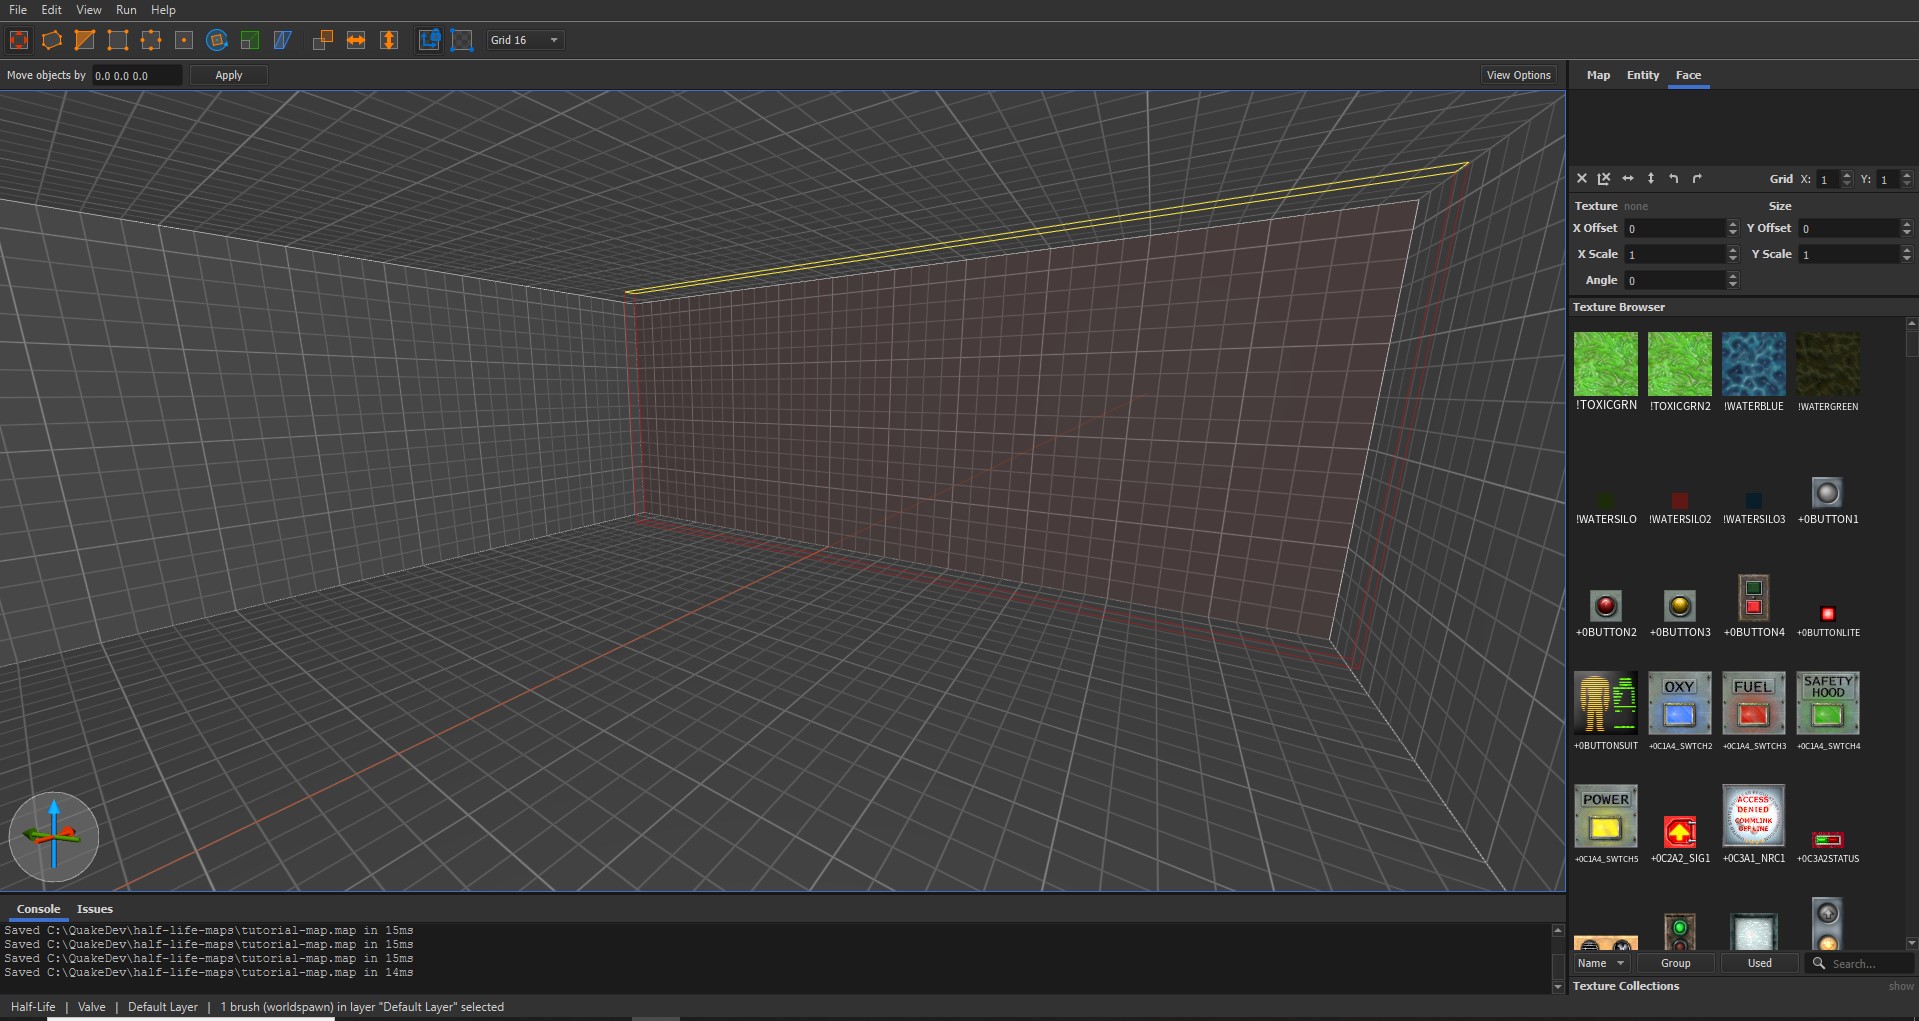 Choose one of the textures in the “Texture Browser” window, and it will be applied to the selected wall:
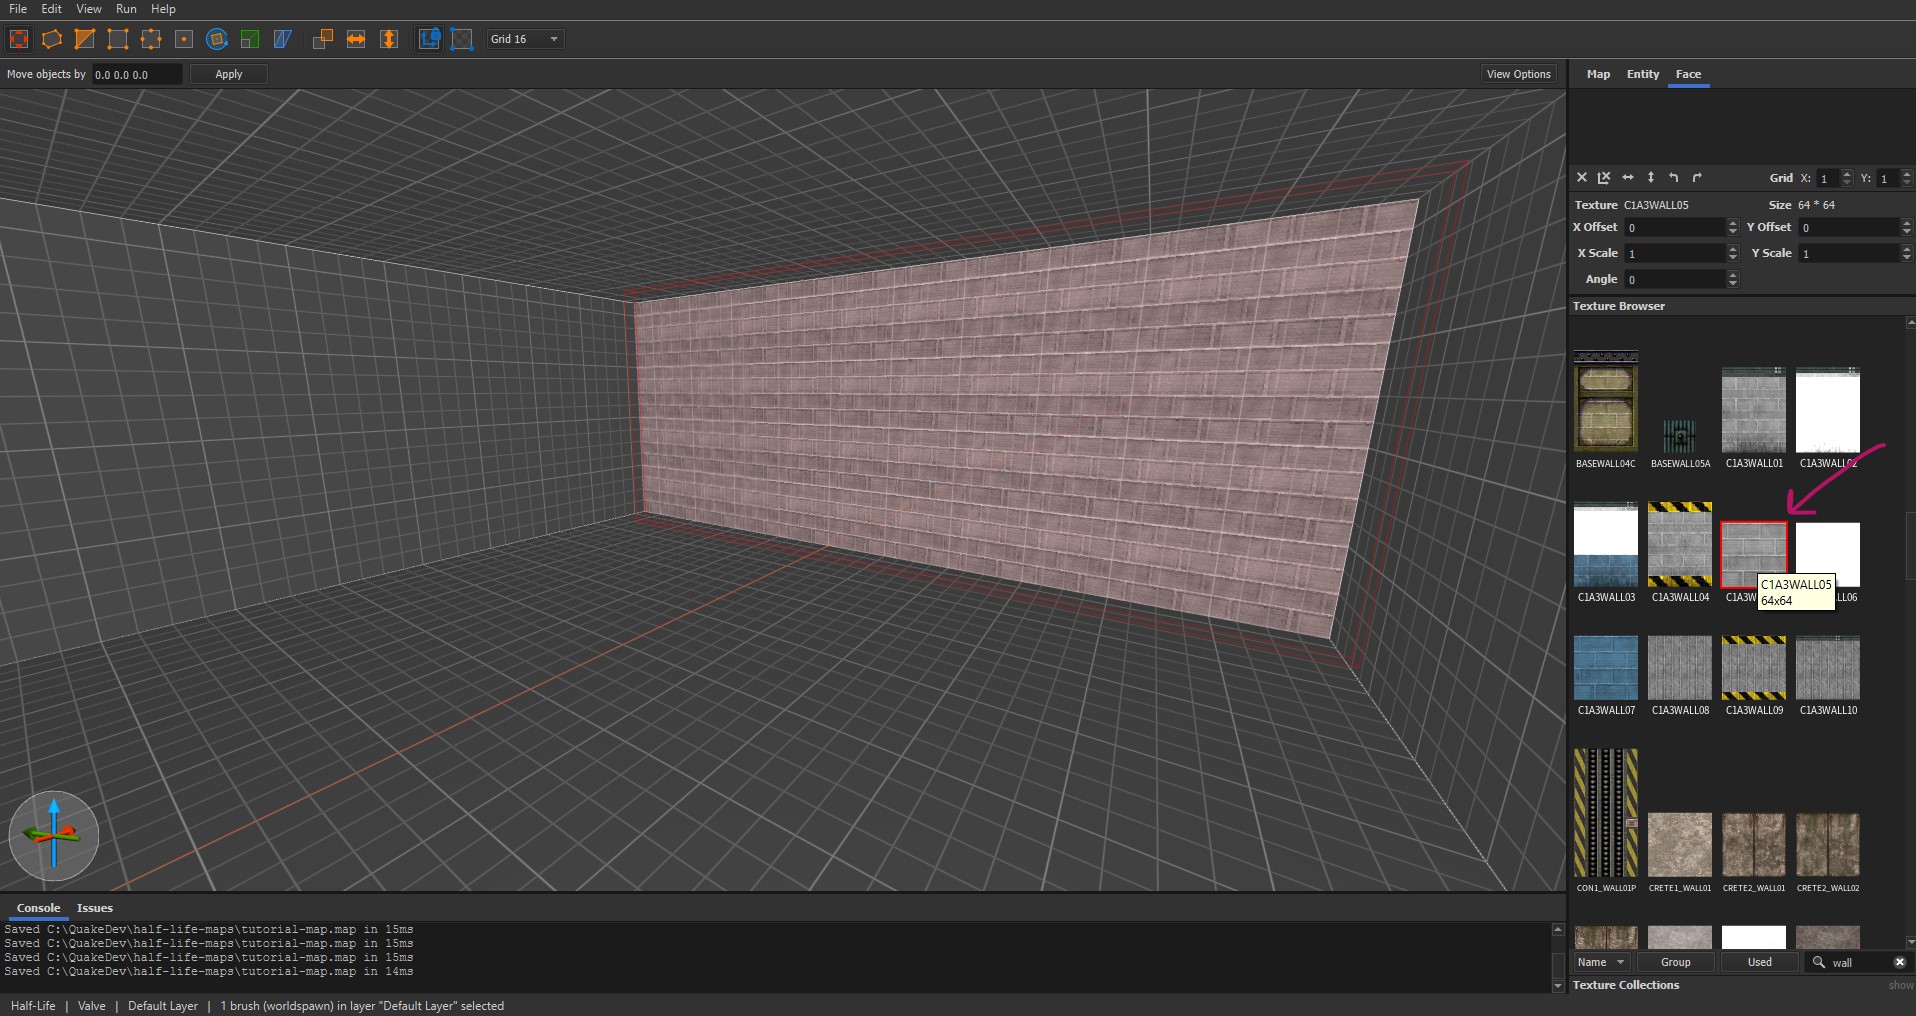 You can press Escape to deselect the wall, and when applying textures, you can hold Ctrl while selecting brushes to select multiple brushes and then textures will be applied to all selected brushes. You can hold shift while a brush is selected to select a single face, and the texture will be applied to just that face. Before moving on, make sure all the rest of your brushes have textures:
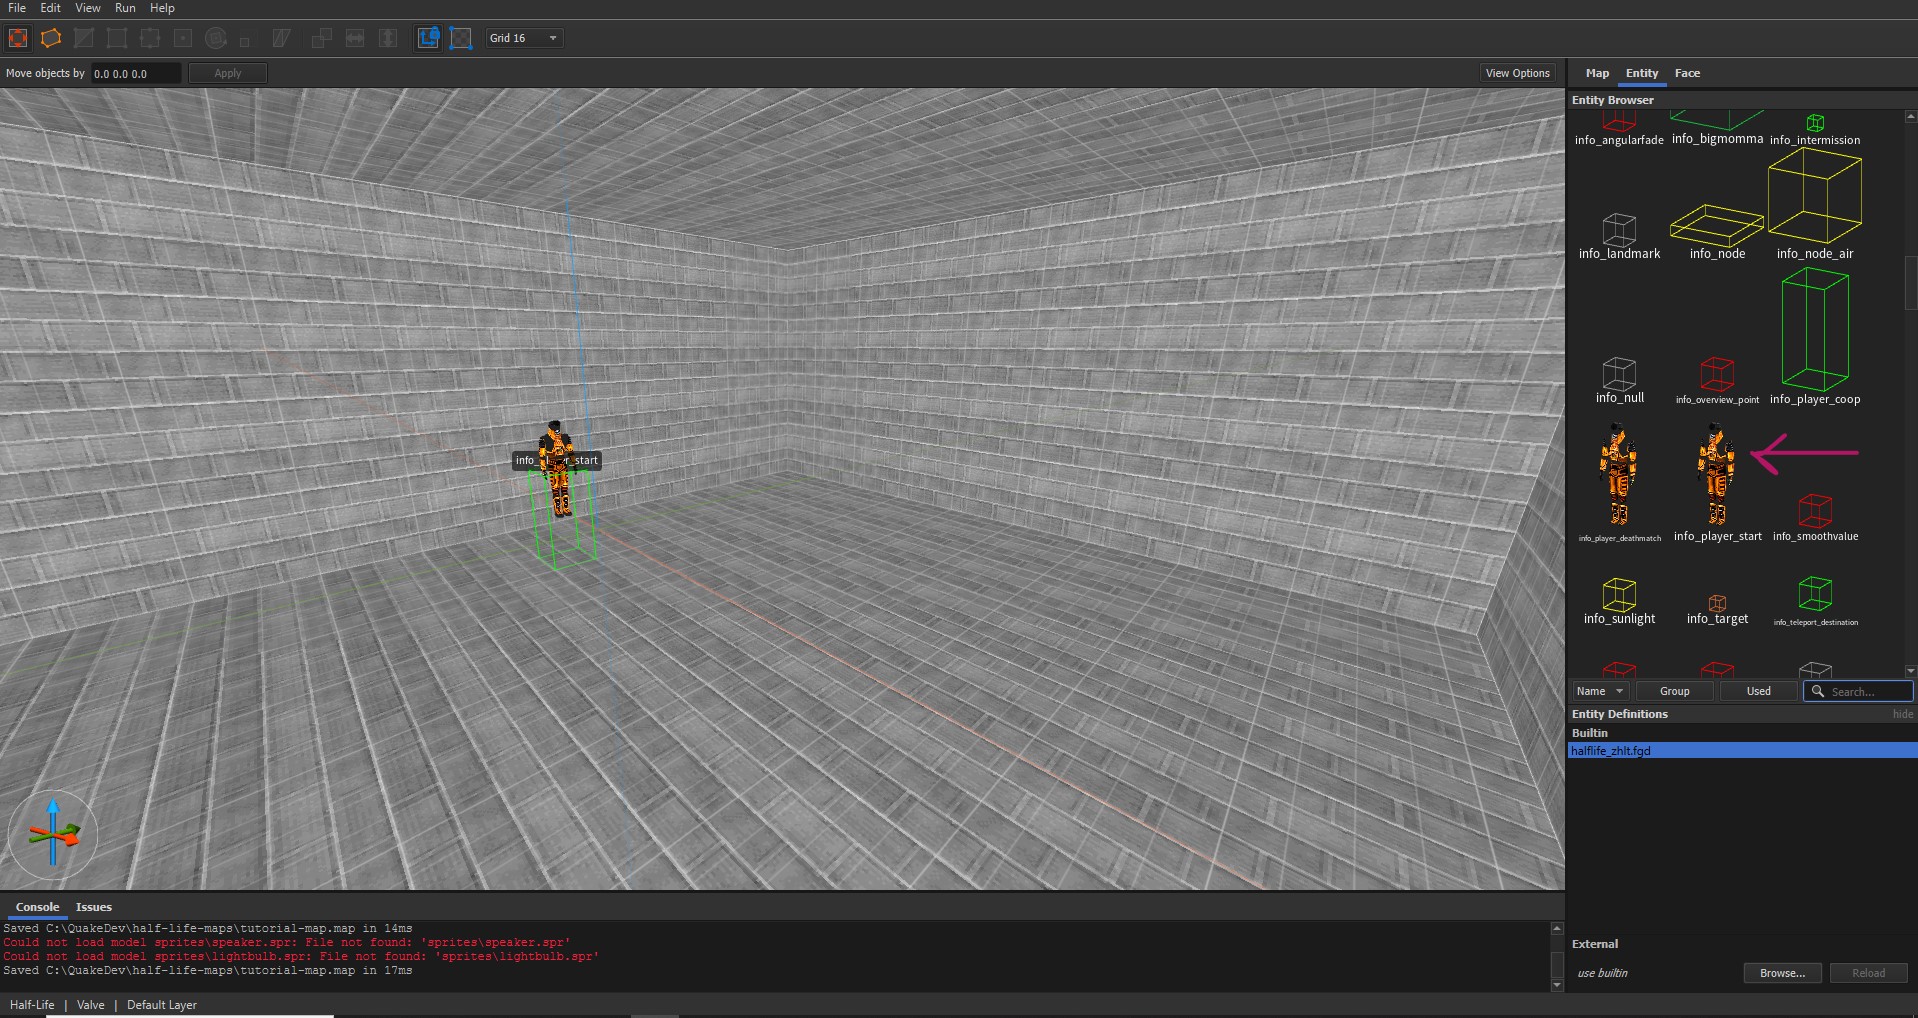
 Now, we need to add entities to the level. On the right, navigate to the “Entities” panel and add an “info_player_start” entity. This defines where the player will spawn in your map:
 Now try adding a “light”, a “weapon_crowbar”, an “item_suit”, and a “monster_zombie”:
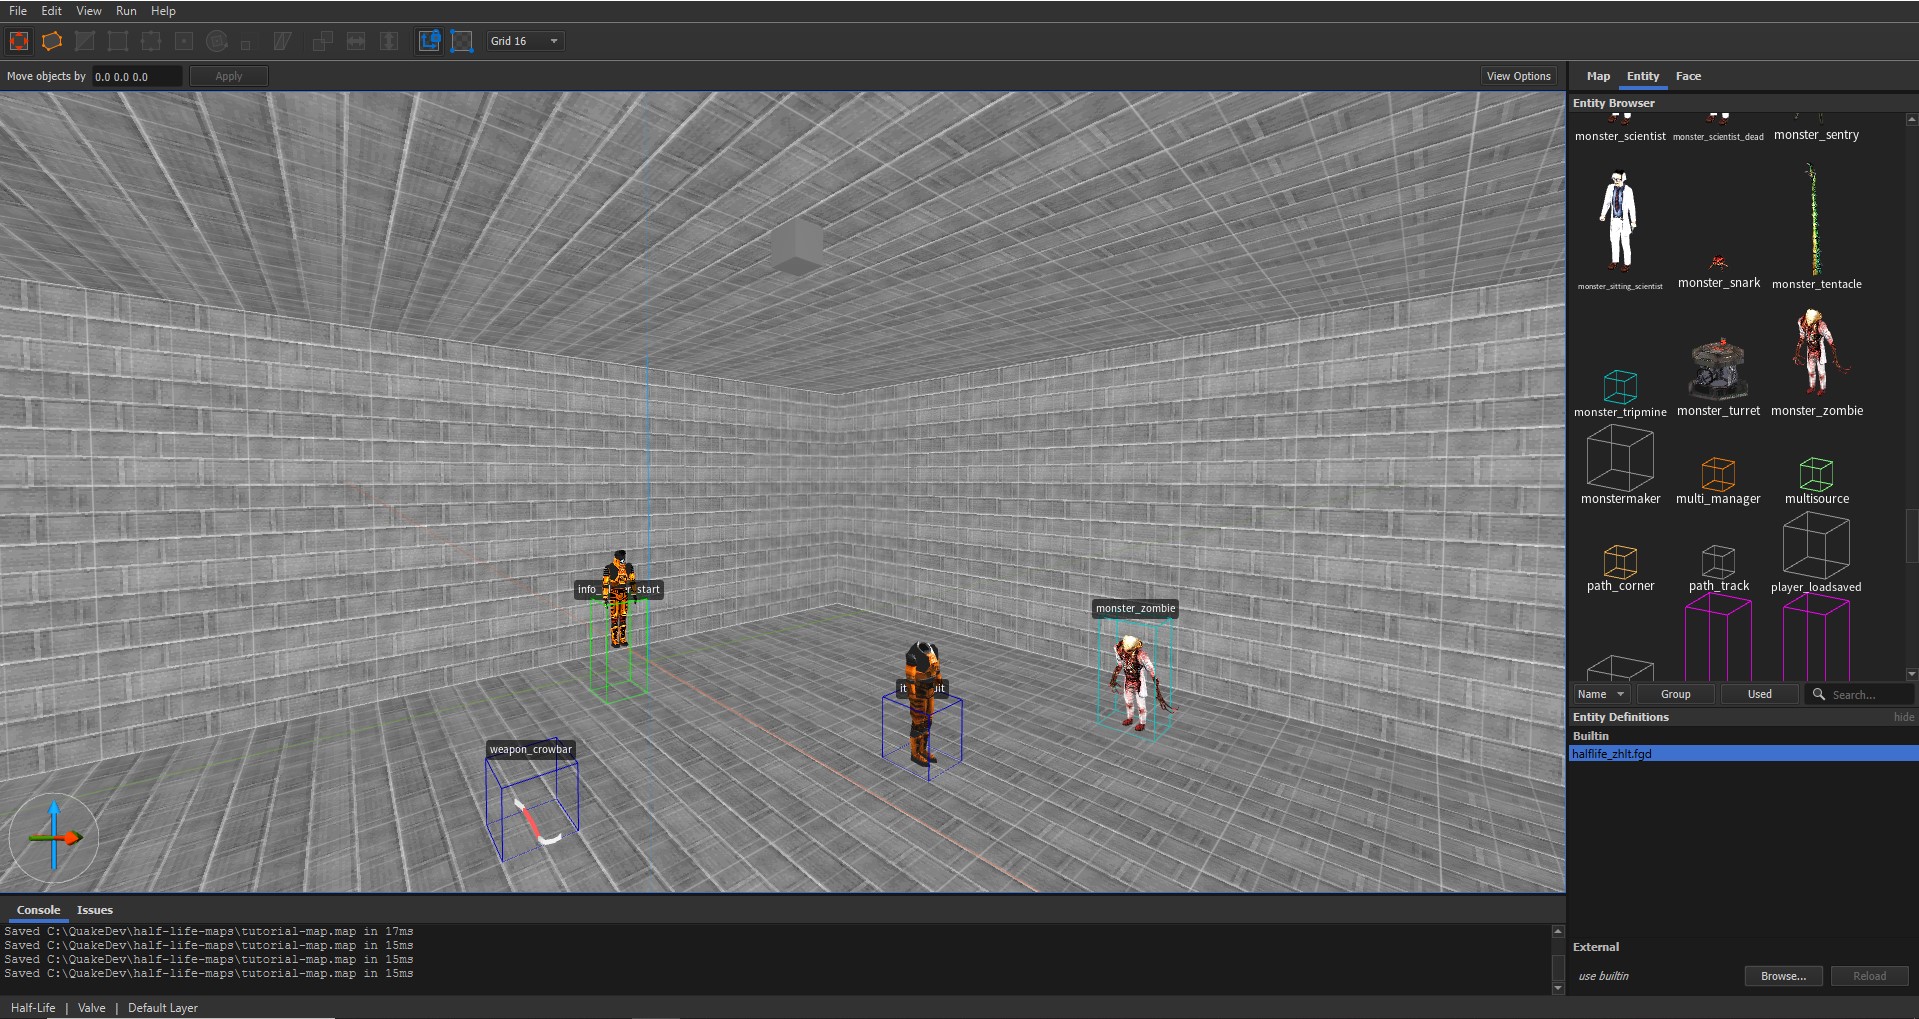 This should be enough for a simple test level. For a more complete guide, check our the Trenchbroom official documentation:
https://trenchbroom.github.io/manual/latest/
Setting up the Compiler
1. Open your map in Trenchbroom, and select “Run -> Compile Map…”. This will open a new window with an option to add compile profiles.
2. In the “Working Directory” text box, type in:
3. Select the “+” near the bottom of the empty compilation steps window and enter all of the following:
a. Export Map
File Path:
b. Run Tool
Tool Path:
Parameters:
c. Run Tool
Tool Path:
Parameters:
d. Run Tool
Tool Path:
Parameters:
e. Run Tool
Tool Path:
Parameters:
(NOTE: Replace the <path to VHLT> to the filepath in your computer that leads to the zhlt.fgd file. For example, it would be something like “C:\Trenchbroom\games\Halflife”.
4. If you performed steps 1-3 correctly, your compile menu shoud look similar to this: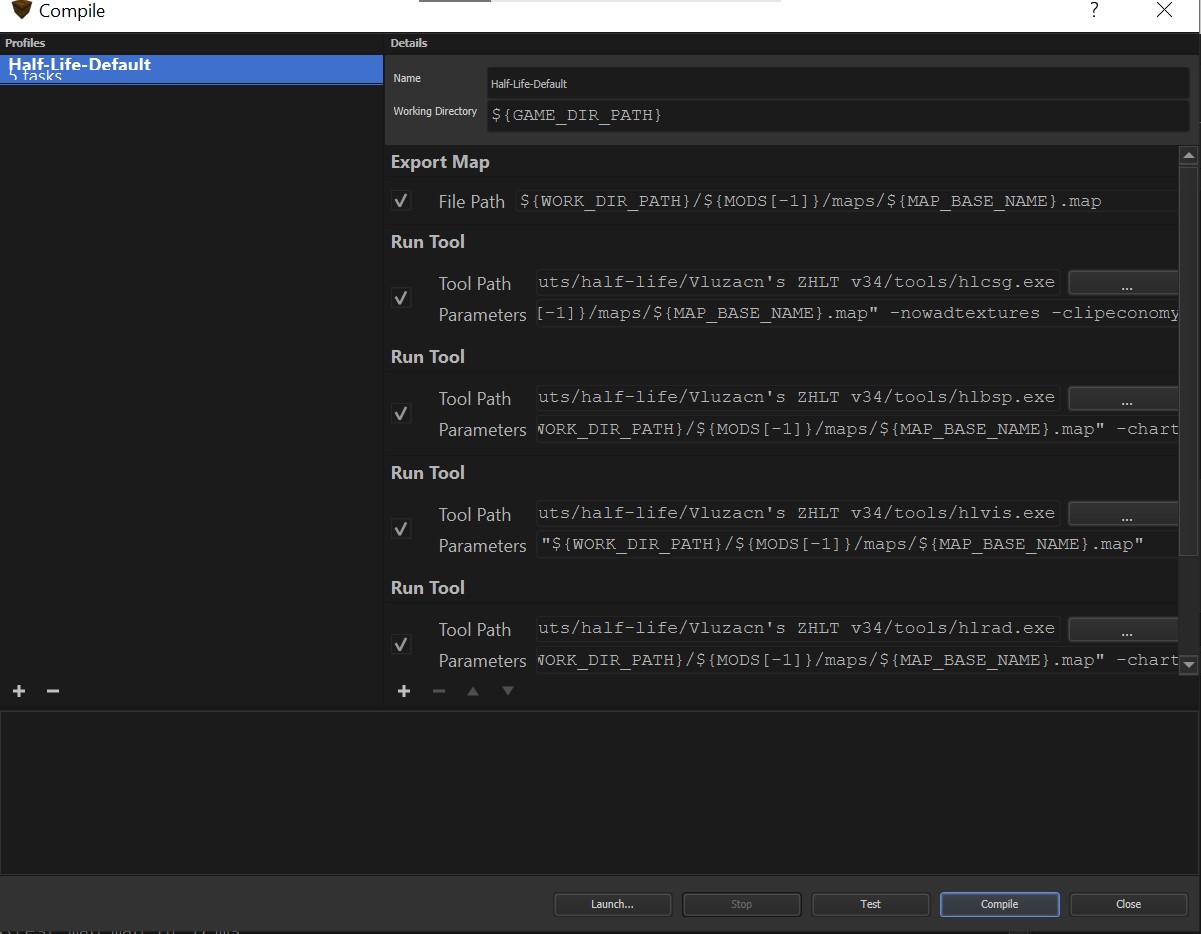
After performing all of these steps, you can press the “compile” button. If done correctly, the compile log at the bottom of the screen should read something like:
———— ————— ————— ——–
models 1/512 64/32768 ( 0.2%)
planes 20/32768 400/655360 ( 0.1%)
vertexes 20/65535 240/786420 ( 0.0%)
nodes 6/32767 144/786408 ( 0.0%)
texinfos 4/32767 160/1310680 ( 0.0%)
faces 16/65535 320/1310700 ( 0.0%)
* worldfaces 16/32768 0/0 ( 0.0%)
clipnodes 18/32767 144/262136 ( 0.1%)
leaves 2/32760 56/917280 ( 0.0%)
* worldleaves 1/8192 0/0 ( 0.0%)
marksurfaces 16/65535 32/131070 ( 0.0%)
surfedges 68/512000 272/2048000 ( 0.0%)
edges 35/256000 140/1024000 ( 0.0%)
texdata [variable] 67732/33554432 ( 0.2%)
lightdata [variable] 7860/50331648 ( 0.0%)
visdata [variable] 1/8388608 ( 0.0%)
entdata [variable] 319/2097152 ( 0.0%)
* AllocBlock 1/64 0/0 ( 1.6%)
3 textures referenced
=== Total BSP file data space used: 77884 bytes ===
Wad files required to run the map: (None)
0.09 seconds elapsed
—– END hlrad —–
#### Finished with exit status 0
You now should open up Half-Life and open the command console with the ~ (tilde) button. In the console, type
and replace the “my-map” with whatever you named your map. You should then be able to play through the map you made!
You should only have to perform steps 1-4 once, but you will have to re-compile your map every time you make changes to test them out.
Extra Resources
https://twhl.info/wiki/page/Tutorial%3A_Setting_up_TrenchBroom_for_GoldSource_games#Before_we_start
Here is a page with a list of various tools for mapping:
https://twhl.info/wiki/page/Tools_and_Resources
Here is the official manual for Trenchbroom:
https://trenchbroom.github.io/manual/latest/
If you have any questions or concerns, feel free to comment, thank you for reading!
And that wraps up our share on Half-Life: How to Create Custom Half Life maps using Trenchbroom. If you have any additional insights or tips to contribute, don’t hesitate to drop a comment below. For a more in-depth read, you can refer to the original article here by Skullzrawk9, who deserves all the credit. Happy gaming!
