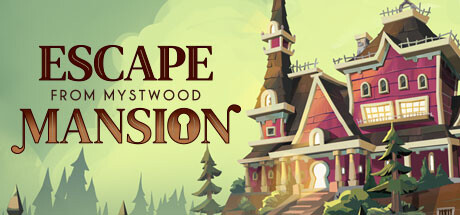
“Having trouble escaping Mystwood Mansion or obtaining all the achievements? Don’t worry, this guide has got you covered. With a detailed walkthrough for every area of the mansion, you’ll be able to progress through the game and achieve 100% completion. Just be aware, this guide contains spoilers and puzzle solutions. Let’s get started!”
Overview
Beginning
*(This will be a trend as you move to each room.)
◦ The doors have locked behind you and you cannot leave, so now we shall start planning our escape.
Entrance
>>> Code: 347
◦ Use the code to open the briefcase, where you’ll find a key and a note for a hidden button.
◦ Insert the key into the bottom left keyhole of the fancy door. The color and symbol should match.
◦ Go to the small area off to the side to find another table, then push the button on the side to open the drawer and obtain another key. Insert the key into the top left keyhole.
◦ Go upstairs to find a key hanging on the wall. Head back downstairs and insert it into the top right keyhole.
◦ This is how the door should look so far, but off to the side is another puzzle. Go halfway up the stairs where all of the pictures are and select 3 frames that match the spaces on the wall.
◦ Here is the solution. This will unlock a secret compartment on the side of the staircase directly behind you.
◦ If you recall the big photo above the table with the button, the year underneath it is the code to unlock the chest and obtain the last key.
>>> Code: 1423
◦ Insert the key into the last keyhole on the bottom right to open the door. Pick up the package and proceed to the next room.
Office
◦ Put the note on the desk next to the phone. Lift the receiver and dial the number from the note to reveal a secret compartment with 2 batteries.
>>> Code: 16557
◦ Open the top right desk drawer and take the remote. Insert the 2 batteries, then use it to turn on the TV.
◦ It’ll reveal a secret compartment in the trim, right next to the office door you came through. Go to the hidden area to obtain a stencil, then go to the small table by the fireplace and clear it off.
◦ Place the stencil over the etchings to reveal a secret message. This is the code to unlock the safe in the shelves.
>>> Code: 284
◦ Unlock the safe to obtain an orange crystal and a piece of paper with triangles. The crystal has a symbol underneath that corresponds to the large clock behind the desk and the pedestals in the shelf.
◦ Take the crystal to the row of pedestals and place it on X.
◦ Return to the TV and pick up the green crystal next to it, if you haven’t already. Place it on pedestal V.
◦ Go back to the safe and retrieve the piece of paper with the arrows. Take it to the dumbwaiter on the side of the bookshelf and press the buttons in the same sequence as the paper. (Up, down, up, down x3, up x2, down, up)
◦ Take the teal crystal to the row of pedestals and place it on I.
◦ Notice the large chest nearby and examine the lock. The symbols correspond to the colored books around the room. The quantity of each will reveal your code.
>>> Red: 2, Blue: 5, Yellow: 4, Green: 1
◦ Take the pink crystal and place it on pedestal III.
◦ Return to the chest and pick up the sign that says “Secret”, then place it above the rotating letters in the shelf near the fireplace.
◦ Just to the left, there’s an open book on the shelf. Grab it and place it on the desk, as we’ll be using this soon. Return to the shelf with the rotating letters and there’s another book at the bottom with a hidden compartment — grab the roll of tape from it and take it to the locked cabinet across the room.
◦ Notice the locked cabinet has a little heart tag. The photo of the heart (next to the chest) has a hidden code to unlock it.
>>> Code: 5718
◦ There’s a cable on the side of the cabinet, so plug that in to the outlet. Use the tape to repair the cable inside.
◦ The desk lamp will now be working and the flashes will have to be translated into Morse code, using the book you found earlier. It spells “RIGHT”.
◦ Open the top left drawer to find a train ticket. Place it under the blue pin on the map across the room.
◦ To the left of the clock, open the bottom shelf drawer to find another train ticket and 2 logs. Place the ticket under the yellow pin. Return to the drawer and put both logs in the fireplace for an achievement.
◦ Pick up the hat on the shelf near the fireplace to find the last train ticket. Take it to the map and place it under the red pin.
◦ Pin the routes to reveal a code for the briefcase near the desk.
Yellow: Warcoa City, Terlin, Locksfield, Newshire, Fea — 4
Blue: Fea, Terlin, Leawood — 7
Red: Terlin, Locksfield, Warcoa City — 1
◦ Unlock the briefcase using code, 471. Take the purple crystal to the row of pedestals and place it on the last one (XII) to reveal a secret compartment with a key. Take the key to the bookshelf to the left of the big clock and clear out the bottom row to uncover a hidden locked compartment. Use the key.
◦ Retrieve the missing letter dial and place it back in the shelf. Spell the word “RIGHT” from the lamp’s message earlier and a drawer will open below. Grab the sign that says “FIRE” and place it under the letter dials, then grab the keys from the drawer to access the fire extinguisher.
◦ Put out the fire using the extinguisher, then push the hidden button on the side of the fireplace to reveal a secret passage. Crawl through. (You don’t need the package at this time.)
>> Behind the Fireplace
◦ Open the fusebox in the right corner. You need to find the missing instructions to decipher the code and turn the power back on, but it does leave you a hint on where they could be.
◦ Crawl back to the other room, then go to the left of the bookshelf next to the dumbwaiter. Look up at the top of the bookshelf to find a piece of yellow paper hanging over. Take it back to the fusebox.
◦ Place the instructions in the fusebox and use the items shown to decipher the code.
Hat: F
Cup from Desk: IV
Book from Chest: N
Cup from Round Table: I
Missing Phone Number: 0
◦ Enter the following:
Top Dial: 5
Middle Dial: 9
Bottom Dial: 0
Switches: Up, Middle, Down, Up, Middle
◦ Pull the lever to turn on the power and gain the achievement, No Loose Ends.
◦ Crawl back into the office, grab the package, and head through the new door. You will earn Out of Office.
Wine Cellar
◦ Once the gate opens, pick up the package and proceed forward. Place the package somewhere safe, then return to the gate to close it. Click on the eye on the wine bottle picture nearby, then take the piece of paper it provides to reveal your first secret achievement, Observant.
◦ Turn around and go straight until you reach a brick wall with some darker bricks that you can push. The symbol to the left is your clue, so you’ll need to push the bricks in this order.
◦ Take the magnet and inspect the pillars at the end of each wine rack. One of them has a cork — remove it, but put it somewhere safe as you’ll need it again later. Place the magnet inside the hole to get a key.
◦ Put the key on the table behind you, then examine the note that looks like the trapdoor in the middle of the room. Find 6 gems around the room, then place them on top of the trapdoor in this order.
◦ Note the pattern of lights that are shown. Go to the barred nook near the entrance gate and interact with the bars to recreate the light pattern. It should look something like this:
◦ Take out the 4 bricks and place them with the others that are in the shelf to start forming the image of a spider.
◦ Retrieve the recipe book that’s under the spider portrait at the far left corner of the room. You’ll need to recreate the recipe as follows:
>>> 5 units Light Red Wine
>>> 8 units Bold Red Wine
>>> 4 units Medium Red Wine
◦ Go to the cup wall to begin the process
- Grab a 5-unit cup and fill it from the L barrel — pour it into the left cylinder.
- Grab a 5-unit cup and fill it from the B barrel — pour it into the middle cylinder.
- Grab a 3-unit cup and fill it from the B barrel — pour it into the middle cylinder.
- Grab a 5-unit cup and fill it from the M barrel — pour it into the right cylinder twice.
- Grab a 3-unit cup and fill it from the right cylinder — empty cup into the drain below.
- Grab a 3-unit cup and fill it from the right cylinder again.
- Turn the valve under the cylinders to fill the wine bottles.
◦ Remove the bottles from the crate and look at the symbols on the corks. You need to match the symbols on the corks to the symbols below the pedestals of the House Wine Collection.
◦ Once you have all of the matching wine bottles on their pedestals, look at the wall from an angle. A secret code will be revealed based on the wine levels — input 271 into the cabinet below.
◦ Take out the 4 bricks and complete the spider image in the shelf. Go behind the bricks to find another code: 0728.
◦ Input the code into the safe behind the spider portrait. You’ll now have a paper with the Braille alphabet and a small map.
◦ Use the map to find the next code location. It’s in one of the racks right next to the trapdoor. Now use the Braille note to decode the wine bottles — you should get TRAP.
◦ Go to the tall cabinet in the corner next to the barrels and unlock it with the code TRAP.
◦ Now grab the small key that you set aside earlier and use it on the small lock inside the cabinet to open a secret door. Get the cork from earlier and go through.
>> Storage Room
◦ Look at the message on the wall and follow the helping hands — “Use picture four and seven.”
◦ Proceed up the steps and look at the two sets of pictures on opposing walls. You’ll need the items shown in pictures #4 and #7 to place on the small podium.
◦ Place the items in this order, from left to right.
- Apple — in the vase filled with water
- Ink pot and quill — on the desk in the corner
- Candle — on the shelf around the corner
- Cheese wedge — on the shelf around the corner
- Red ornate bottle — on the shelf next to the large locked chest
◦ Take the key from the podium and unlock the large chest. You’ll find a piece of paper and a key. Take the paper and stand behind the door to decipher the message.
◦ X marks the spot — “FLIP A3, B5 and C1”
◦ Now take the key from the chest and go back to the previous room. Go to the back where the exit is and use the key to open the panel on the wall. Do what the message said and flip switches A3, B5 and C1.
◦ Retrieve the package and proceed through the exit and up the stairs to the next area.
Winter Garden
>>> Code: 5684
◦ Pick up the package and go through the door.
◦ Place the package down, then go to the pedestals around the fountain — each one will have a little bronze statue on top. Rotate the statues to their food source.
>>> Bug points to Grass
>>> Frog points to Bug
>>> Snake points to Frog
>>> Bird points to Snake
This will unlock the achievement, Food Chain Expertise.
◦ There will now be a walkway at the base of the tree. Go to the tree and unlatch the birdhouse, then open its door to find an angled pipe (1/4).
◦ Move on to the green doors and look up. There’s a code hidden in the pattern above the doors — this will open the lock.
>>> Code: 6254
◦ Proceed to the next room, the greenhouse.
>> Greenhouse
◦ Now observe what’s on the blackboard — there’s a riddle, butterfly photos, and a tree chart. Let’s focus on the trees for now. Find the locked tree box on the wall next to the green doors. Use the branches on either side of the trees to decipher the code.
>>> Code: 6738
◦ Inside you’ll find a compass. Place it on the end of the stand in the middle of the room, then begin to solve the puzzles nearby and make the appropriate changes.
◦ Puzzle #1: Turn the lights above Off, On, Off, On, Off.
◦ Puzzle #2: Flip the green levers — Left, Up, Right, Up.
◦ Puzzle #3: Turn the red valves, so one spoke is facing Up, Down, Down, Right, Left.
◦ After solving all three puzzles, a secret compartment will rise out of the stand, revealing another angled pipe (2/4).
◦ Return to the blackboard, this time focusing on the butterfly photos. The photos will give you a clue as to what order you should arrange the butterfly photos on the wall. You can find the missing photo at the bottom of the tall cabinet in the greenhouse.
From left to right:
>>> Left Wall: Red, White, Yellow, Blue, Black
>>> Right Wall: Orange, Blue, White, Red, Purple
◦ A secret compartment will open in the pillar behind the butterfly symbol. Take the map and return to the greenhouse.
◦ Go to the corner with the wide glass cabinet and pictures of flowers. To the right, you’ll see 5 pots of baby plants — match them to the correct flower photo. Your hint is across the room in the fully grown flower bed.
From left to right:
>>> Yellow: Thin stalk with sparse leaves
>>> Blue: Dark green fern
>>> White: Light green, very leafy
>>> Red: Flat, broad leaves
>>> Pink: In water
◦ You’ll now have 5 seed pouches. Grab the small shovel from the bag of soil to the right and take it to the flowerbed on the other side of the room. Dig in the right corner closest to you, as indicated by the map you recently found, to uncover another angled pipe (3/4).
◦ Retrieve the small shovel and go back to the plant pots — fill each one with soil. Now, according to the riddle on the blackboard, place the correct seeds in their correct pots.
>>> P: Rain
>>> L: Lightning
>>> A: Sun
>>> N: Snow
>>> T: Cloud
◦ Take the key from the chest and use it to open the tool cabinet. Grab the small shovel and hang it on the hook. Go to the plant next to the pink flower doors where you entered — there’s a broken saw there. Pick it up and place it in the cabinet as well. Now arrange the wrenches, so that they’re in their proper place. This’ll earn you another secret achievement, Organized.
◦ Inspect the doors leading to the next section. The herbs on the shelf to the left will give you the code. Take the first letter of each herb to decipher the word: TROPICAL. Press each button on the door to spell it out correctly.
◦ Bring the compass from earlier into the next room.
>> Dining Room
◦ Once the plates are set correctly, the last angled pipe (4/4) will be revealed.
◦ Return to the cabinet you just organized and grab the crowbar — return to the starting area near the flower doors. Move the large planter pot to reveal a hidden passageway behind some ivy.
◦ Climb through and use the crowbar to remove the wood planks that are blocking the door. The door is already unlocked, so move on to the next room.
>> Pipe Room
◦ Gather all 4 pipe pieces and bring them back to the pipe room. Match the colors to fill in the empty spaces. After completing a pipe set, water will start to fill the clear tube in the middle of the room.
◦ Take the key that’s floating at the top of the clear tube and use it to open the door. Retrieve the package — go through the door and down the stairs to the next area.
Library
◦ Pick up the sun symbol that fell out and insert it into the cabinet around the corner behind you. Open the cabinet.
◦ Look at the ends of the shelves indicated on the map — the letters will spell out the next code.
>>> Code: ENIGMA
◦ Take the torn piece of paper and set it aside for later. Head to the shelves near the entrance. There will be 4 symbols that resemble clock hands, indicating the times 3:00, 6:00, 8:00 and 9:00.
◦ Go across the room to the shelf on the other side of the entrance. There’s a combination lock with the hint “Time waits for no one…” Put in the clock times to open the compartment.
>>> Code: 3689
◦ Take the screwdriver and go to the vent near the cabinet you opened earlier. Use it to remove the 4 screws from the vent — inside, you’ll find 3 candles.
◦ Take the 3 candles from the vent, along with 3 others you can find in the room, and take them to the shelf with the 6 candle holders. Place them so that the wick is level with the line drawn. The candles underneath the Roman numerals will indicate the code.
>>> Code: 6451
◦ Go to the combination lock with the candle symbol and use 6451 to unlock it. Take out the torn piece of paper and combine it with the other one. Set it aside again.
◦ Now you’ll need to find 8 labeled books scattered throughout the room (1 is already in the shelf, so it’s a total of 9). You’ll need to place them in the correct order, according to the story of Little Red Riding Hood. Fill in the blanks — match them to the symbols on the books and that’ll be the correct order.
>>> There are a few that are sneakily hidden: one under a pillow next to the shelf, one behind the podium where Little Red Riding Hood is, one on the other side of the gate, and another against the wall in the hall (by the vase).
◦ Once the books are correctly placed, glowing green symbols will appear. Examine the repaired notes you found and use the numbered words to decipher the phrase: “The code to the gate is the opposite of”. Now use the glowing symbols to decipher the 4-letter word, DEAD, which means the code you need is ALIVE.
◦ You can use the code to open the gate OR you can earn the achievement, Thinking Outside the Box, by using the screwdriver to remove all 8 screws holding up the gate.
◦ Pick up the package and carry it up the stairs. Open the dumbwaiter, place the package inside, close it and push the button. This will give you the achievement, Dedicated.
If you didn’t drop or throw the package, you’ll also earn Handled With Care.
◦ Go back down the stairs and look at the desk along the way. Drag the black cards over the scroll to reveal the phrase: “Use hammer on the fifth step of the left staircase”.
◦ Grab the hammer and use it on the step indicated by the message — pick up the code sheet from inside. Take note of the red symbol on the back.
◦ Go up the stairs to find a shield with the matching red symbol and a locked panel. Use the code sheet to decipher the message: “RED PLUS BLUE”.
>>> Code: PURPLE
◦ Pick up the 2 gold plaques and take them to the bookcase near the dumbwaiter.
◦ Grab the screwdriver and go to the green puzzle that’s covered by a wood plank — remove all the screws. Look at the back of the plank to find a series of symbols. The symbol on the locked panel is a combination of four of these: 1000, 900, 80 and 4.
>>> Code: 1984
Take out another 2 plaques and put them with the others (by the dumbwaiter).
◦ Next, go to the black and white image on the wall. Pick it up and tilt it to reveal a hidden message: “The key lies beneath the eye”.
◦ Go to the gold eye on the railing and open the little compartment at the bottom to find a key. Take the key and use it on the grandfather clock. Take out the blue books from the bookshelf along the wall to find a time indicated by shapes — return to the clock and set the time to 6:35.
◦ Enter through the bookcase passage and grab the last 2 gold plaques. Take them to the others.
◦ Arrange the gold plaques to read: “The end is near. Your key to escape is”, then the word MELLON will appear.
◦ Go to the last bookcase. While the word MELLON will open it, you can also translate this from Elvish to mean FRIEND — this will get you the achievement The Translator.
◦ Once the bookcase opens, proceed to the next door and earn the achievement Literary Escapee.
>> Entrance
If you didn’t use any hints in-game, you’ll also get the achievement Look Ma, No Hints!
◦ If you found all 3 secrets, the green door in the entrance will be unlocked. Go through for an alternate ending.
Secret Room
- HALF PAST TWO
- TEN TO FOUR
- FIVE PAST NINE
The cipher itself reads:
OBSERVANT, WISE, ORGANIZED, PUZZLED, WISHFUL, DEDICATED.
◦ Input the times on the clock and take note of the letters the hands fall on.
>>> Code: UNLOCK
◦ Input the code to unlock the door upstairs.
◦ There is plenty to look at in this room, but sitting in the chair will end your game and give you the achievement First Day On Your New Job!
OH, and you can open the package! ♡
Final Achievements
>>> Throw the package, if you haven’t already, to get the Wait…Did That Say Fragile? achievement.
>>> Grab the screwdriver from the “Time waits for no one…” panel. Code is 3689.
>>> Remove all the screws from the gate.
>>> Go to the bookshelf and enter the word MELLON or FRIEND.
◦ Go to the entrance and select the other ending, whether it’s to leave the mansion or go through the green door.
End
♡♡♡ THANK YOU ♡♡♡
And that wraps up our share on Escape From Mystwood Mansion: Escape From Mystwood Mansion | Complete Walkthrough + 100% Achievements. If you have any additional insights or tips to contribute, don’t hesitate to drop a comment below. For a more in-depth read, you can refer to the original article here by m a j i, who deserves all the credit. Happy gaming!