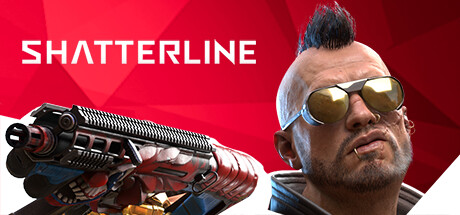
Hey there, Gamers! Looking to conquer Shatterline and earn all the achievements? Look no further! This quick guide will help you navigate through the game and unlock those coveted achievements. Plus, we’ll also give you tips on how to customize your Steam library page for an even more immersive gaming experience. Let’s jump right in!
Introduction
Ratings are appreciated!
Getting the Achievement, part 1


Getting the Achievement, part 2


TIP: Using the sniper rifle for the first two waves and the mini gun for the last two waves are ideal.

Achievement unlocked!

Game Shutdown
To all you achievement hunters or completionists (is that even a word?) out there… you have literally 3 days to get this achievement. Good luck!
Steam Client Customization

This is actually an option for any game’s Library Home in the Steam Client. I first discovered this while creating a customization guide for a different game. So… let’s take a look at these weird context menu options!

Set Custom Background
The first option is setting a custom background. You can pretty much pick any screenshot and it will auto crop to the center of the image. If you use a screenshot that doesn’t show the in game HUD, it’ll look a lot better.

Clear Custom Background
When you apply a background of your own, the context menu option changes to Clear Custom Background, so that you can reset the background if you don’t like the results.
The next few options are all for editing the logo on this game’s home page…
Set Custom Logo
This literally lets you set a custom image as the logo for this page. If you are a hardcore fan of a articular class, changing this to one of those logos may be your go to. I’ll add that the logos that work best here are the ones with no backgrounds or background colors. You’ll want a transparent background or the logo will be a box blocking out a good portion of your screenshot.

Adjust Logo Position
This allows you to use an interface to shrink or stretch your logo as much as it lets you, and gives you an option to align the logo by pinning it to top, center, bottom, or bottom left. Look for the lime green clickable objects in the cover area to adjust the position of the logo image.

Reset Logo Position
If you don’t like the position or size that your logo ends up in, this is your option to reset it. If you like your eidts, click the blue Done button in the bottom right.
Clear Custom Logo
When you actually apply your own image for a logo, you’ll notice a new context menu option called Clear Custom Logo. This let’s you set the page back to the actual in game logo if you don’t like your end results.
This section last updated July of 2024.
Sources
The cropped screenshot that I used for the background customization was found in the Shatterline community hub.
100% Achievement Group, the Steam Group
I found this game in the 100% Achievement Group discussions.
Other Published Steam Guides
https://steamcommunity.com/sharedfiles/filedetails/?id=3279194234
https://steamcommunity.com/sharedfiles/filedetails/?id=2264419335
And that wraps up our share on Shatterline: Shatterline Achievement and Customization Guide. If you have any additional insights or tips to contribute, don’t hesitate to drop a comment below. For a more in-depth read, you can refer to the original article here by ronjester, who deserves all the credit. Happy gaming!

