Are you looking to make the graphics in your Metal Gear Solid – Master Collection Version game even sharper? If yes, then this article is for you! Here, you will learn how to remove the Bilinear filter, an element that you can’t usually disable normally. With this guide, you can make your game look super sharp. It may even help you with things like Reshade! All you need to do is follow the instructions in this guide, which have been created to make it easier for you to troubleshoot.
update 2
If the link is removed its the MGSM2Fix and its linked on the pcgamingwiki page for this game if needed.
I’d recommend you use this instead as its more user friendly and doesn’t require changing files :).
Thanks for your interest in my and others work in the mean time.
Update: New script
Still in the testing phase but it should be much more straight foward.
option 1 will find your game location through the registry and patch the game for you as well as backup the original files.
Option 2 is in any case where option 1 is unable to find the correct path, it will require you to copy the files to the patch folder, run the script, then move them back.
Let me know of any issues you come across with this.
Video guide
Links
The file this guide is built off and also another fix someone else made are here: https://drive.google.com/drive/folders/1MJ0KREkD1EZjXz8-FhhCfgTdmk565U-H
The delta patcher seems like a great method but will only work on US versions of the game right now, so if the ntsc version of mgs1 is what your game came with without downloading any dlc then give that method a shot.
github patch guide
(if you have any issues with this guide you can also try the version from the time this guide was made which will be in the google drive link)
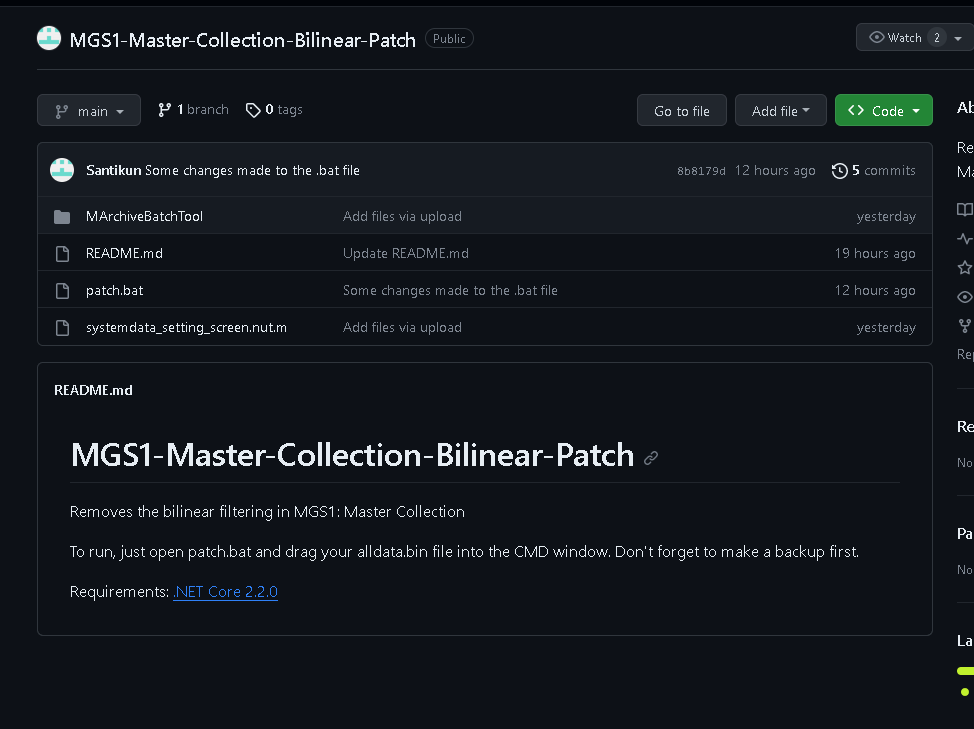
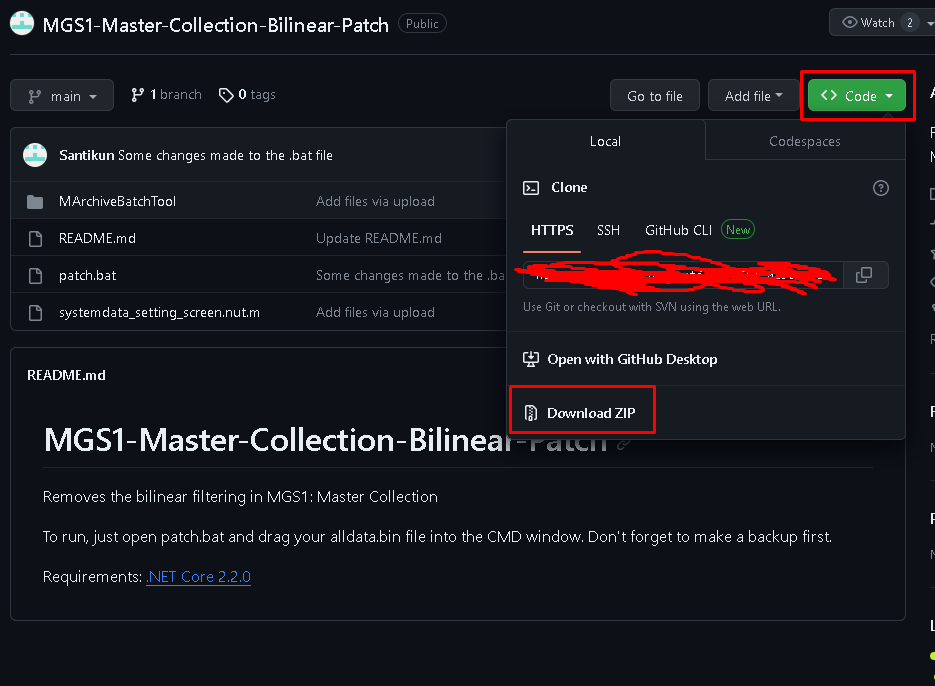
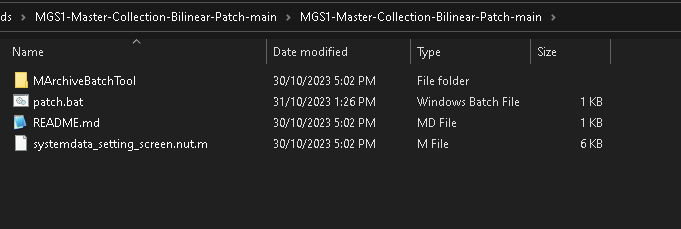
extract the zip folder using what ever program you’d like. you should end up with a folder with all the stuff in it.
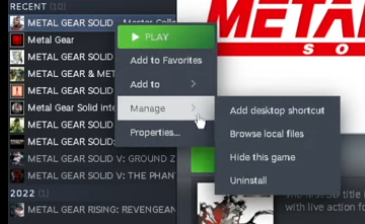
go to your steam, right click on metal gear solid master collection version, click manage, browse local files.
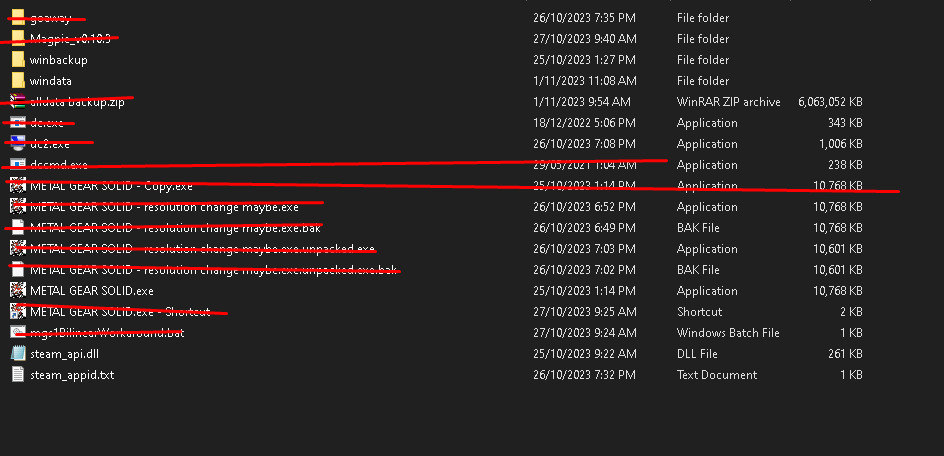
From here go to the windata folder (ignore all the crossed out stuff that was me experimenting with possible methods before this one)

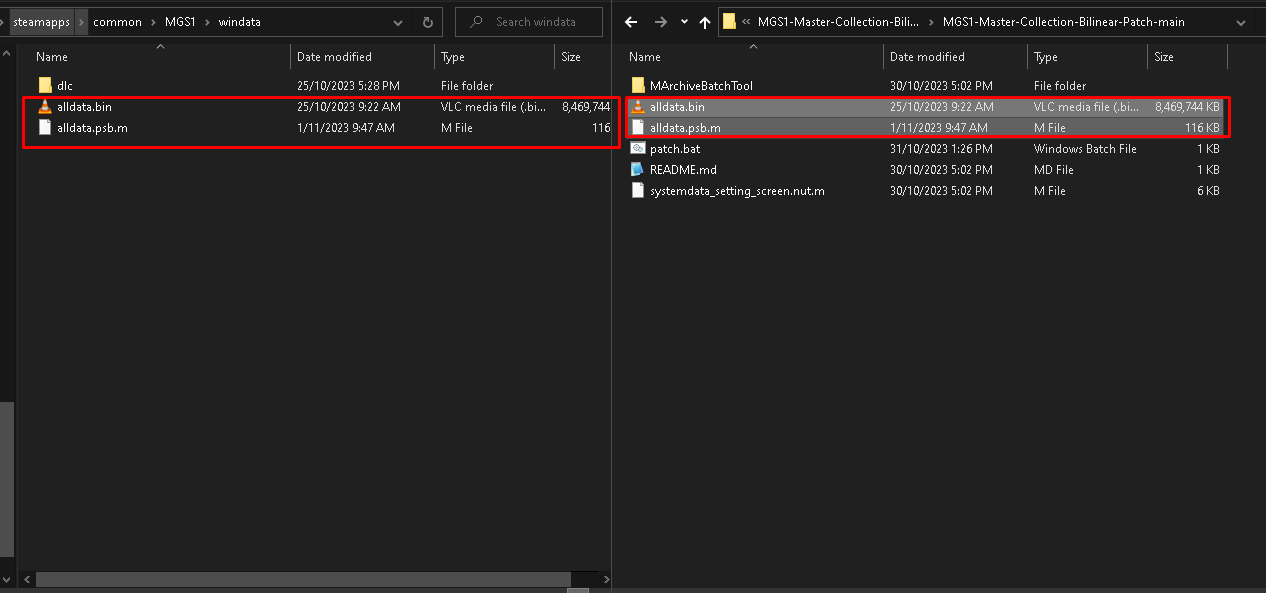
Backup alldata.bin and alldata.psb.m.
I personally back these up to the folder with the patch in it but its up to you.
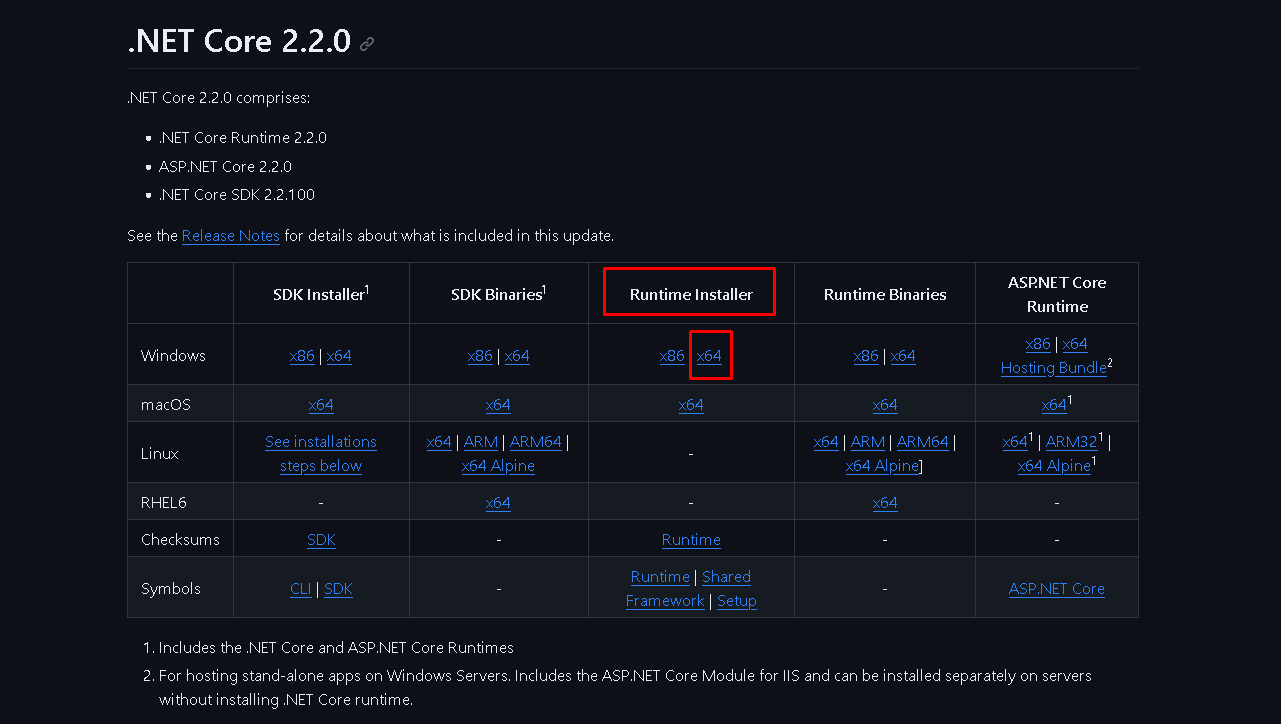
now go to https://github.com/dotnet/core/blob/main/release-notes/2.2/2.2.0/2.2.0-download.md
And download the runtime installer x64 (if you’re on a 32bit version of windows download the x86 version instead) and run it.
now go back to that patch folder we extracted earlier and run the patch.bat file.
Then drag and drop the alldata.bin from your mgs1 game folder into the window.
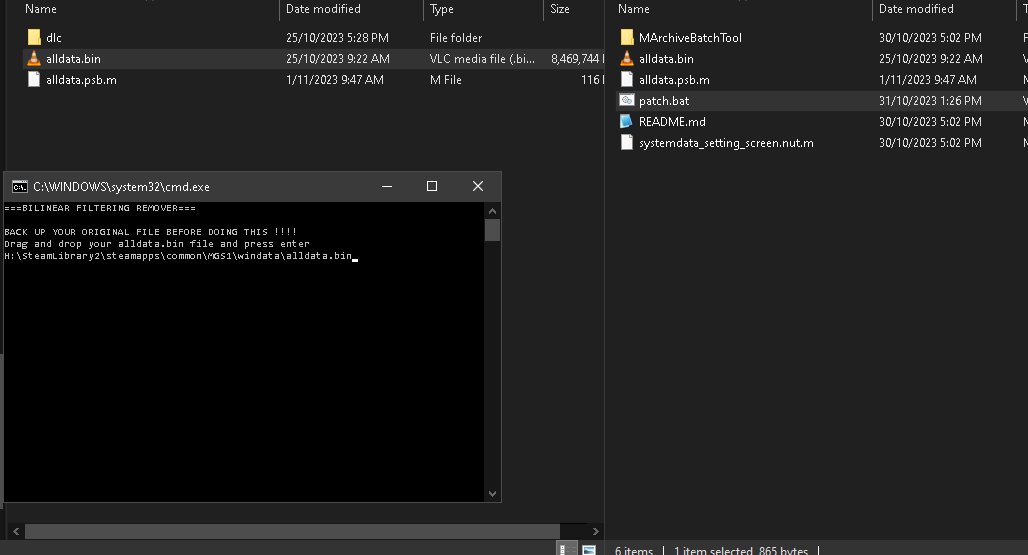
(if when pasting the line you get quote marks on either side like this, manually delete them as they tend to break the script).
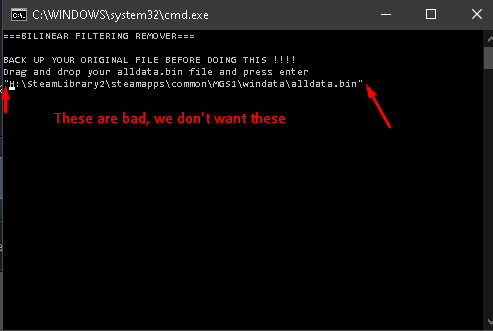
After drag and dropping the file (and getting rid of any ” marks) just click on the window and hit enter.
You’ll know its working if the following happens:
A window pops up to unpack the files
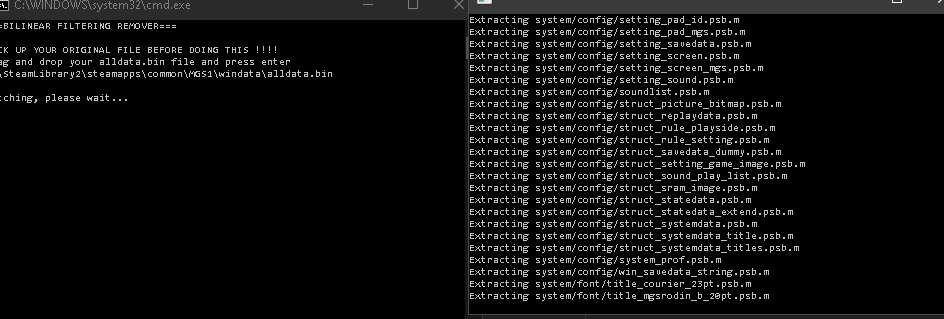
A file is successfully copied
and a window opens again to pack the files back up.
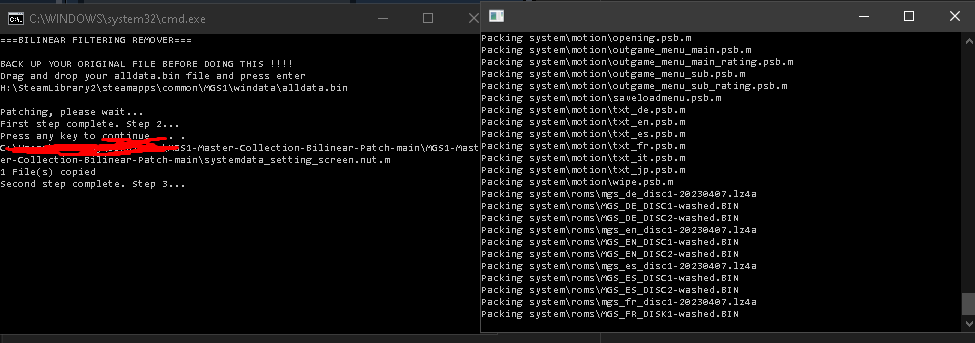
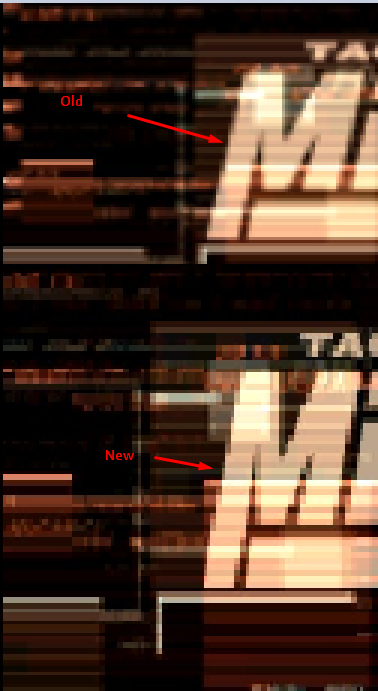
once this message pops up you should be done, check if your game starts successfully, then you should see more of a staircase affect on the M on menu.

Troubleshooting:
If the second window never pops up or you’re asked if its a file or a directory then make sure there are no quote marks in your path and that you have installed dotnet 2.2.0.
If the file fails to copy try using the version of this patch backed up in the google drive.
If once completed the game is just a black screen then restore those 2 files you backed up and try again (if you didn’t back them up thats ok, you can delete them and then on steam verify the game in properties and it will download only those files again)
Delta patcher (easier but only seems to work on North American version at the moment)
as in the previous guide back up alldata.bin and alldata.psp.m.
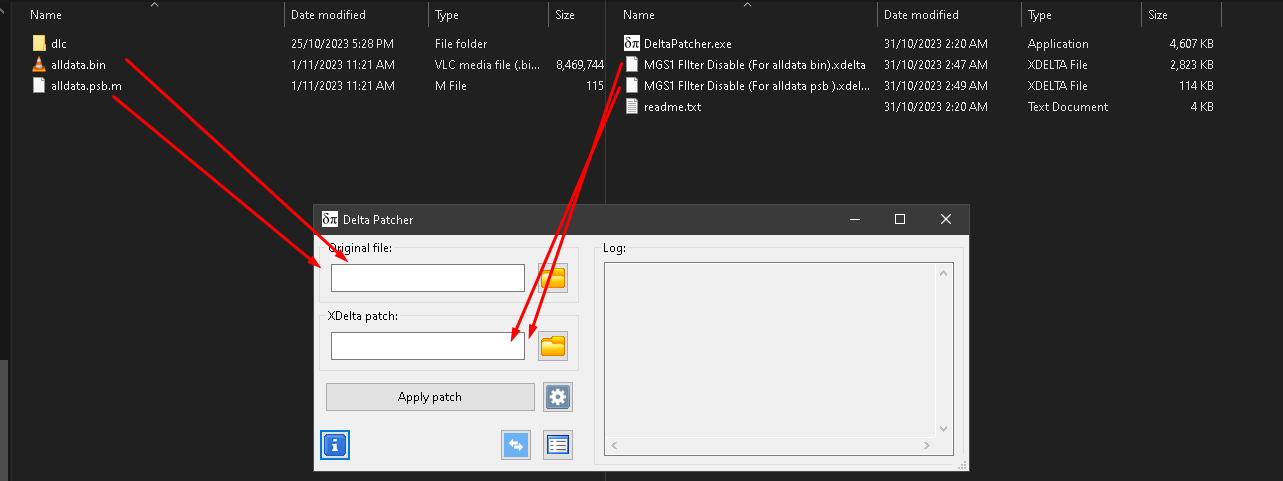
Open up the delta patcher and click the folder icon next to “original file”to select the alldata.bin and then click the file icon next to “xdelta patch:” and select “mgs1 filter disable (for alldata.bin.xdelta”.
Do the same for the alldata.psp.m and you should be done.
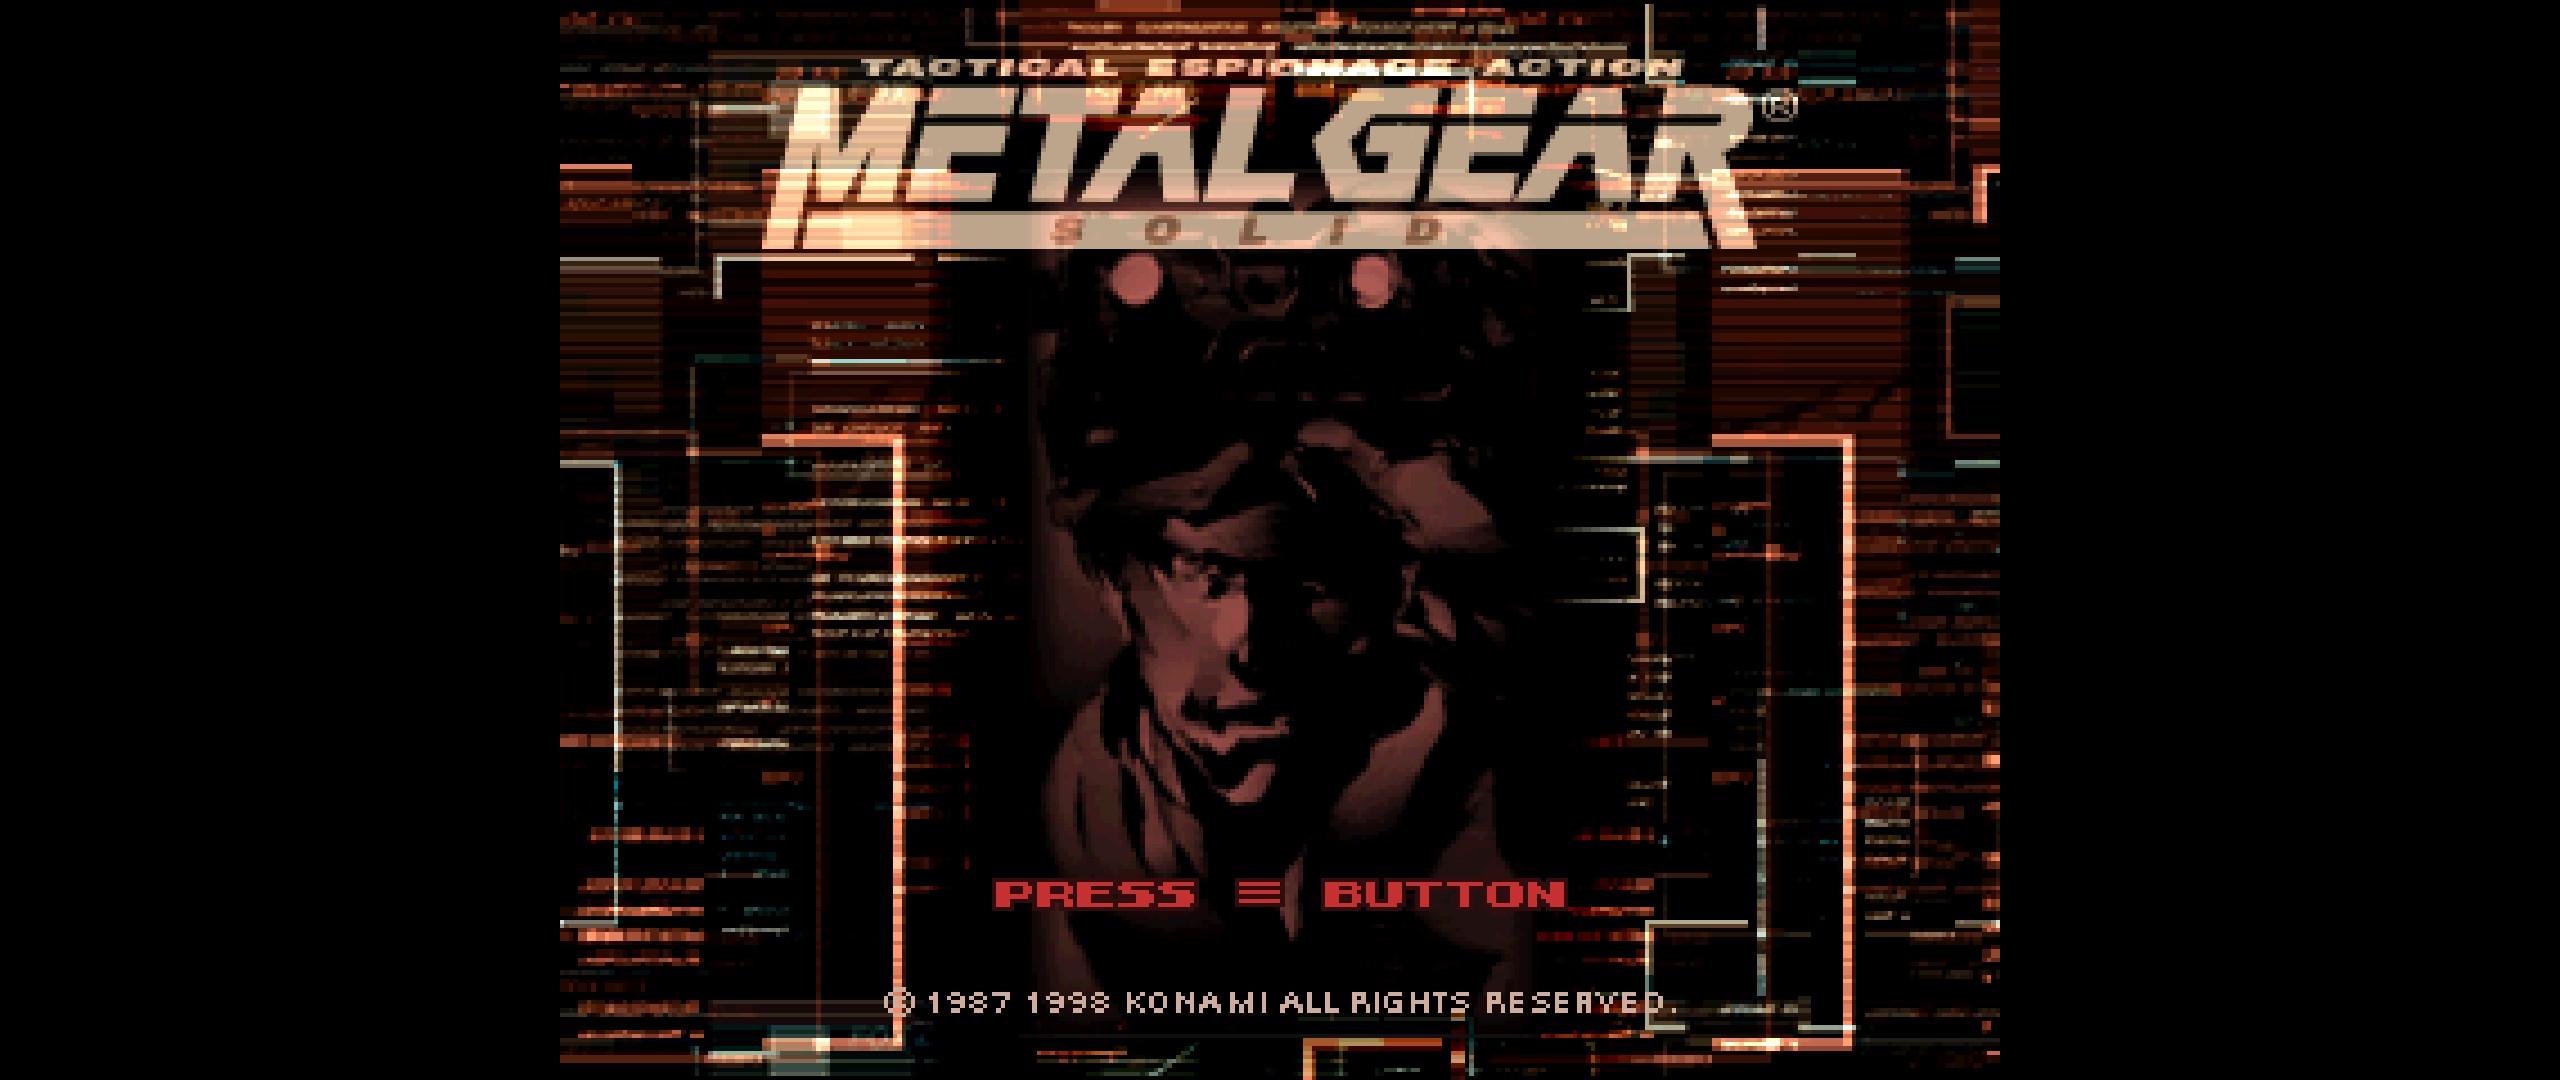
example photos:
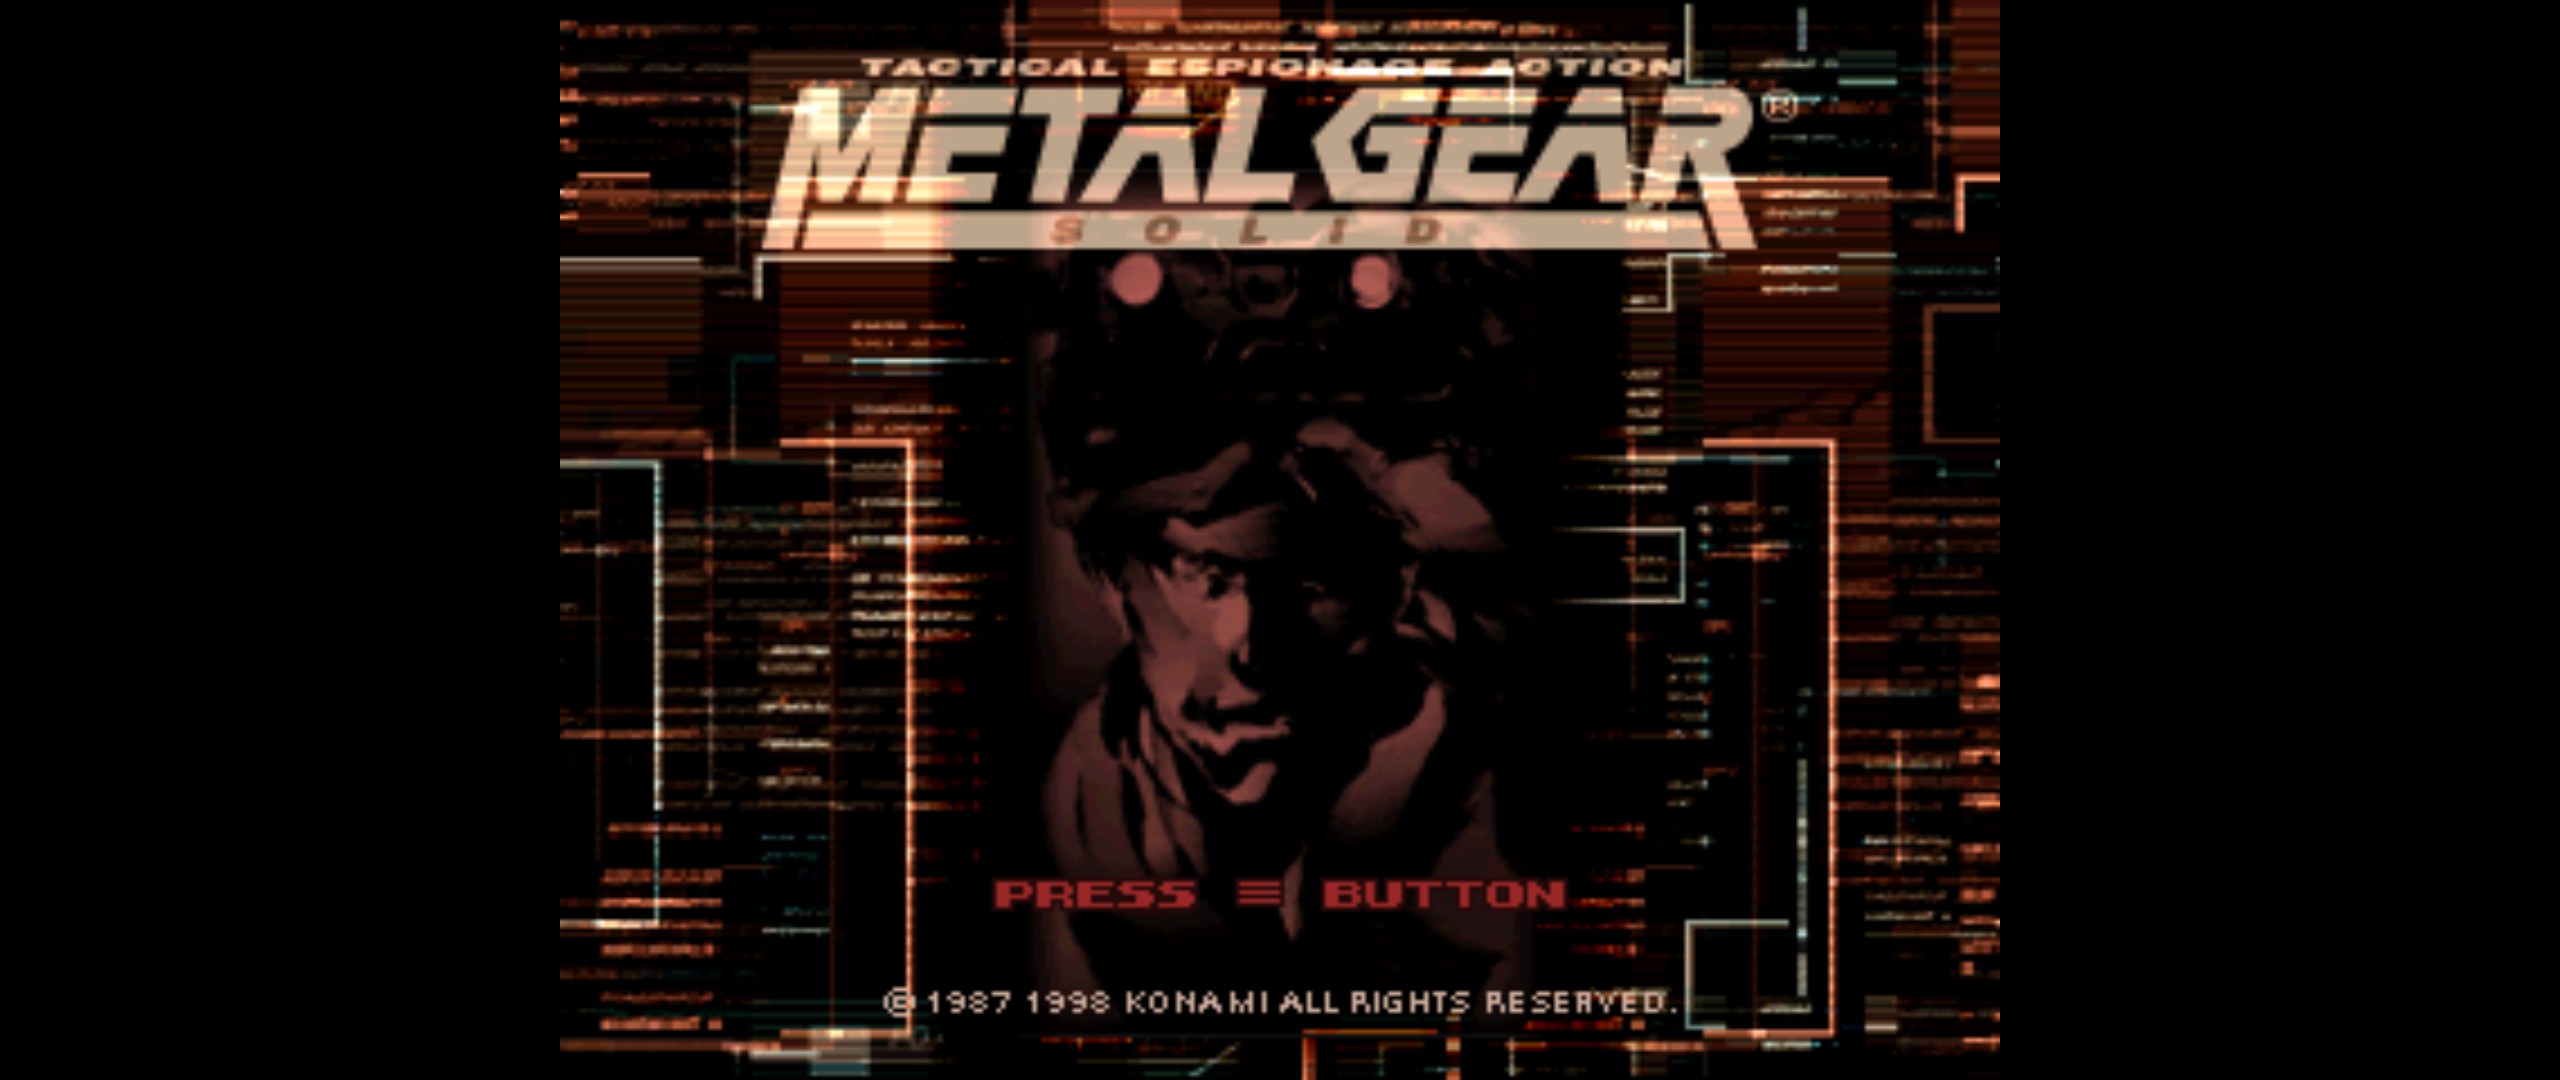
new:
And that wraps up our share on How to remove the Bilinear filter. If you have any additional insights or tips to contribute, don’t hesitate to drop a comment below. For a more in-depth read, you can refer to the original article here by samuskay, who deserves all the credit. Happy gaming!
