In this guide, we will provide you with a step by step approach to help you survive and excel in the world of Luckcatchers 2. Whether you’re a beginner or an experienced player, this guide will cover all the essential information you need to know. So, let’s dive in and become a master of Luckcatchers 2!
Step 1 – Contracts
Oftentimes Steam breaks youtube video links, so here is the direct link if the one above does not work. LINK
So, you’ve made it through the basic tutorial have you? Or perhaps you haven’t. If you haven’t I suggest you try. The tutorial is extremely rigid and will not allow for any deviation unfortunately, but if you complete it you get a free ship and some currency.
If you gave up on the tutorial in frustration and want to just start playing, click on the market icon at the bottom of your screen (looks like scales) and go to “Ships” then buy a noobship. Shibay for the Orcs and Suttler for the humans. It costs 100g but will get you started on your journey.
Ok, we are all caught up. Now for the cargo tutorial.
Let’s start by finding our ship in the docking port. Click somewhere on the screen with nothing to make sure you deselect anything you may have accidentally clicked on.
Now, click the docking port of the settlement you are currently in. If nothing happens, click off the port and click back on it again. The UI can be a bit finicky. This game teaches patience alongside frustration haha.
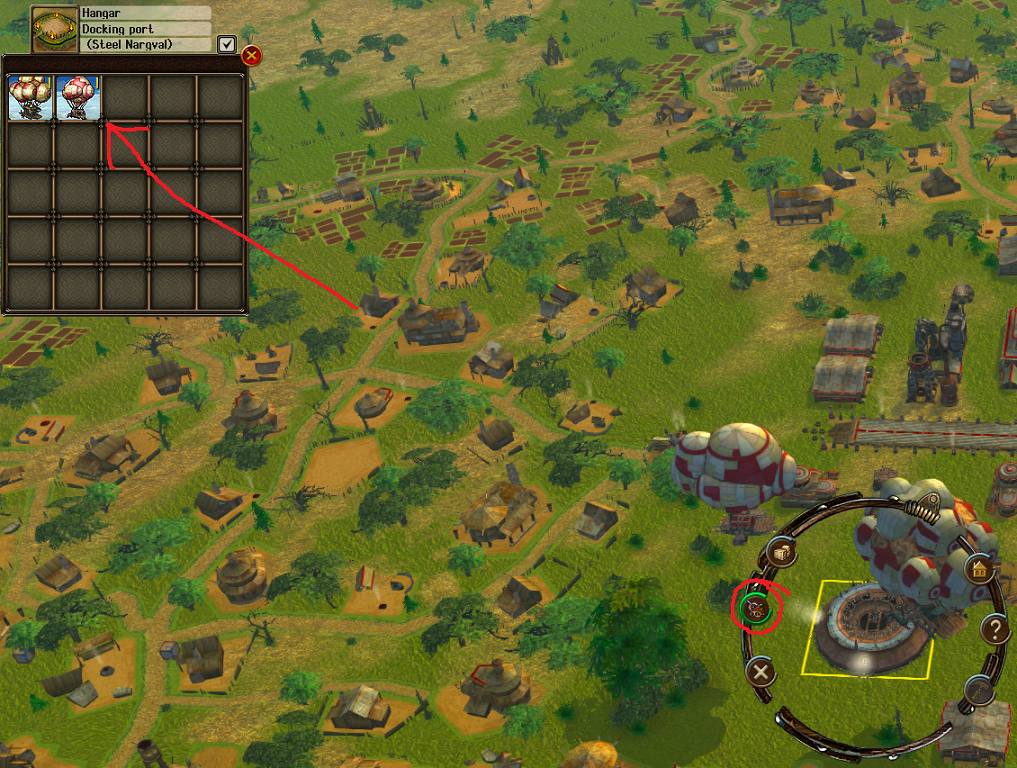
See how awesome I am? I took the time to draw on these images with MSPaint. I’m so nice.
In the event clicking on the docking port does not bring up your ship, you can force the ship list open with “K” or by clicking the hangar as shown in the pic above. All set? Let’s continue.
Next, click on the ship. You may have to click it a few times as with all things in this game. Frustrating? Yes, but the quirks of this game are not enough to keep some of us away 🙂
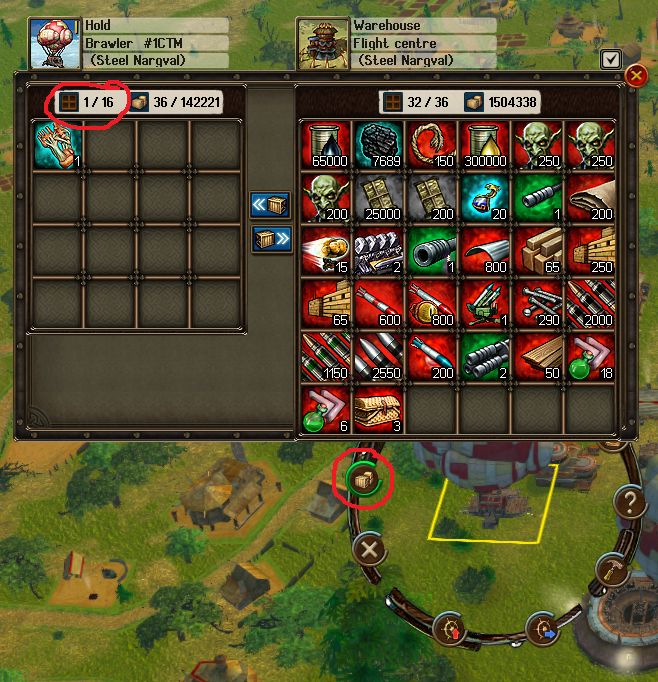
Once you have selected your ship, you need to click the hold of the ship. By default, the game will show you a side by side of your cargo and the settlement. Ignore the 1 dragon sinew in my cargo. I tossed that thing out like a Milli Vanilli CD.
NOTE: I moved my ship to Starlit Nargval for the next pics because I forgot this character is lvl 5 and can’t draw cargo contracts from the main capital anymore. The same rule applies to you. Once you pass lvl 5, contracts get bigger and better, but you will need to travel longer distances for them. Humans, that means moving from Misty Beregor to one of the other two Beregors for your lvl 5+ contracts.
Moving on, after opening the cargo hold of your ship, go down to the contracts box as indicated by the box icon on the bottom of your screen. Another image with red circles to follow.
Next, locate “settlement contracts” so that you pull them directly from the settlement you are docked with.
Take note of the size of the contracts, the city they are going to, and the size of your ship’s hold. If you have the brawler/pilgrim from the game’s intro tutorial, you can hold roughly 140k cargo. If you are in the noobship, it’s less, so don’t grab 5k weight contracts in that little guy.
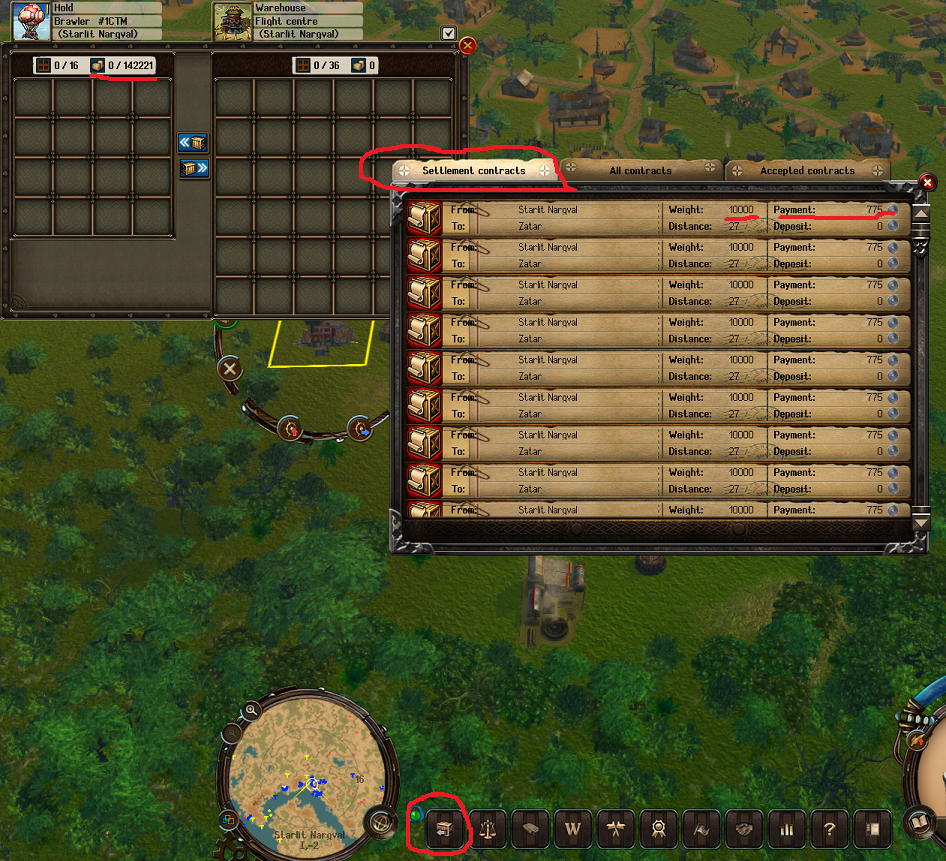
Take note of where it is sending the contracts. In my case, it is sending them straight to my Brawler’s hold and will do so until I am out of slots or out of weight. Go ahead and accept as many contracts as you can fit. Noob contracts will respawn instantly (The ones that weigh almost nothing) and anything more such as 5k weight or higher have a timer on them. That means you can only have 10 of a specific cargo contract type/weight. In this image, you can’t see it but I have packed my ship with 10 contracts that weigh 10k each and some additional less lucrative ones that only weigh 5k each.
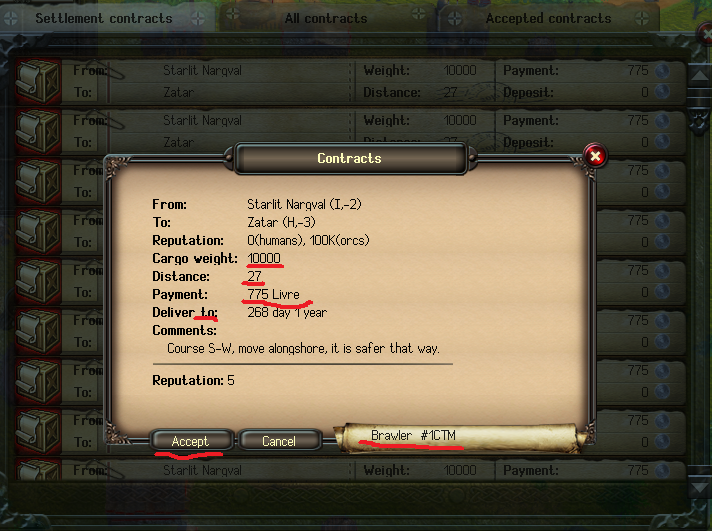
Now, I can go back to the contracts button at the bottom of the screen and then select “Accepted Contracts” to double check where this thing is going. Bonus fact, if I click on one of the accepted contracts, the game will place a map marker on my destination city.
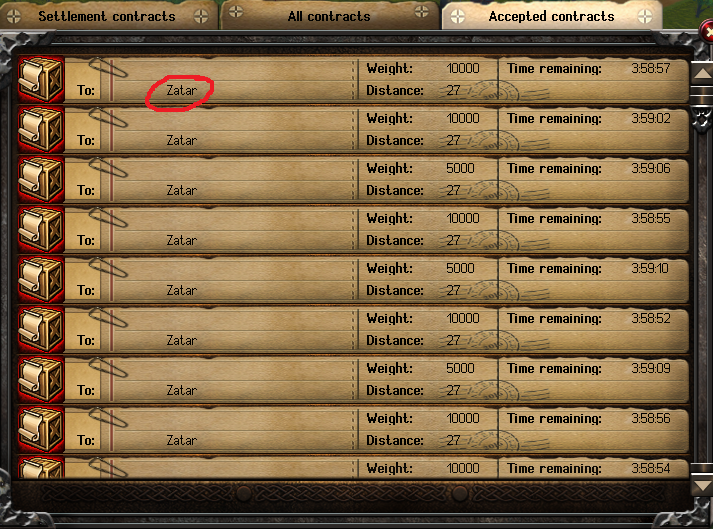
Ok, let’s take off! Click your ship and then click “Take Off.” This can be done by clicking the button you see in the pic below or by pressing 6 after selecting your ship. As a general rule, I click instead of using hotkeys.
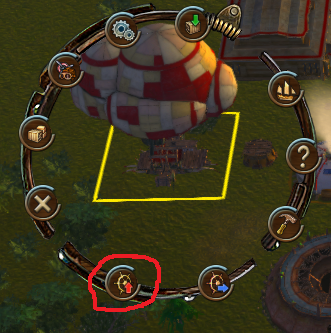
The next part is easy. Click on your ship (always click on your ship. The game loves de-selecting things) and hit shift-m. This is a case where the hotkey is indeed better. Now, find the location your contract needs to go to and click on it! For me, it is Zatar. For you, it’s whatever your contract says. Your ship will now putt putt along on its way to its destination.
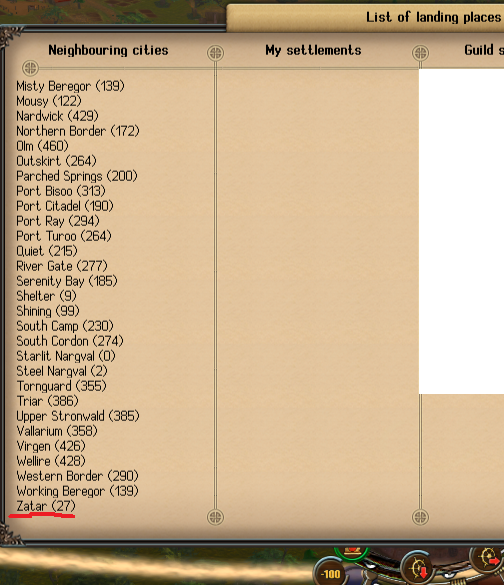
Ugh steam is dumb. It wants to shove all the text next to the images despite me putting in line breaks. Sorry for the ugliness.
Remember, you can use glide to get there a bit quicker. The hotkey for that is 8. Or you can click the icon at the top of your ship wheel.
Orc ships are a bit slower than humans but can hold more cargo. Human ships are faster but a bit tighter on space restrictions. Both ships are fine for cargo contracts.
Once you land in your destination settlement BAM the cargo is instantly removed and you will be paid. Check to see where contracts go from your current settlement. A good trader can run an entire trade loop and make a sizeable fortune in silver. Good luck out there! See you soon for the next tutorial.
Oh and if you are a caveman and can’t read, just watch the youtube video I linked above. I hope it helps!
Step 2- Mining
Step 3 – Advanced Mining
Step 4 – Dragon Hunting
Step 5 – Pirate Hunting
Step 6 – Basic Settlement Production
Step 7 – Advanced Settlement Production
And that wraps up our share on “Luckcatchers2: The Ultimate Guide to Everything”. If you have any additional insights or tips to contribute, don’t hesitate to drop a comment below. For a more in-depth read, you can refer to the original article here by [AoG]Xbwalker, who deserves all the credit. Happy gaming!
